Repeat the above steps for each model whoose output data you want to import into Consolidation & Financial Planning.
Updating the Data Import from xP&A into Consolidation & Financial Planning
Last updated on 2026-05-07
Overview
After the initial import into Consolidation & Financial Planning has been configured and executed for the first time, you then only need to update the CFP import every time you want to transfer updated xP&A data to CFP.
The steps of this recurring update process are described in this Quick Reference Guide.
This article contains the following sections:
Creating an Updated Export in xP&A
If you want to transfer updated data from xP&A to CFP, you first need to create an export of the updated data per model. Proceed as follows:
In the model you want to export the data from, click the Settings button ![]() and navigate to the Export and download section.
and navigate to the Export and download section.
Click + to create a new export and configure the steps in the New export dialog as follows.
Configure the Export defintion:
- Give the export a clear name that matches the model (e.g. "Sales forecast").
- Choose the export type Raw.
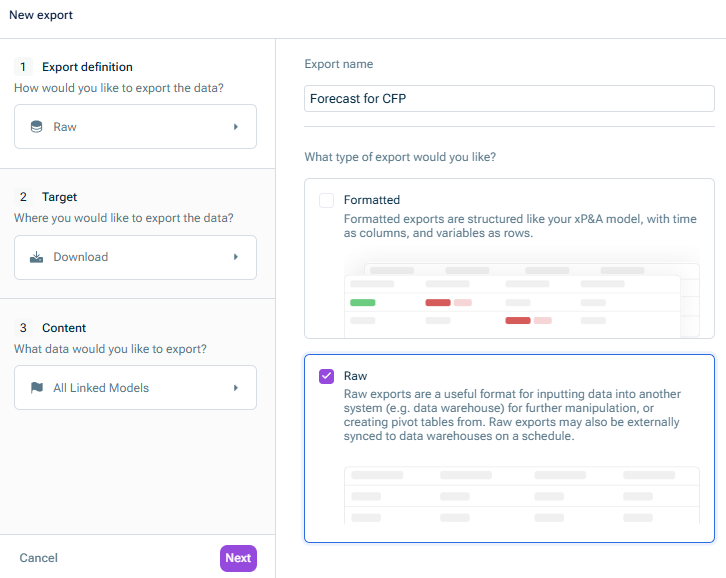
Configure the Target:
- Under Export target, keep the Download preselection
- Under Export output, choose Parquet.
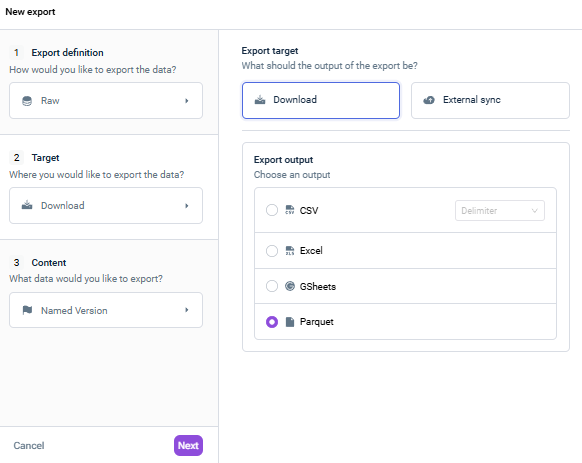 Configuring the export target
Configure the Content:
- Choose what data you want to export: All values, a specific View, or a named Version.
If you work with specific planning versions (e.g. "Forecast 1+11"), choose Version and select the relevant one. This is required when you need to map different versions to different data levels in CFP. - Under Additionally exported columns, select at least the columns Variable ID and Scenario. You can optionally activate Cell location if you want to drill down from CFP to the data in xP&A.
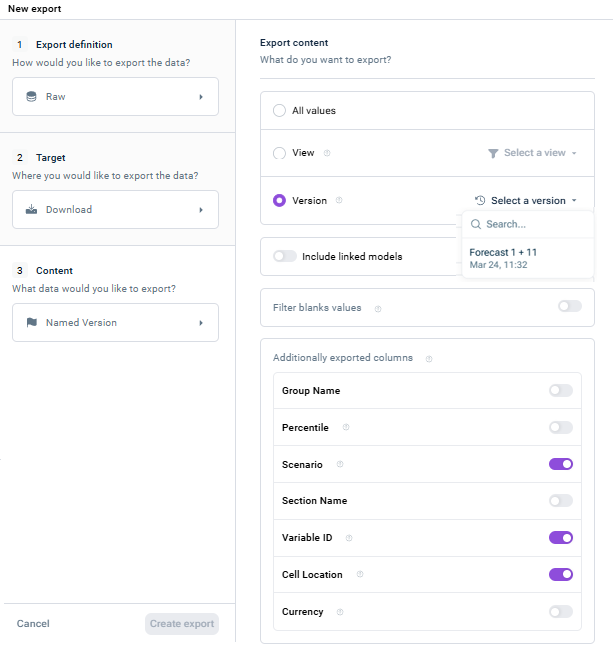 Configuring the export content
Click Create export.
The export is created and displayed in the Export and download section:
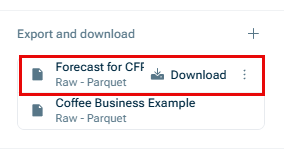
The export can now be accessed by Consolidation & Financial Planning using the script Lucanet xP&A #3700-xP&A.SQL.FOS.
Updating the Configuration of the Import Script
To import updated xP&A data into CFP, you need to update the configuration of the import script Lucanet xP&A #3700-xP&A.SQL.FOS that is used, to include the new xP&A exports and update the dimension mappings. Proceed as follows:
Navigate to the script in the Scripts workspace and click Edit in the detail view of the script.
 Edit the import script
On the Connection tab, select all the Export IDs of all xP&A exports (models) that are to be imported.
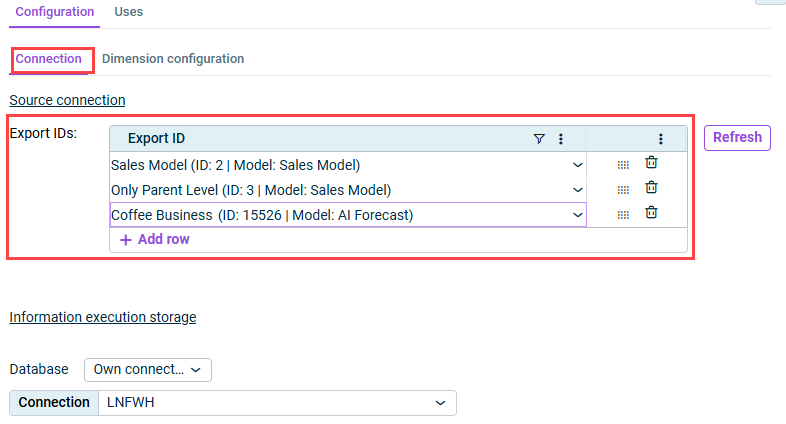 Selecting the export IDs
Open the Dimension configuration tab. The tab is displayed as follows, for example:
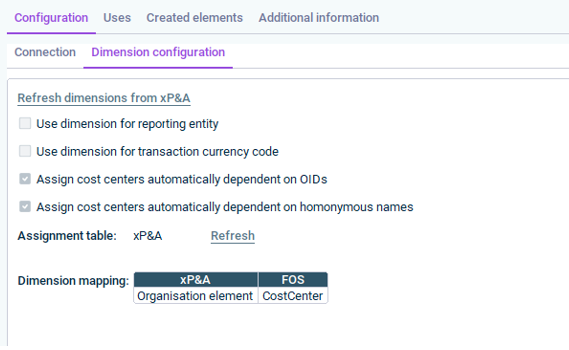
Click Refresh dimensions from xP&A to update the available dimensions from the specified xP&A export(s).
Choose how the entity dimension in your xP&A model translates to dimensions in CFP. The following options are available:
- Use dimension for reporting: Choose this option, when you use a custom dimension in xP&A (not synced from CFP) and want to map it to entities manually.
- Use dimension for transaction currency code: This is a legacy option and not needed in current xP&A setups
- Assign cost centers automatically dependent on OIDs: Choose this option when you use the Organization element structure from CFP in xP&A. The OID (unique identifier per cost center) enables automatic matching.
- Assign cost centers automatically dependent on homonymous names: This is a fallback option for matches based on name. Requires a dedicated assignment table.
Behind Dimension mappings, assign the dimensions from your xP&A exports to the corresponding dimensions in CFP.
Save the configuration.
Best practice: Always create a separate assignment table for xP&A imports to avoid conflicts with other import processes.
Executing the Import of Updated Data
Once you created the exports of the updated xP&A data and updated the import script to include these new exports, you can execute the data import into CFP.
Please note that it is not necessary to configure the data source and assignment table again, as these already have been defined during the initial import and will be re-used during every recurring import.
Proceed as follows:
Navigate to the data import element in the Importing data into reporting entities workspace and click Edit in the detail view of the script.
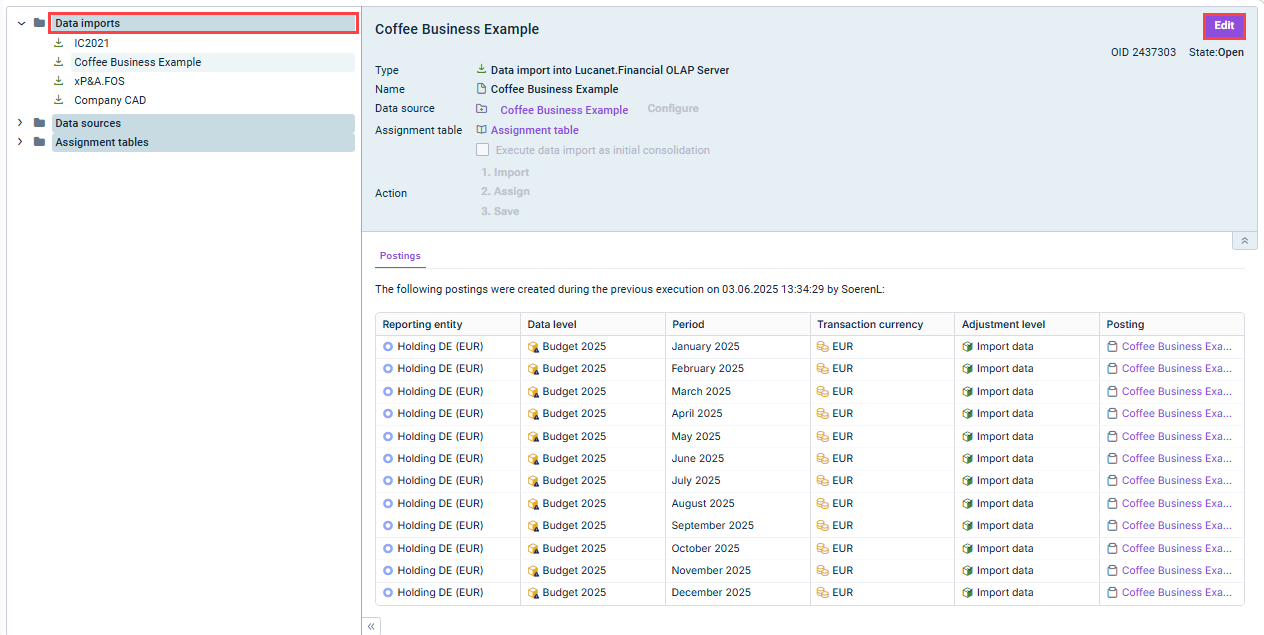 Data import element
In the detail view, click Import. The Provision via script dialog is displayed as follows, for example:
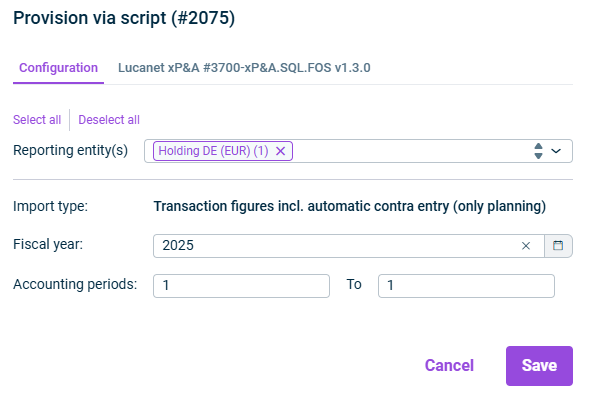
Specify the following:
- Reporting entity(ies): Select the reporting entity(ies) in CFP to import into
- Import type: Choose Transaction figures incl. automatic contra entry (only planning).
- Fiscal year and accounting periods: Set the time range matching your planning horizon.
Switch to the tab with the script name and go to the Model configuration tab. The tab is displayed as follows, for example:
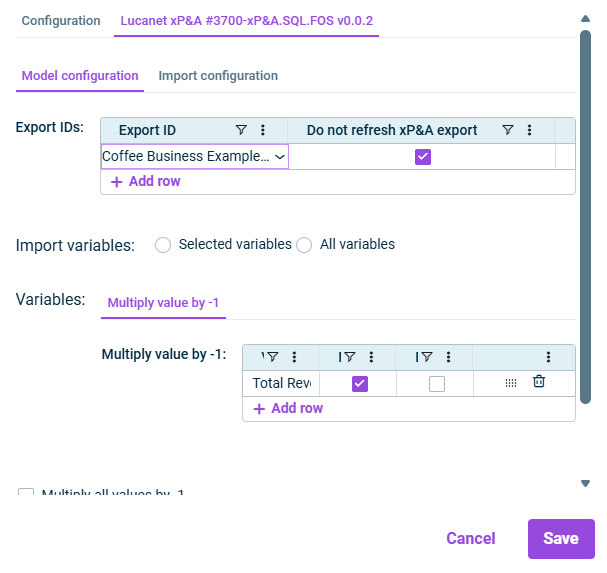
Configure the following options on the Model configuration tab:
- Export IDs: ID of the export from xP&A whose values are to be read (selectable options are based on the script configuration).
- Import variables: Choose Selected variables (recommended) and select individual variables or sections to be imported or choose All variables.
- Multiply value by -1: xP&A typically stores revenue as positive values, but CFP uses debit/credit logic where revenue (P&L credit) must be imported as negative to display correctly. You can apply this option per variable or per section in the table, or globally via the checkbox at the bottom.
Structure your models with separate sections for revenue and cost outputs, so you can apply the -1 multiplier cleanly at section level.
Switch to the Import configuration tab. The tab is displayed as follows, for example:

Configure the following options on the Import configuration tab:
- Import values: Choose between As specified currency (uses the currency from xP&A) or As default currency (uses the entity's default currency in CFP).
- Scenarios: Select one or more scenarios to import.
- Import additional years: If your model spans more than one year into the future, specify how many extra years to include.
- Prefix/Suffix: Optionally add a prefix or suffix to a specific dimension to control how values are mapped (e.g. for sub-ledger account differentiation).
Click Start to execute the import.
After the import has been finished, go to the assignment table to map any unrecognized values to the correct GL accounts.