Navigate to Data Collection | Form templates.
Creating and Configuring Form Templates
Last updated on 2026-04-23
Overview
Form templates are the foundation of data collection in Data Collection. A form template defines the structure and layout of the data you want to collect from reporting entities. You can configure your form templates by adding elements that are based on Consolidation & Financial Planning structures, or by creating them from scratch.
This article contains the following sections:
Creating Form Templates
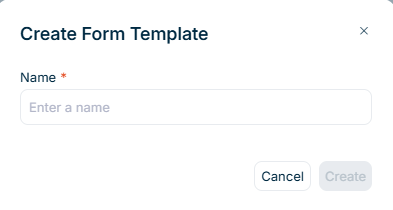
To create a form template:
Click Create Form Template in the top right. The Create Form Template dialog is displayed:
 'Create form template' dialog
Enter a unique Name for your form template.
Click Create. The form template detail view opens, where you can build your form by adding sections and elements.
Adding Sections
A form template consists of sections that contain elements.
Sections help organize your form into logical groups, while elements are the individual data entry fields within each section. To build your form template, first add one or more sections, then add elements to each section.
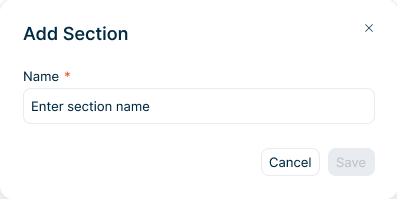
To add a section:
In the Form structure panel, click Add section. The Add Section dialog is displayed:
 'Add Section' dialog
Enter a unique Name for the section within the form template.
Click Save to create the section.
Adding Elements
Once you have created a section, you can add elements to it.
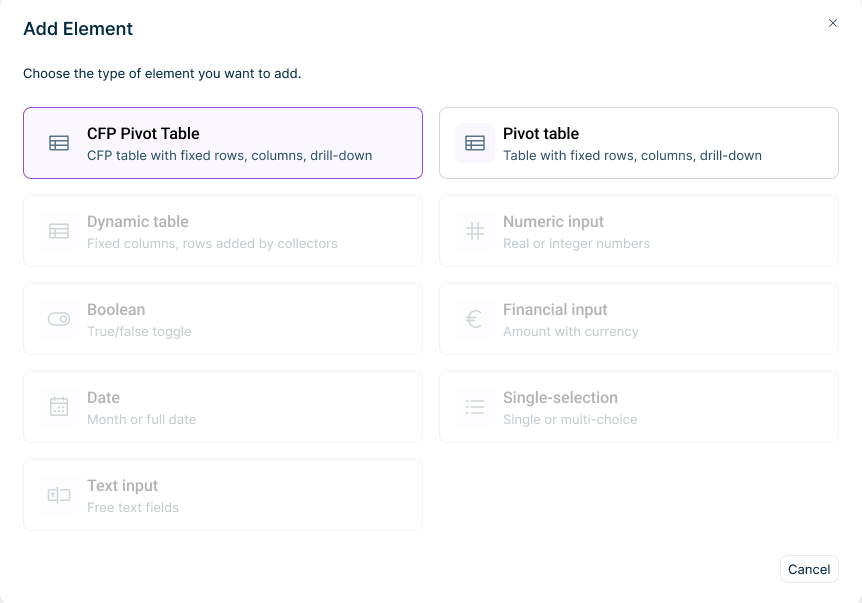
To add an element:
In the section, click + Add element. The Add Element dialog is displayed:
 'Add Element' dialog
Select the type of element you want to add. The available element types are described in the following section. The selected element is displayed in the form template.
In the Element configuration panel on the right, enter the following:
- Element name: The name must be unique within the template.
- Label: This is the display name that data collectors will see. The label must be unique within the template for each language.
- This element is mandatory: Activate this checkbox if data collectors must complete this element before submitting the form.
Available Elements
The following elements are available when creating a form template:
Element
Description
CFP pivot table
A table whose row structure is imported from a Consolidation & Financial Planning workspace. Select a ledger or schedule to import the account hierarchy, preserving the structure and element descriptions.
Pivot table
A custom table that you define manually by adding your own rows and columns. Requires at least one row and one column.
The Add Element dialog displays additional element types that are grayed out. These element types are not yet available and will be provided in a future update.
Configuring Form Templates
After creating your form template and adding elements, you can configure the table structure by adding columns and rows.
Adding Columns
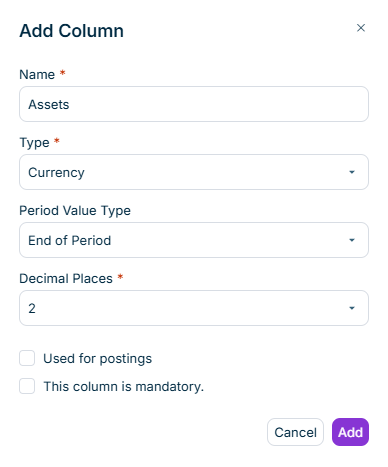
Columns define the data points you want to collect for each row in the table. Click Add column in the table header and select one of the following options:
Creates a column from scratch where you define all properties manually. The following options are available:
 'Add new column' dialog
Field
Description
Name
Unique name for the column within the table
Type
Data type for the column values. Available types include:
- Numeric (float)
- Numeric (integer)
- Currency
- Text
Period value type
Available for numeric and currency columns. Defines which type of period data is retrieved when importing from Consolidation & Financial Planning. See Period Value Type for CFP Import for details.
Decimal places
Specifies the number of decimal places. Available for Numeric (float) and Currency column types.
Text type
Defines whether the text field allows single-line or multi-line input. Available for Text column type.
This column is mandatory
When activated, data collectors must provide a value for this column.
Creates a column based on dimension elements from Consolidation & Financial Planning. The following dimensions are available:
- Transaction types
- Partners
- Adjustment levels
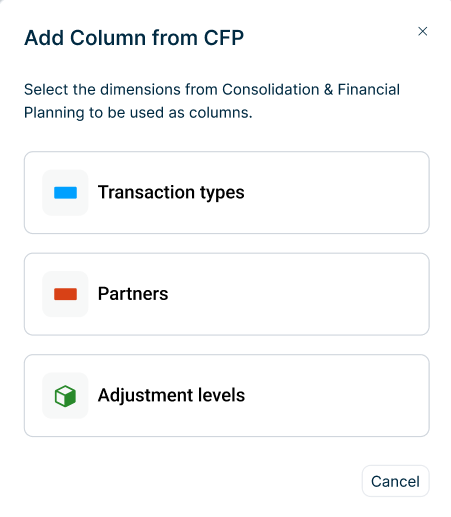 'Add Column from CFP' dialog
Creates an automatically calculated column that aggregates values from other columns.
The total column is only available when your pivot table contains at least two numeric or currency columns. Calculated columns (such as existing total columns) cannot be included in a new total column.
The following options are available when creating a total column:
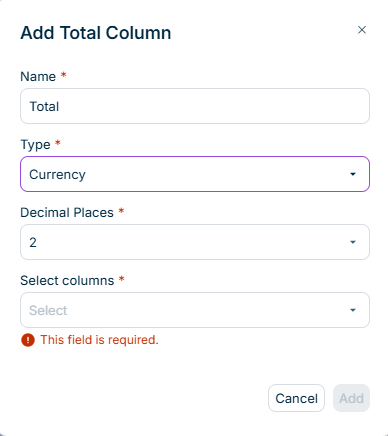 'Add Total Column' dialog
Field
Description
Name
Unique name for the column within the table
Type
Data type for the aggregated values:
- Numeric (float)
- Numeric (integer)
- Currency
Decimal places
Number of decimal places for the result. Only available when Currency or Numeric (Float) is selected as the type.
Select columns
Columns whose values are aggregated
Period Value Type for CFP Import
Period value type is a required setting for Numeric and Currency columns. It defines which type of period data the system retrieves when importing from Consolidation & Financial Planning, so that each column gets the right values — for example, opening balances, within-period movements, or closing balances.
| Period Value Type | Description |
|---|---|
| Beginning of period | Value at period start |
| Within period | Changes during the period |
| End of period | Value at period end |
| YTD value | Cumulative from fiscal year start |
| Standard (auto) | Let CFP determine based on account type |
Period value type is configured when creating the column. Once data has been collected in the column, this setting cannot be changed.
Adding Rows
Rows define the items or categories for which you want to collect data. Click Add row at the bottom of the table and select one of the following options:
Creates a new row where you define the name manually.
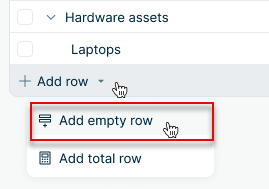 'Add empty row' option
Creates a row that automatically aggregates values from other rows.
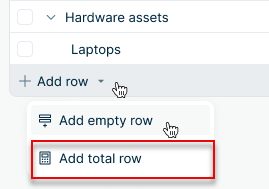 'Add total row' option
To add a subordinate row under an existing row, right-click the row and select Add row. The submenu offers:
- Empty – adds an empty child row under the selected row.
- Based on the CFP Partner dimension – opens the Add row based on CFP dialog to add subordinate rows based on the Partner dimension.
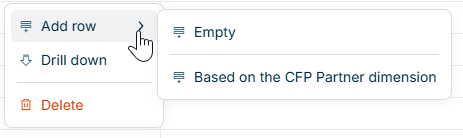 Adding a subordinate row
The Add row option is not available on total rows.
Configuring Drill Down
Drill down allows data collectors to provide more detailed data at a lower, reporting entity-specific level. You can configure drill down at the row level or column level.
To configure drill down for a row:
Right-click the row.
Select Drill down. The Configure Drill Down dialog is displayed:
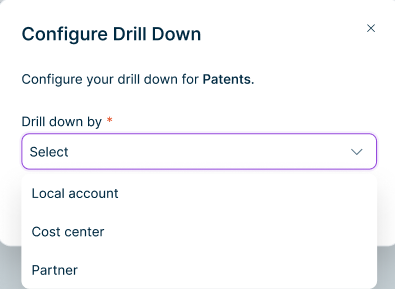 Configuring drill down
Select the dimension from the Drill down by drop-down list:
- Local account: Collect data by local/company-specific accounts
- Cost center: Collect data by cost center
- Partner: Collect data by intercompany partner
Click Save.
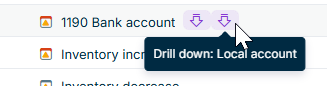
The row now displays an indicator showing that the drill down is configured. When row-level drill down is configured, data collectors must provide data for all numeric and financial columns of that row for each member of the selected dimension.
You can configure drill down for columns with Numeric or Financial data types. To configure drill down for a column:
Right-click the column.
Select Add drill down. The Configure Drill Down dialog is displayed:
Configuring drill down
Select the dimension from the Drill down by drop-down list:
- Local account: Collect data by local/company-specific accounts
- Cost center: Collect data by cost center
- Partner: Collect data by intercompany partner
Click Save.
When column-level drill down is configured, data collectors must provide data for that column for each member of the selected dimension, across all rows in the table.
Once drill down is configured for a row or column, you can add a second-level drill down to create hierarchies for more detailed data collection. To add a second-level drill down:
Right-click the row or column that already has drill down configured.
Select Configure drill down. The Configure Drill Down dialog is displayed:
 'Add second-level drill down' option
Click + Add second-level drill down.
Select the dimension for the second level from the drop-down list.
Click Save.
The row now displays indicators for both drill down levels. Data collectors must provide data for each combination of the selected dimensions.
 Second-level drill down added
Managing Form Templates
The form templates list displays all configured templates with the following information:
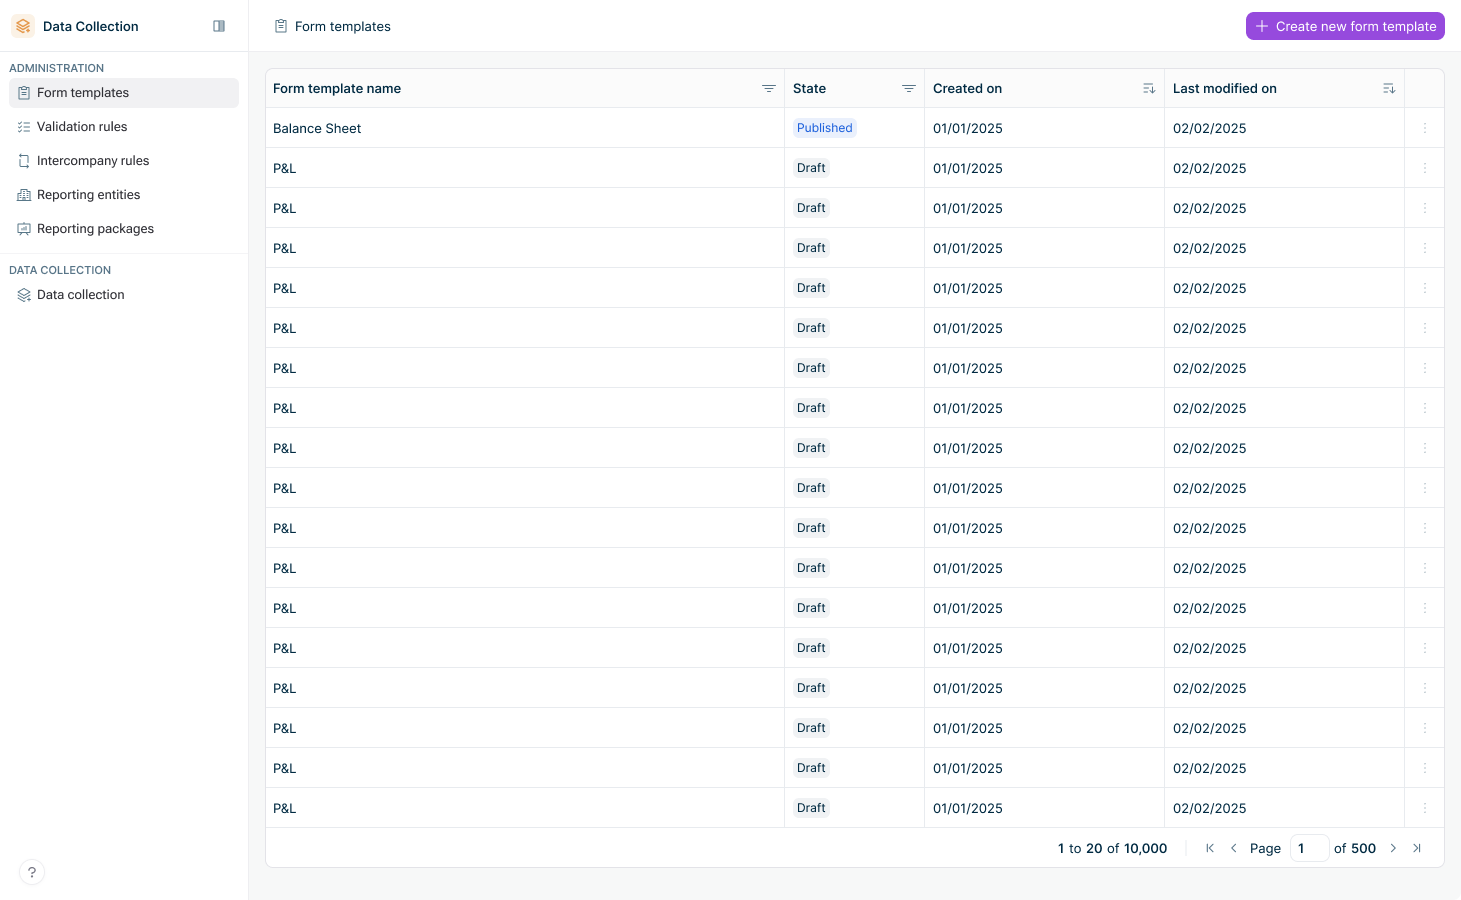 Form templates list
Column
Description
Form template name
Name of the form template
State
Current state of the form template:
- Draft
- Published
Created on
Creation date
Last modified on
Date of the most recent modification
Editing a Form Template
To edit an existing form template, click the three-dot menu at the end of the row and select Edit.
Publishing a Form Template
When first created, a form template is automatically in Draft state. While in this state, it can undergo any number of modifications. Once its configuration is finalized, the form template must be Published before it can be used in validation rules and reporting packages.
To publish a form template, click Publish in the top right of the form template editor.
A published form template can only be modified if it is not referenced by other configuration elements (such as ongoing data collection processes). Editing a published form template automatically brings it back to Draft state.
Deleting a Form Template
To delete a form template, click the three-dot menu at the end of the row and select Delete. In the confirmation dialog, click Yes, delete.
Form templates that are attached to a reporting package or referenced by validation rules cannot be deleted.