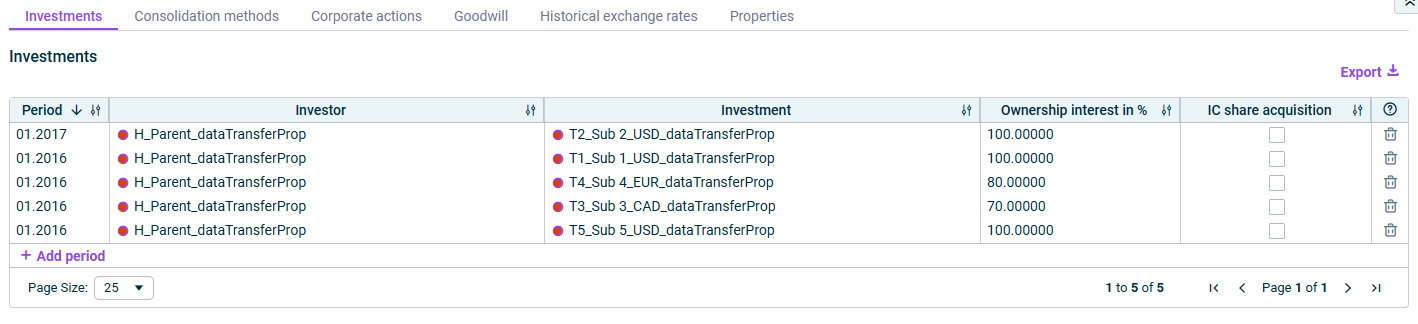
Investment relationships Changes in investors Consolidation methods Fair value of non-controlling interests Increase and decrease in capital Periods accounts amortization of goodwill Translation with historical exchange rates
For every group and every data level, you must create a master data administration that is used for all consolidated financial statements of the group. When configuring the master data for planning data levels, you can use already configured master data from the actual data level by means of synchronization (see Synchronizing Actual Master Data for Planning Data Levels
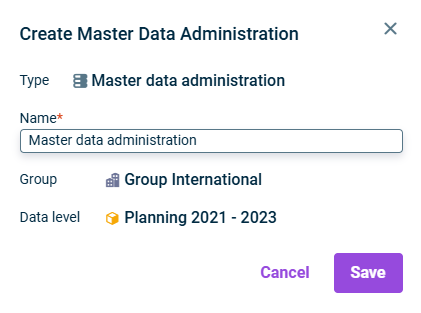
In the ‘Groups’ workspace Select the desired group in the overview and navigate to the Master data administration Create master data administration
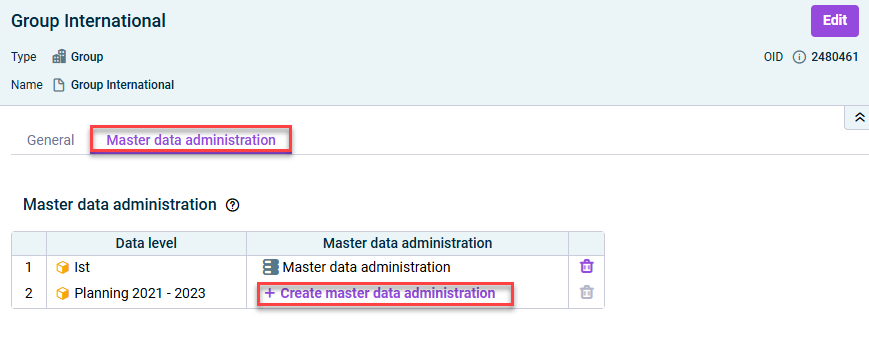
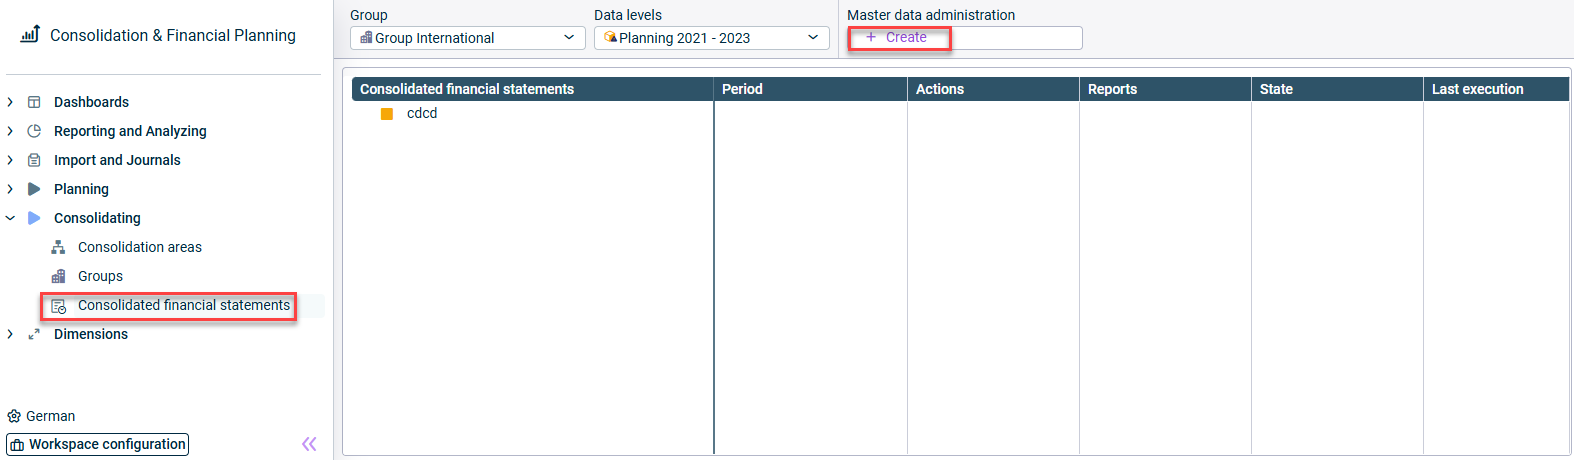
In the ‘Consolidated financial statements’ workspace Select the desired combination of group data level Create Master data administration
![]()
- - - - *Cannot be selected for default consolidation units and consolidation units of investors. | |
![]()
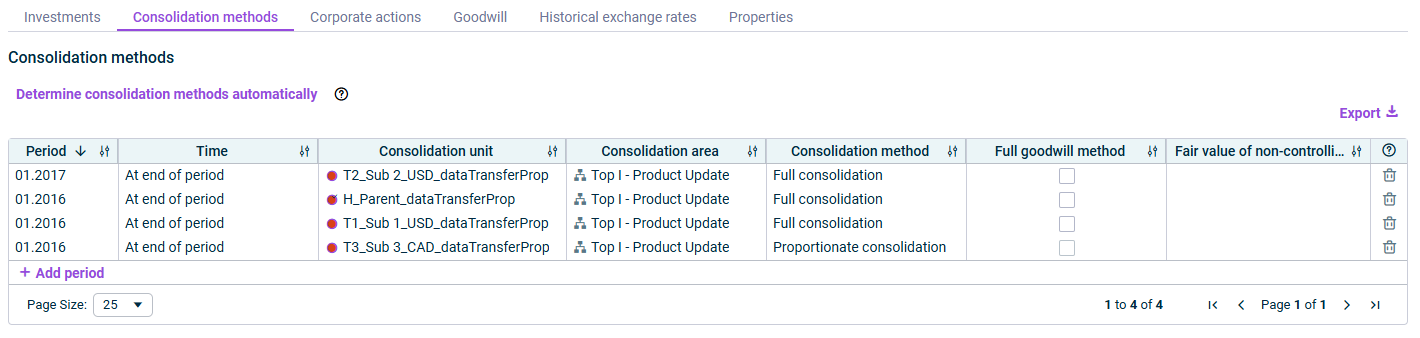
If you use the app for equity elimination do not If you are using the legacy app for equity elimination in Lucanet.Financial Client, you must configure this tab in case of corporate actions. To do this, activate the check box Configure consolidation of corporate actions Add period If you are using the legacy app for equity elimination in Lucanet.Financial Client, you must configure this tab in case of corporate actions. To do this, activate the check box Configure consolidation of corporate actions Add period

- - |
After that, for each deviating issue, add a new row using the command |
- - | |
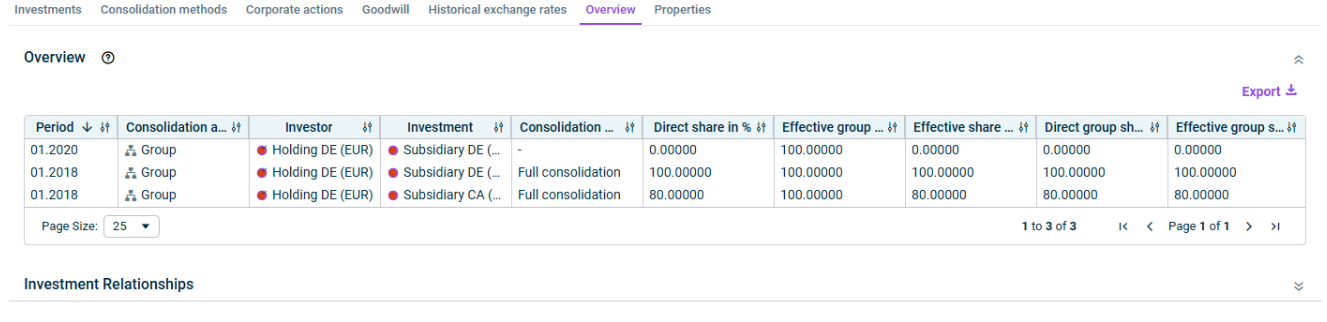
To ensure that the information displayed is up to date Investments Consolidation methods Generate report The app for equity elimination Overview
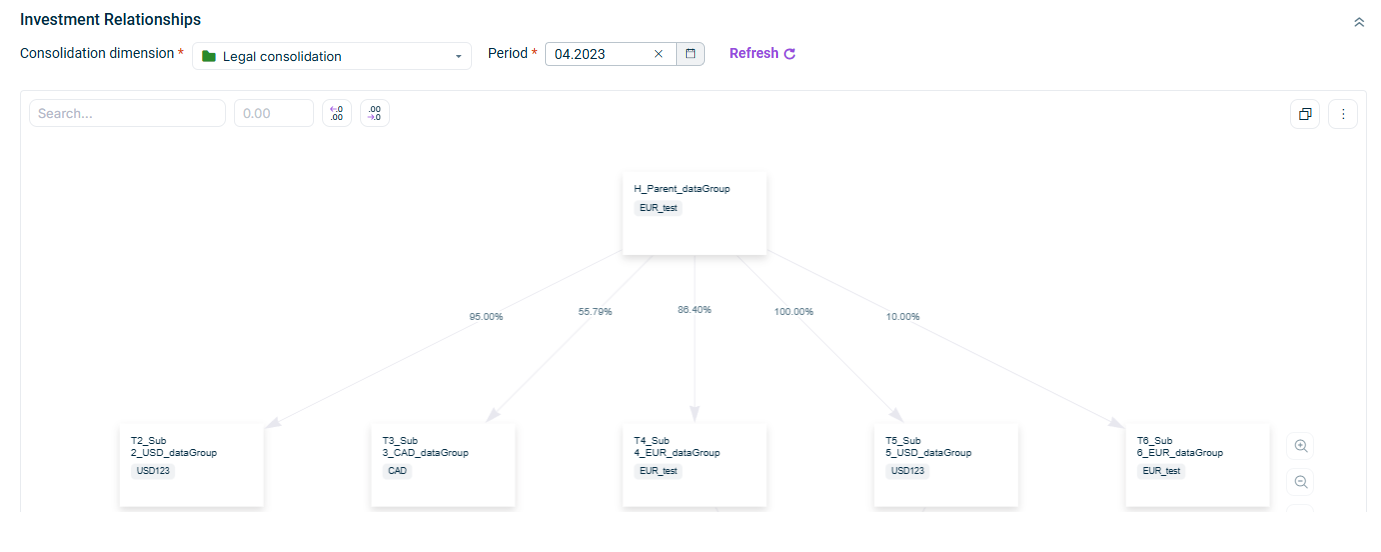
Refresh Search Adjust the decimal places Copy 
Save the chart as PNG JPEG print 
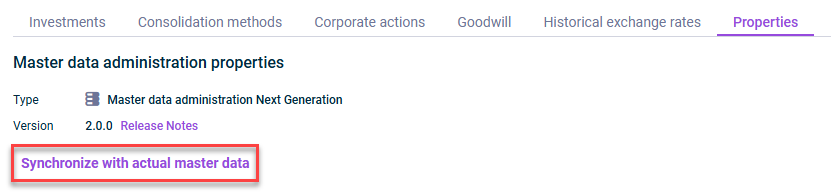
Type Version Refresh Release Notes Command to synchronize


Last updated on Jun 3, 2026