Granularity Date range Last actual date Relative dates Fiscal year settings


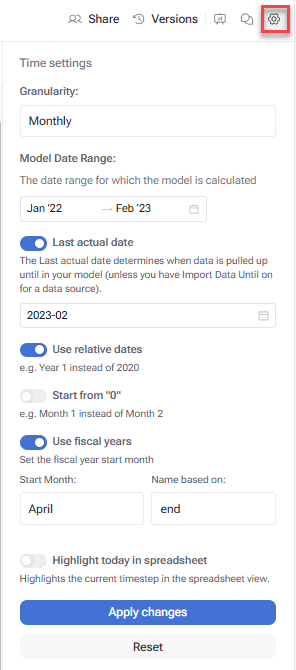
Daily Weekly Monthly Quarterly Yearly None
There is also a Helper variable last actual date For more information on the last actual date in xP&A, see Last Actual Date
Use this option in a model's time settings only if you enter your actual "historic" data manually If you import your actual data using a data integration, this option described here is not used. In this case, the last actual date is set using the intergration via a data source. There is also a helper variable available for the last actual date. For more information, see Helper variables
Retention rate Sales person


Enter a custom 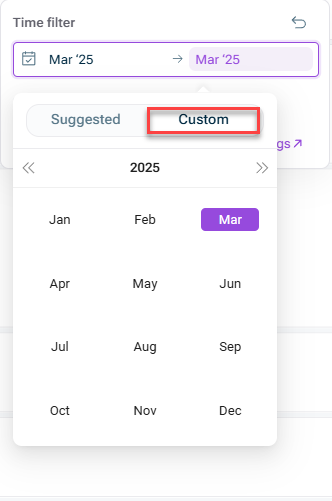
Select a dynamic suggested Actuals, Current year, Last 3 months of actuals, Forecast Last Actual Date
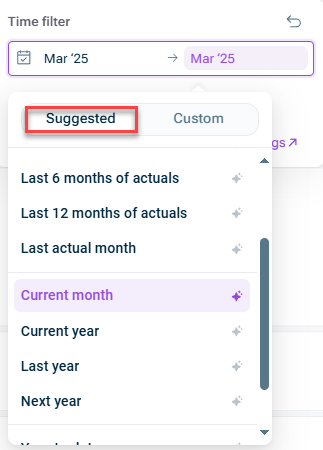
The time filter setting does not change the model time settings or underlying calculations, it simply filters for the time range you have selected. Dashboard viewers (who do not have edit access to the underlying model) can easily toggle the period they are looking at by themselves (although the default period will be set by model editors).