Creating and Executing the Data Import
Last updated on 2025-10-20
Overview
All data that is imported into reporting entities is transferred to the current Lucanet database using data imports. The data import object is used to determine which data source and assignment table are to be used during the import.
The actions in the detail view of the data import are used to execute the data import, create assignments in the assignment table used and save the data import. You can create any number of data imports which can be updated at any time and combined in data import folders.
This article contains the following sections:
Creating a Data Import
To create a data import:
- Choose the command Create | Data import from the context menu of the Data imports root folder or a data import folder.
 Creating a data import
 - Enter a name for the data import in the Create data import dialog and click Save.
The data import is created. The detail view of the data import is displayed as follows: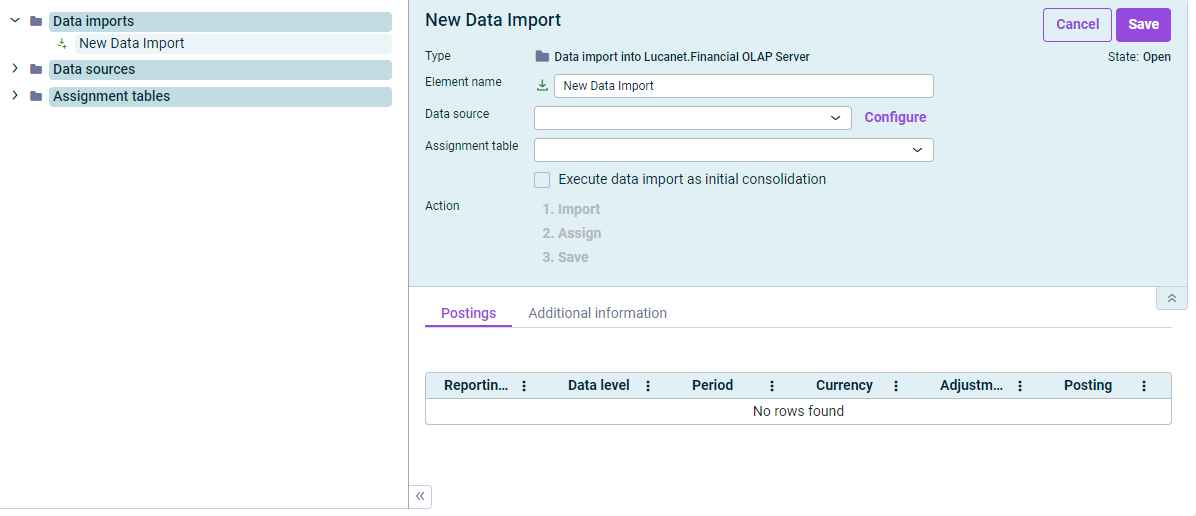
Detail view of a data import - If necessary, activate the Execute data import as initial consolidation check box, if all items of the general ledger are to be posted automatically to the corresponding transaction type category with transaction type Addition to consolidation area. This ensures that the effects of the initial consolidation are displayed correctly also in the cash flow statement.
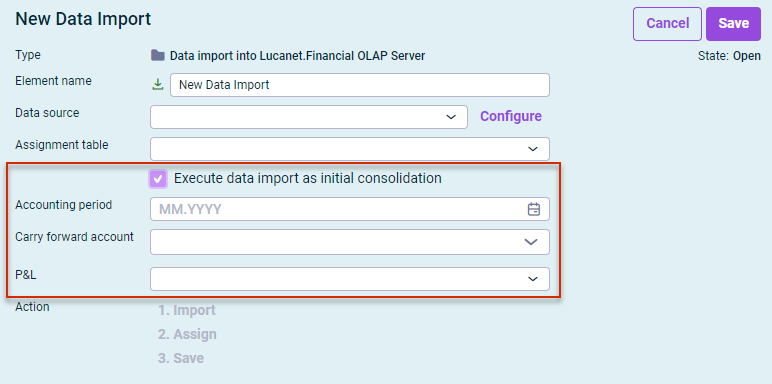
Detail view of an import with activated 'Execute data import as initial consolidation' check box
When activating the check box, three drop-down lists are displayed:- Choose the accounting period (posting month) and carry forward account for P&L values from the Accounting period and Carry forward account drop-down lists displayed.
- If necessary, choose a subledger in the P&L drop-down list. All subledgers can be selected.
- Configure the data import (see section Configuring the Data Import).
- Import the data (see section Executing the Data Import).
Configuring the Data Import
Option
Description
Name
Name of the data import
Data source
The data source to be used. You can choose from all data sources in the Data sources root folder.
Configure
Opens the dialog with the properties of the data source. Used to check or change the data source (see chapter Defining the Data Source).
Assignment table
The assignment table to be used. You can choose from all assignment tables in the Assignment tables root folder.
If necessary, a description of the data source is displayed on the Additional information tab. The description of a data import is optional and can currently be entered only in Lucanet.Financial Client.
Importing Data
- Click 1. Import. The Configuration dialog is displayed:
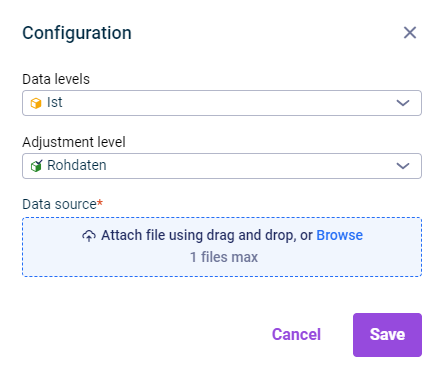
Dialog for the configuration of the import parameters - Enter the data level and the desired adjustment level and add the Excel file to be imported in the Data source field.
- Click Save. If there are any missing assignments, these assignments will be displayed in the detail view of the import:
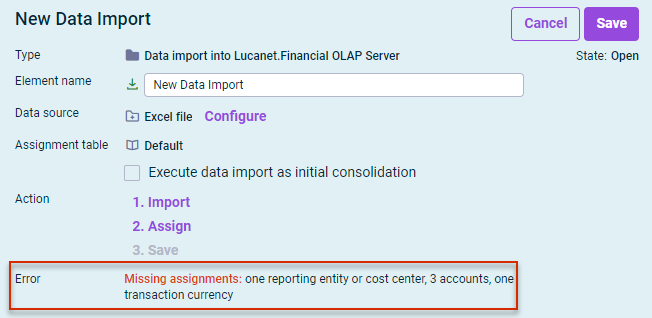
Detail view with the display of missing assignments - Click 2. Assign. The assignments are displayed, for example as follows:
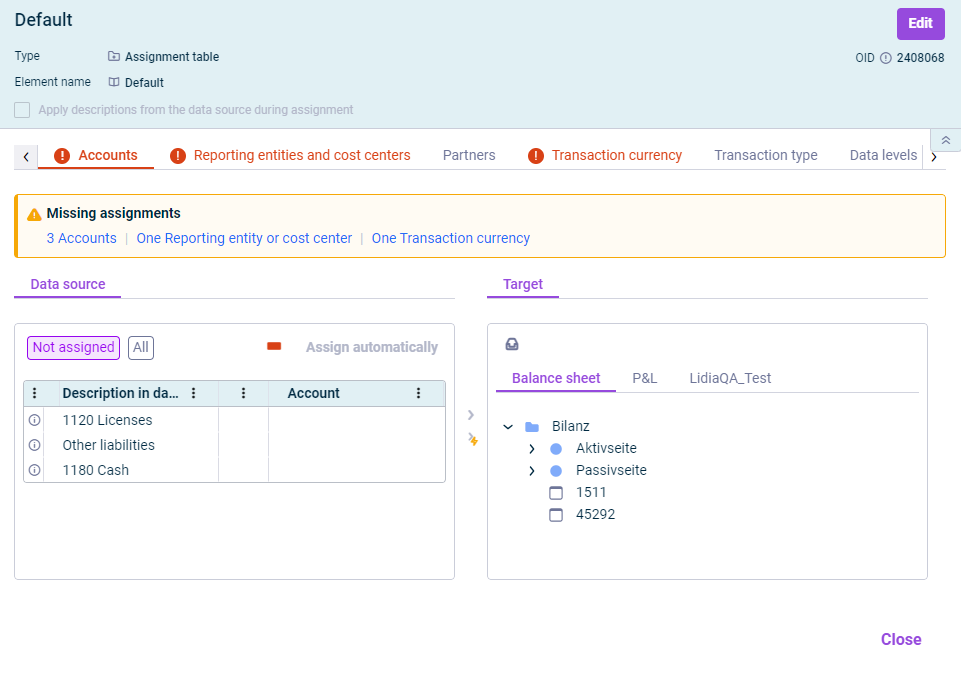 Assignment table with missing assignments
 - Check the assignments and, if necessary, edit any missing assignments (see chapter Assigning Data).
- Save the data import by clicking 3. Save.
- Every newly-created data import can only be saved when the import has been successfully performed and all elements have been assigned so that debit = credit is guaranteed in the general ledger (assets side = equity and liabilities side).
- If a data import is to be performed for a period, a reporting entity, a data level or a adjustment level disabled by any audit trail, an error message is displayed. If necessary, switch to Lucanet.Financial Client to edit the relevant audit trail.
As soon as a data import has been successfully saved, the data of the created postings are displayed on the Postings tab. You can open the details of each posting by clicking the corresponding link in the Posting column.
Furthermore, the data source and assigment table used for this import can be accessed via a link in the general properties of the data import.
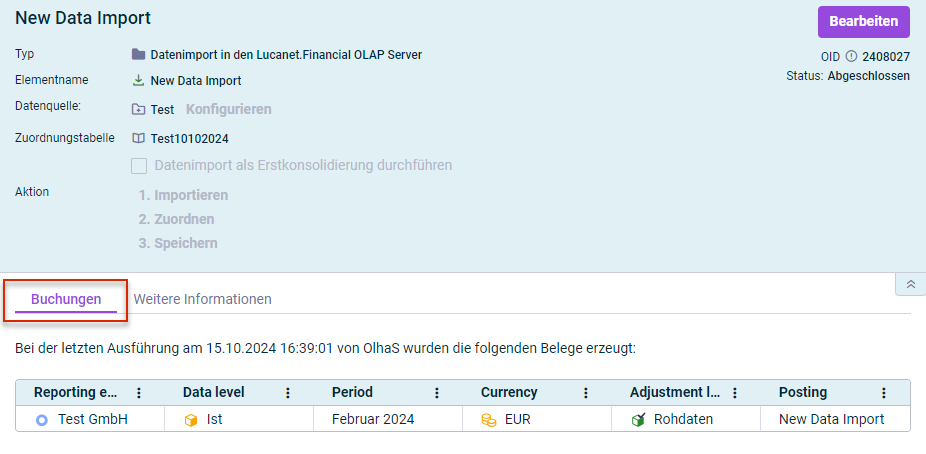 'Postings' tab with a created posting