Editing Dashboards
Last modified on 2023-11-08
Overview
In the dashboard, you can add new widgets and edit or delete existing ones. You can also lock dimensions to prevent incorrect dashboard configurations.
This article contains the following sections:
Activating Editing Mode
To edit the dashboard, you must first put it in editing mode. At the top right of the dimension bar, right-click Edit.
 Button for editing a dashboard
The following functions are available in the dashboard:
You can lock dimensions to prevent unintentional display of incorrect values in the widgets.
To lock dimensions:
- To lock specific dimensions, click the
 icon to the right of a dimension.
 - To lock all dimensions, click the three dots icon
 and choose Lock all.
To unlock dimensions:
- To unlock specific dimensions, click the
 icon to the right of a dimension.
 - To lock all dimensions, click the three dots icon
 and choose Lock all.
 Dimension bar with functions for locking or unlocking dimensions
To add a widget:
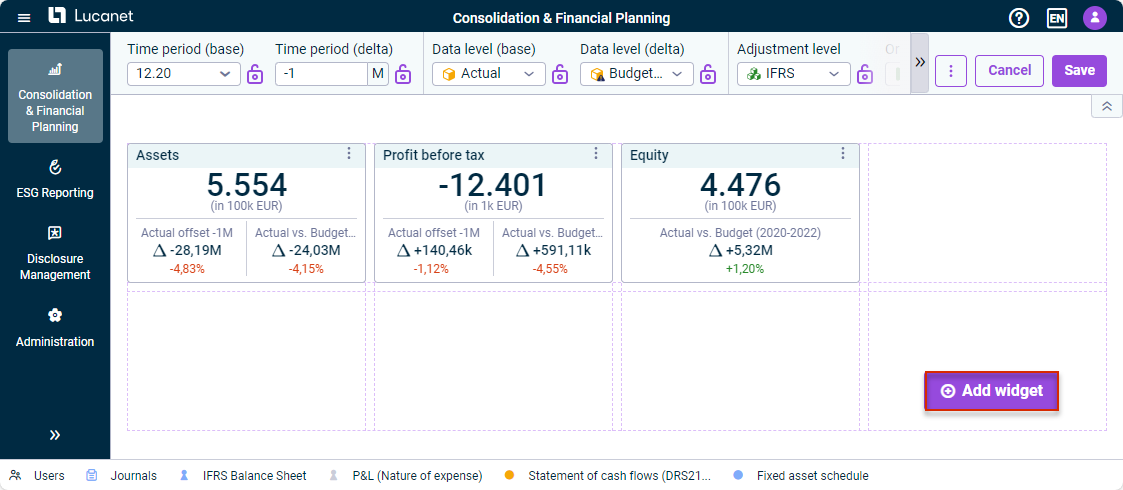
At the bottom right, click + Add widget.
 Button for adding a widget
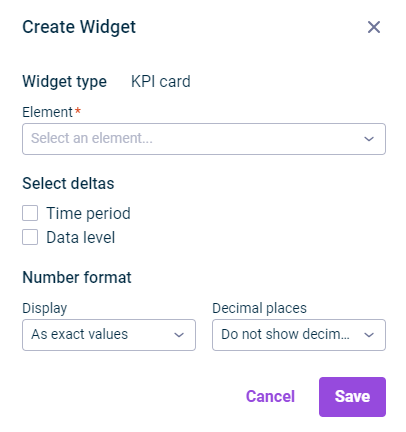
The following options are available in the Create widget dialog:
 'Create widget' dialog
Option
Description
Widget type
Type of widget
Element
Element to be displayed in the widget
Select deltas
Optionally, delta values can be displayed in the widget. The following options are available:
- Time period: Enables the comparison of two time periods. The delta values are displayed in the widget based on the Time period (base) dimension and the Time period (delta) configured in the dimension bar.
- Data level: Enables the comparison of two data levels. The delta values are displayed in the widget based on the Data level (base) dimension and the Data level (delta) configured in the dimension bar.
You can find out more about configuring the dimension bar in Displaying and Configuring Dashboards.
Number format
Options for displaying and specifying decimal places of values in the widget
You can edit or delete widgets in your dashboard at any time.
To edit or delete a widget:
- Click Edit in the dimension bar of the dashboard.
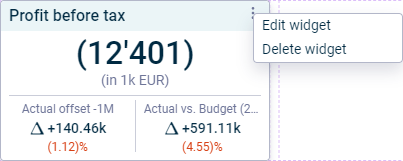
- Click the three dots icon
 on the widget and choose Edit widget or Delete widget from the context menu.
 Widget with menu commands 'Edit widget' and 'Delete widget'
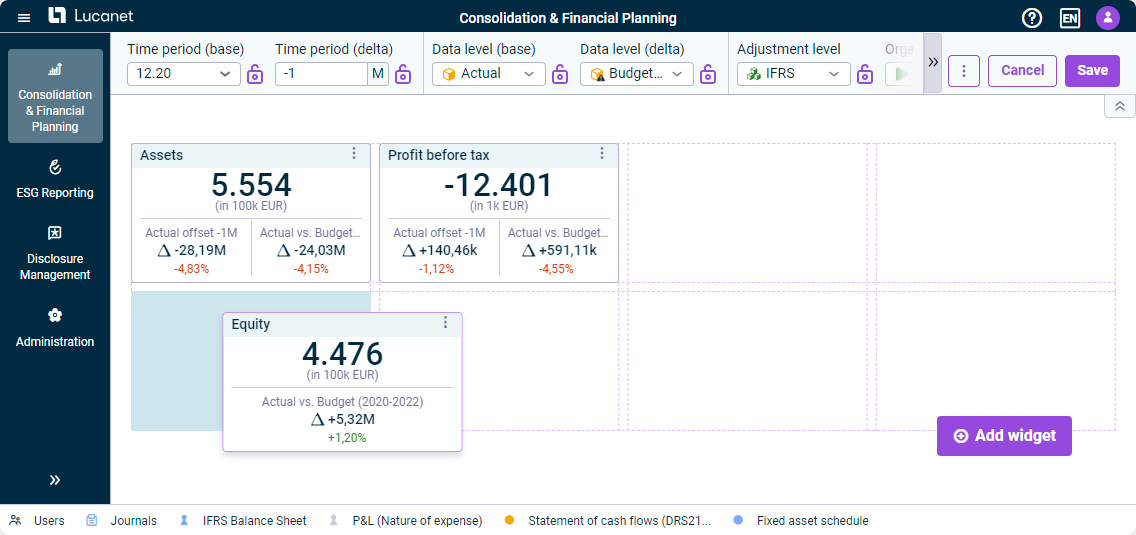
You can arrange widgets anywhere within the specified grid in the dashboard using drag and drop.
- Left-click the widget that you want to move.
- Hold down the left mouse button and move the widget to the desired position.
- Release the mouse button.
 Moving a widget