Currency settings at model level Currency settings at variable level Currency settings at dimension item level In addition, you can set a currency on data sources
Users who are also working with Lucanet Consolidation & Financial Planning For users who do not work with CFP, currency translation is based on Auto Rates
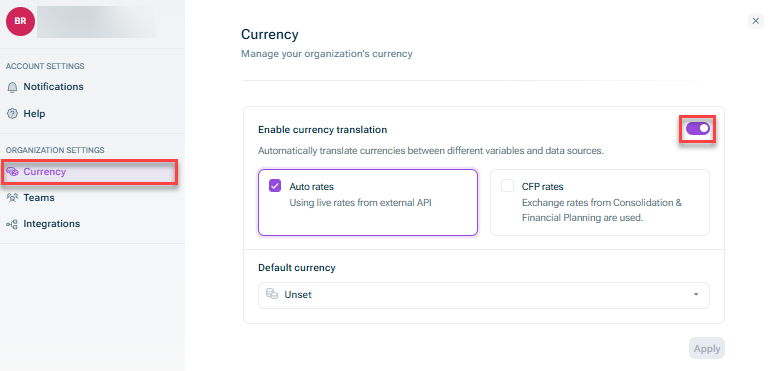
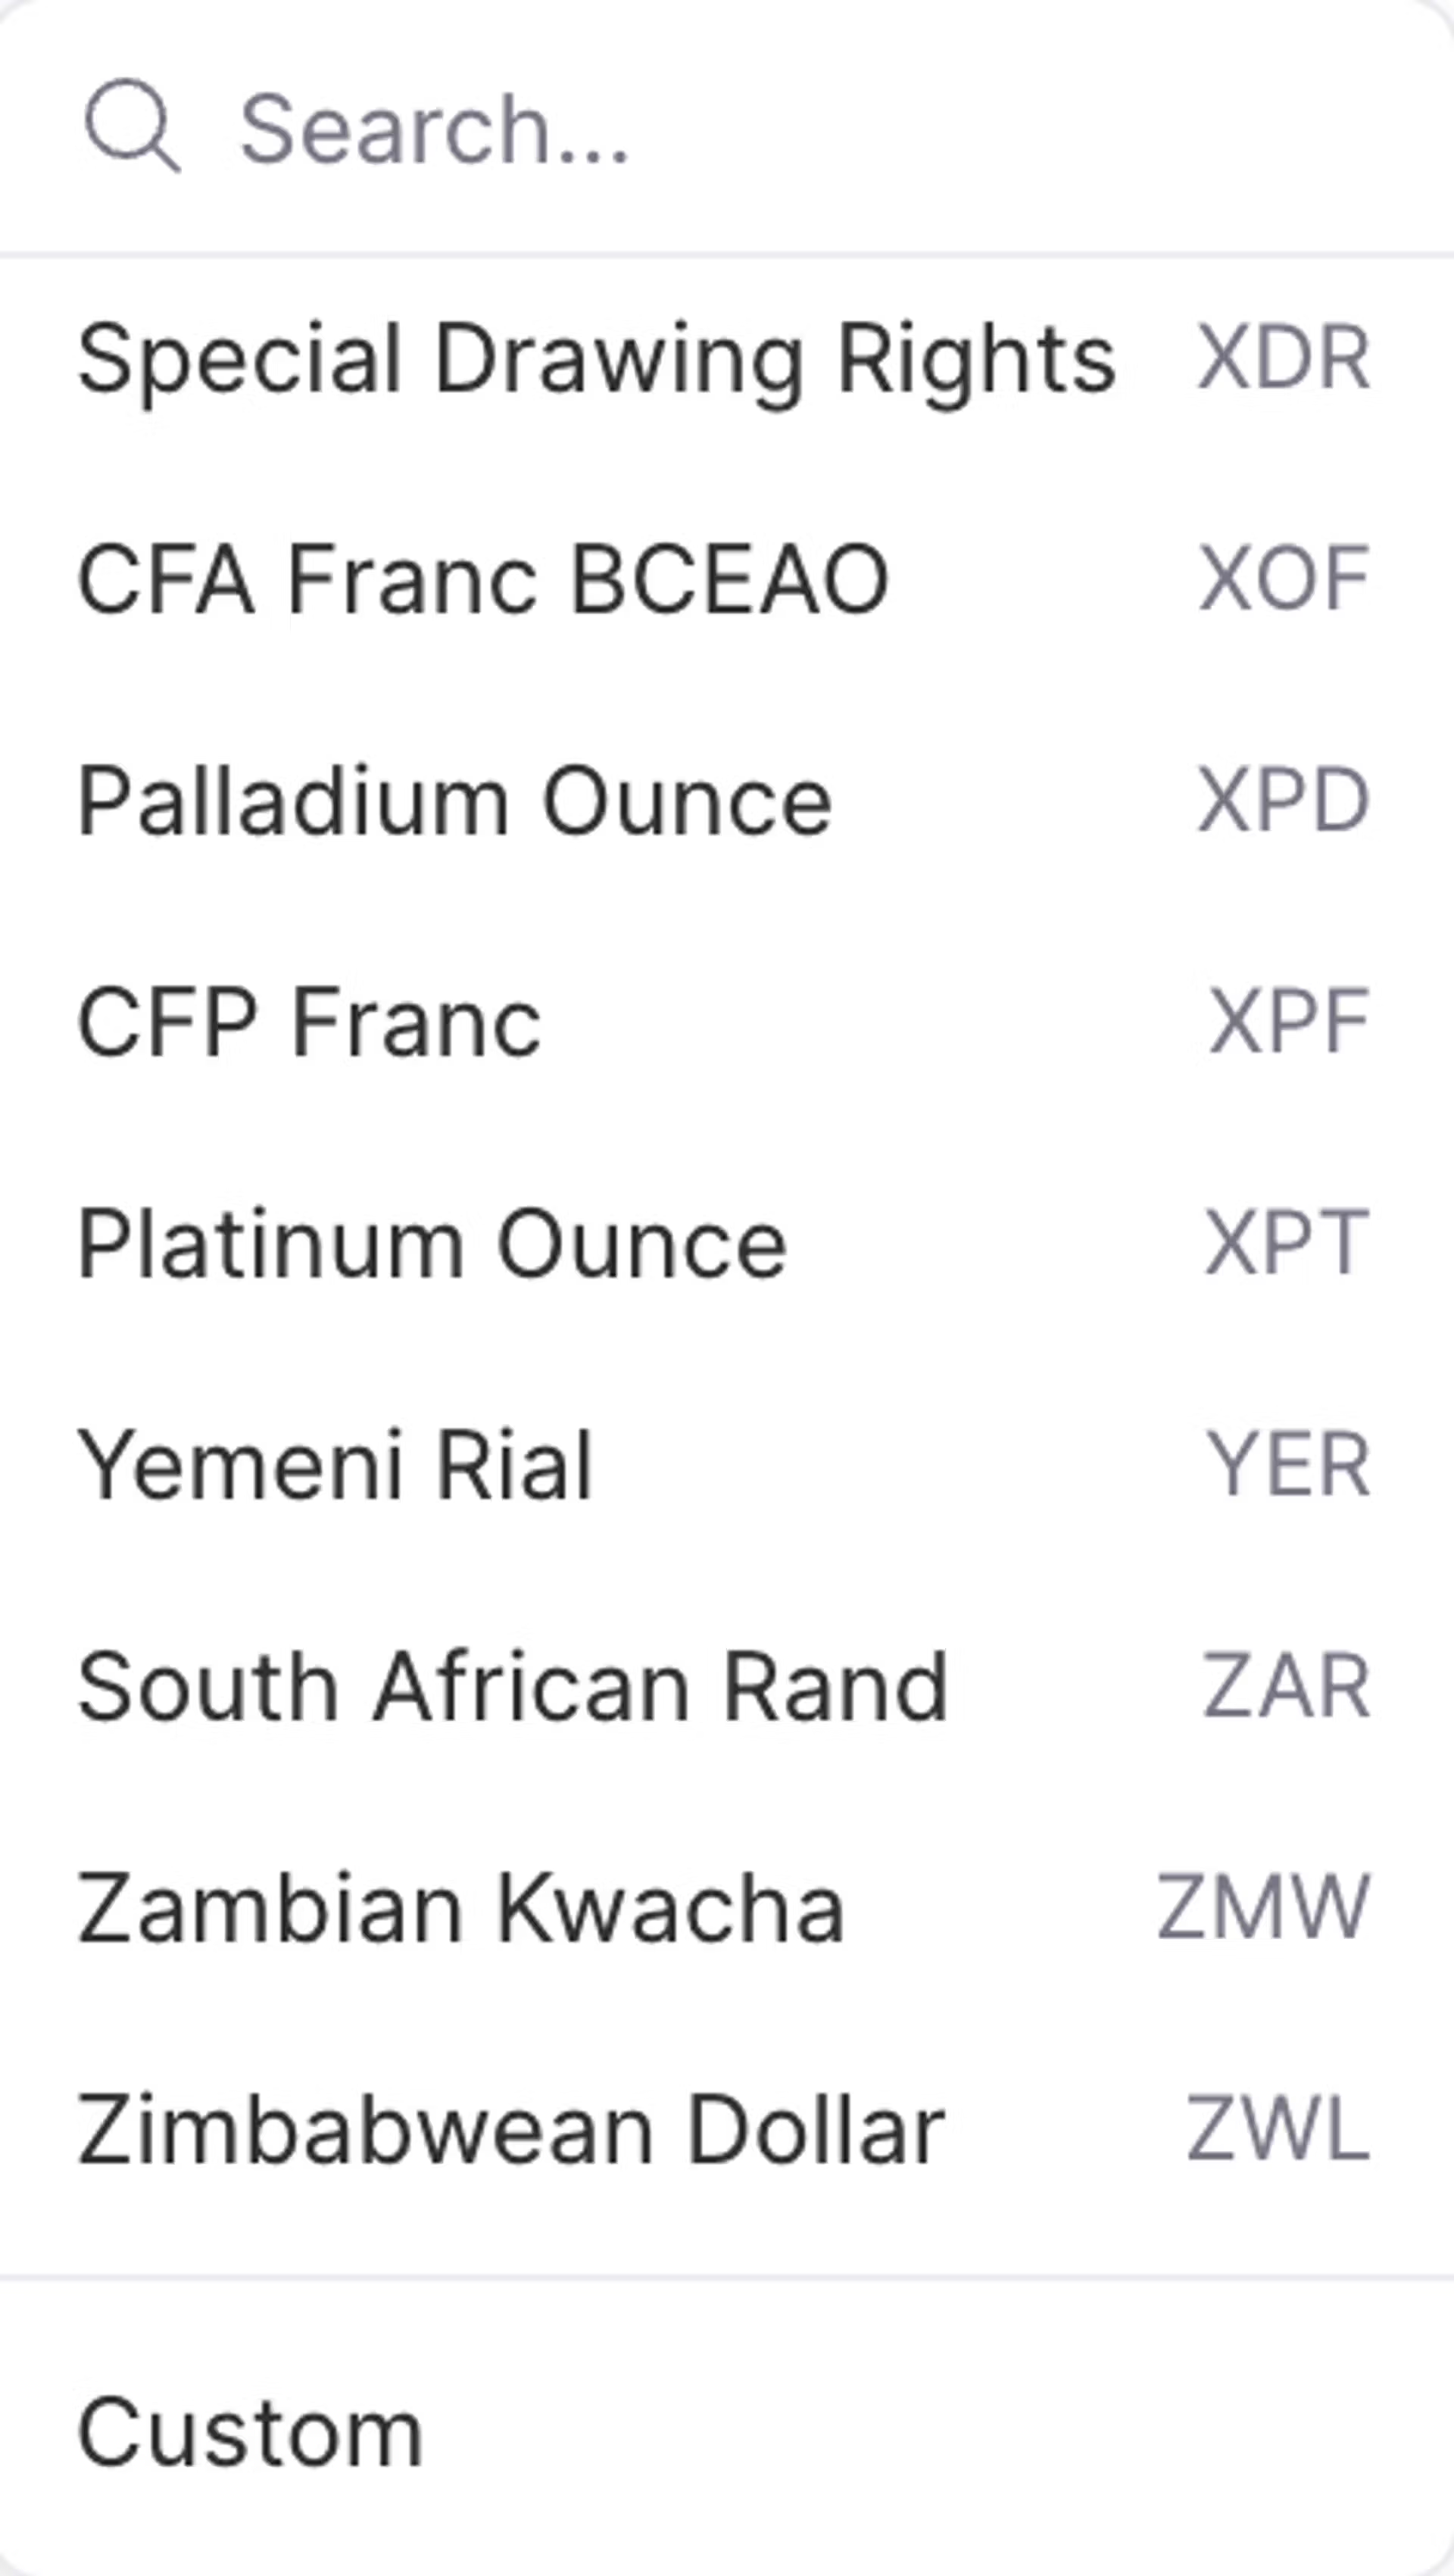
Auto rates Open Exchange Rates CFP rates Consolidation & Financial Planning
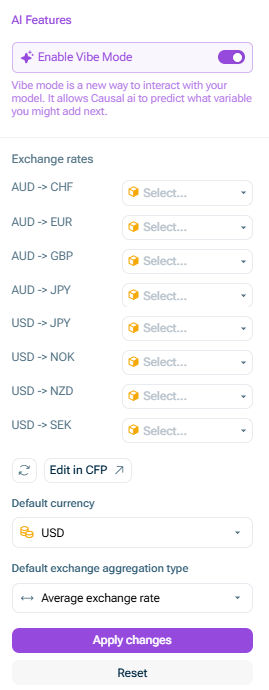
Average exchange rate Closing exchange rate
![]()
![]()

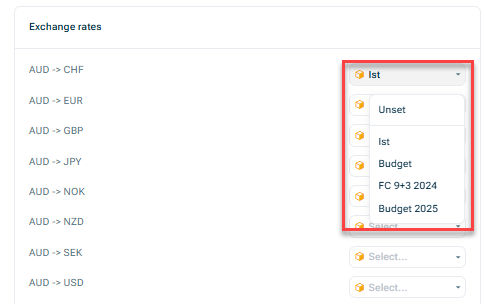
Only those currencies for which an exchange rate table has been defined in the model settings If a variable in EUR uses a variable in USD, automatic conversion
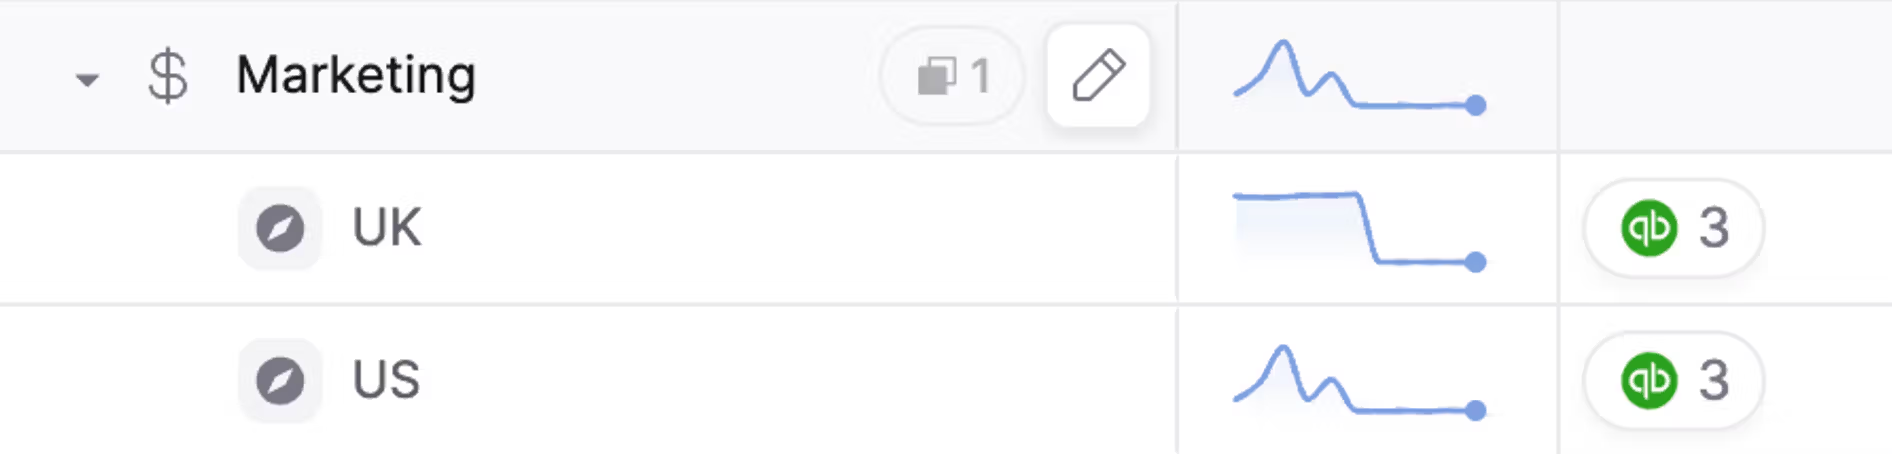
Revenue [US] uses USD Revenue [France] uses EUR Revenue [UK] uses GBP
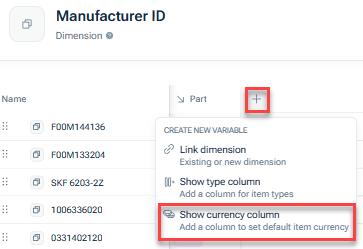
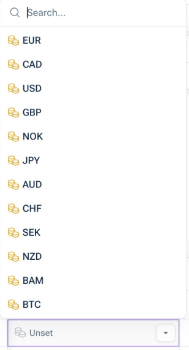
Choose the default currency Choose Unset
Once a default has been set, new currency variables using this dimension will automatically use the set currency as default. Existing variables are not automatically changed but they keep their current settings.
Parent default Default currency Choose a specific currency exchange rate aggregation type
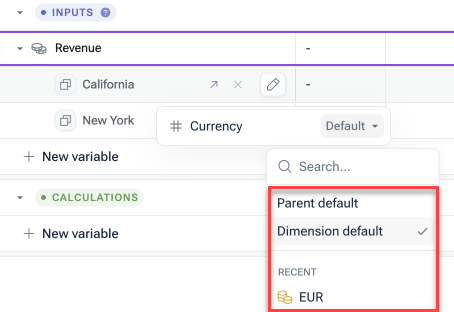
If you select Dimension default Revenue [France], EUR If you select Parent default Revenue [France] USD If you select GBP GBP
If a variable is not Currency settings only apply to variables with a currency unit type
If you update a default currency in the dimension settings, only dimension items set to Dimension default Dimension items with explicit currency selections remain unchanged
If you remove a default currency from the dimension settings, all dimension items using Dimension default Parent default A confirmation warning will appear before this change is applied
US → USD UK → GBP France → EUR Germany → EU
Revenue [US] shows in USD Revenue [UK] shows in GBP Revenue [France] shows in EUR Revenue [Germany] shows in EUR

e.g. if your variable is in AUD, but you connect data that is in USD, xP&A will convert the USD data values to AUD e.g. if your data is in USD but you want to see how that converts to EUR, set the variable to EUR and xP&A will convert USD to EUR
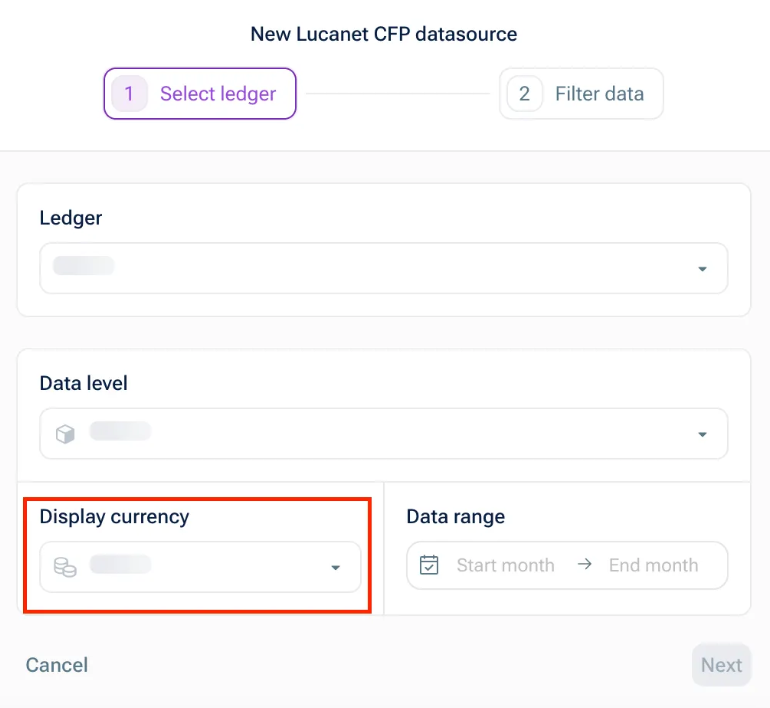
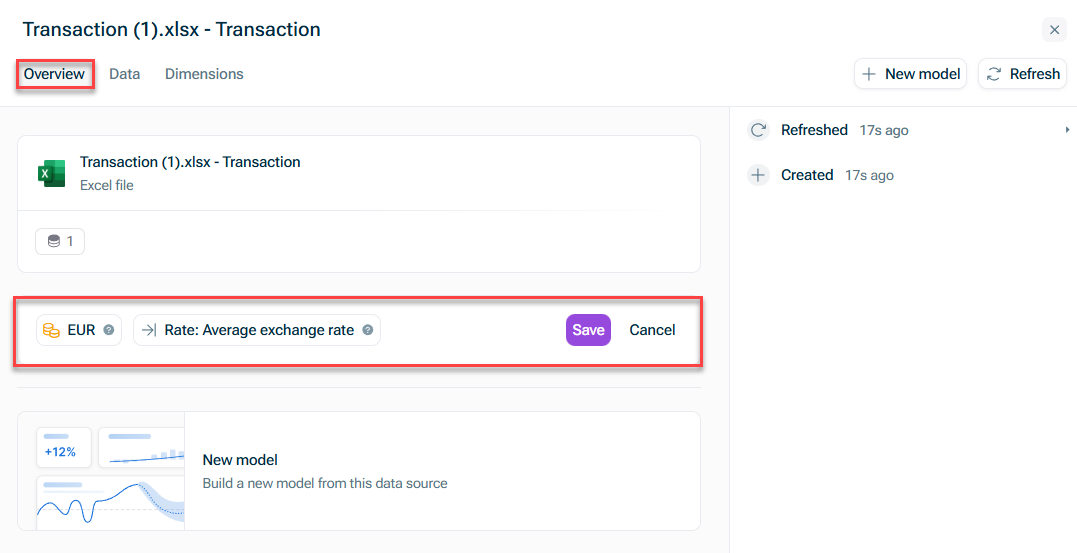
Only the user that created the data source can update the currency settings. For common data sources, currency settings are automatically detected and set by xP&A. For other data sources where xP&A cannot auto-detect the currency (e.g. Google Sheets), currency can be manually set (but currency settings are completely off by default).
Where can I see the exchange rates used? Where does xP&A source the exchange rates from? Can I adjust the exchange rates used?
What if there is data present for the current period (e.g. month in a monthly model), but the period is not yet finished?
Create a dimension called 'Entity Breakdown the variables by this 'Entity' dimension
Last updated on Aug 16, 2023