Data Export
Last updated on 2026-05-15
Overview
The flexible export currently supports the creation of a CSV file with data from the trade tax allocation (GewStZ) and the generation of CSV and PDF files based on custom reports.
This article contains the following sections:
Navigation
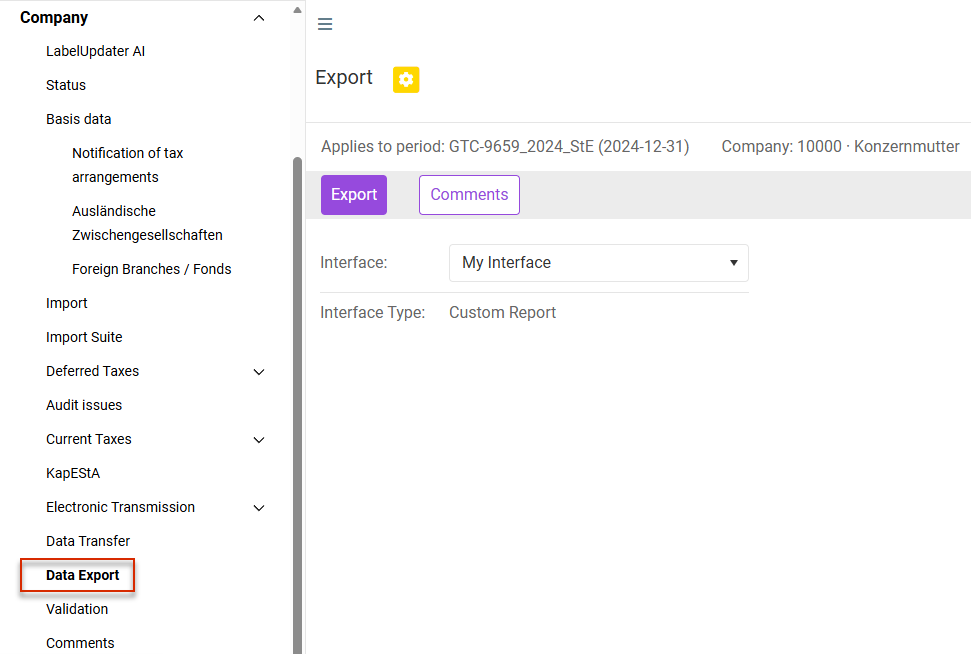
The Data Export workspace can be found under Company | Data Export or under Reporting | Data Export.
The Data Export workspace is displayed, for example, as follows:
Requirement for the Data Export
To export data, an interface structure must be created under Master Data | Interface | Structure.
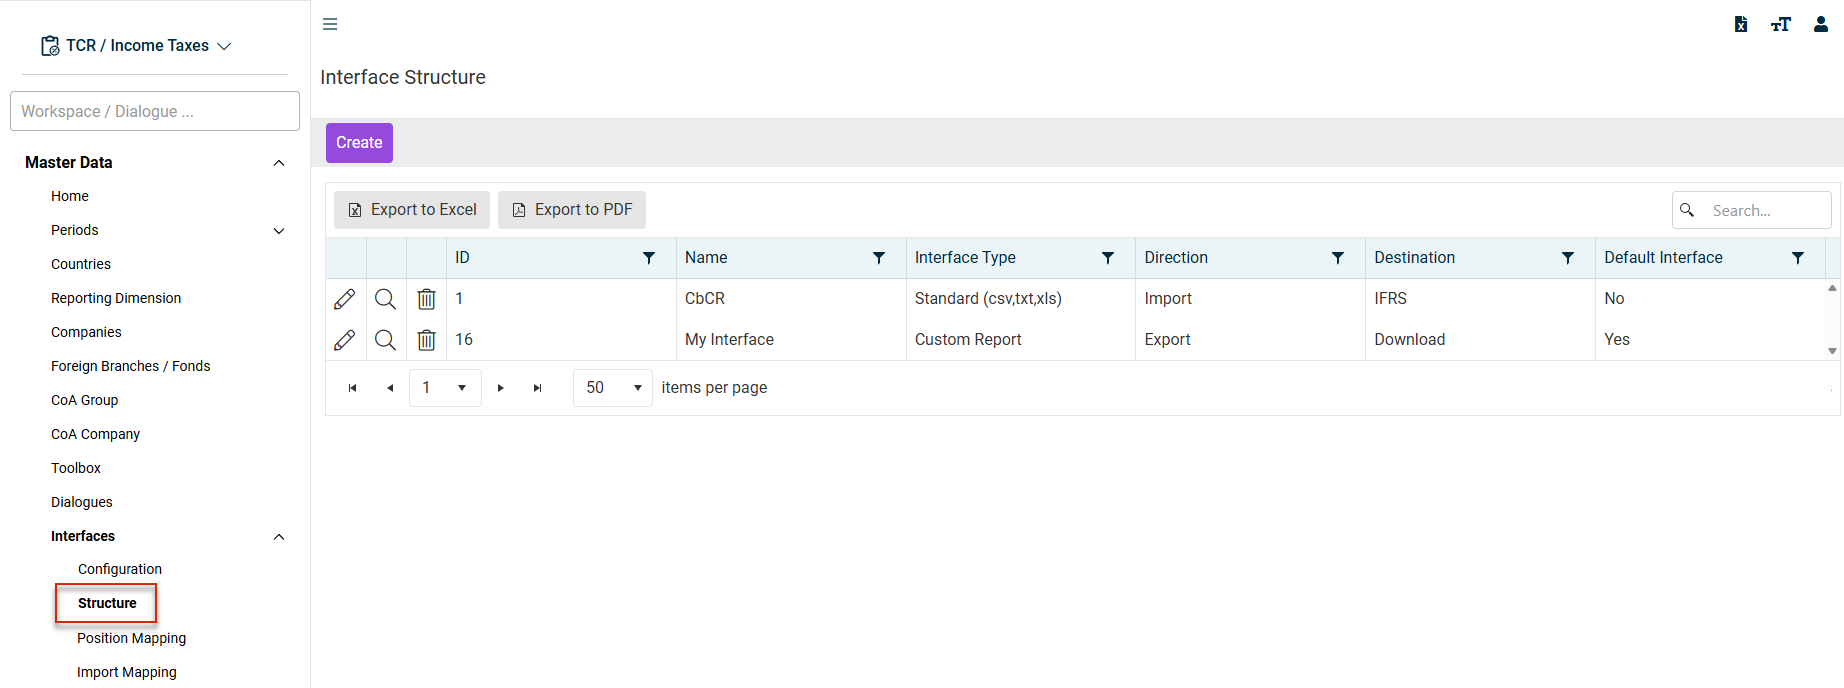
You can find details on creating interface structures in Structure.
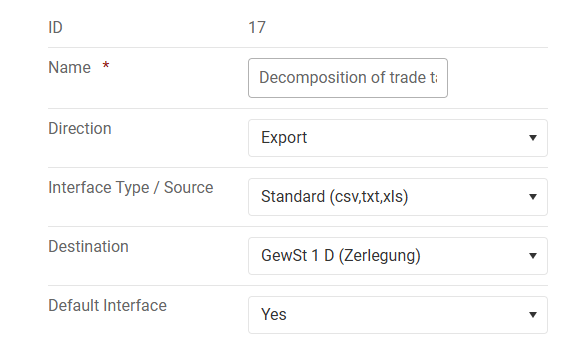
GewStZ Export (Trade Tax Allocation Export)
To export trade tax allocation data, you must configure the following settings with a name of your choice:
Export with Custom Reports
The prerequisite for this case is that you have previously created a custom report of type Export under Reporting | Reporting Engine.
To create a custom report of type Export under Reports | Reporting Engine, you must have the System Administrator – Edit permission.
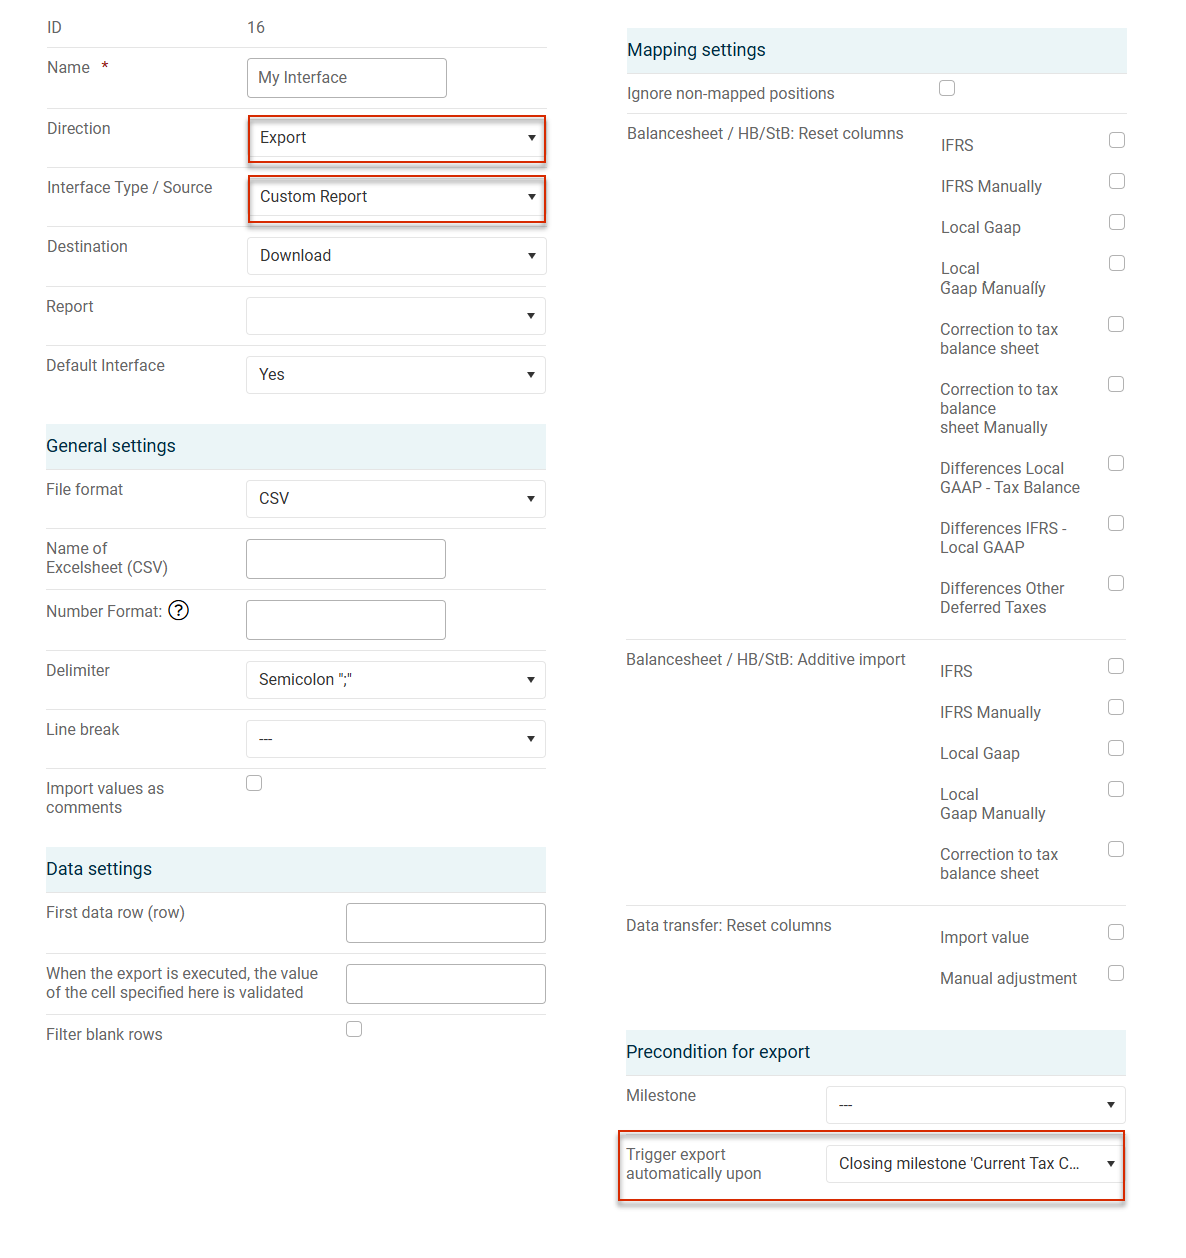
On this basis, a data export can now be configured. When the export is executed, the custom report is generated and the data from one worksheet of this Excel file are read out and exported in CSV format. The following settings must be made in the interface structure:
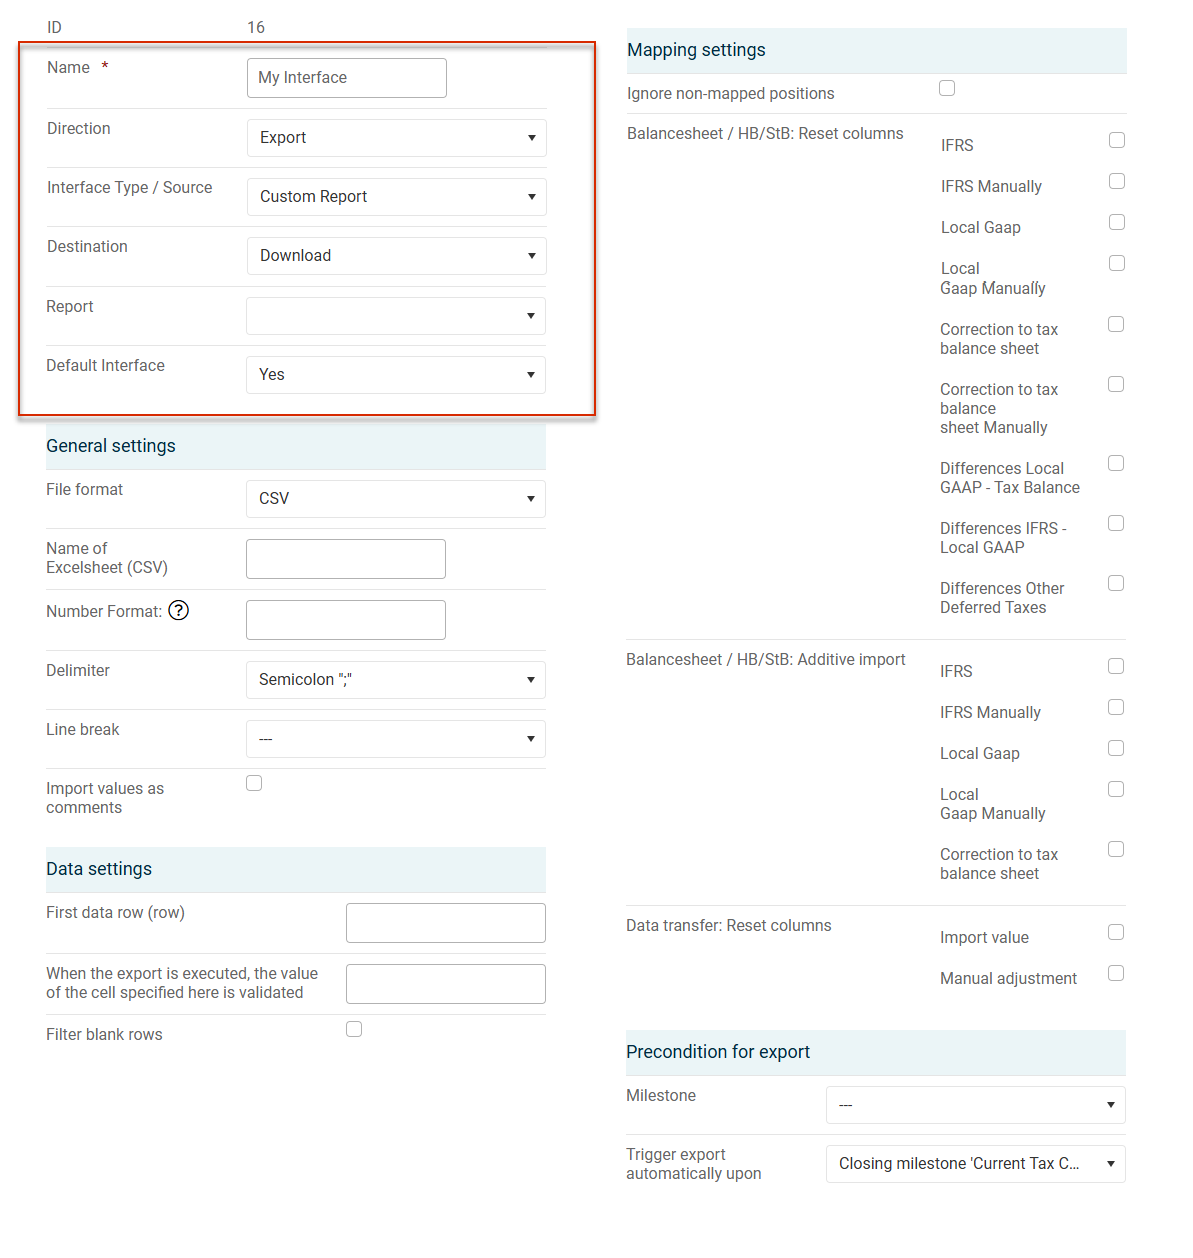
The following details are particularly important:
- The Custom Report entry,
- The Excel sheet from which the data are taken
- The row of the Excel sheet in which the export should start (skip header rows)
- The target that specifies whether the export is made available as a download, exported to the specified file path, or exported to a database table
When exporting to a database table, the Excel sheet name must match the table name from the database. In addition, the column names in the report must match the column names in the database table.
Optionally, specify a restriction in the Milestone drop-down list. This means that the export may be performed only when a specific milestone has been reached.
Specifying the Complete File Path
In the Absolute file path field, the name of the export file must be entered with a complete and valid path of the web server, e. g.:
<code>C:\temp\Exportdatei.csv</code>
The path must exist on the web server, which means Income Taxes does not explicitly establish an FTP connection or similar connection.
Placeholders (in curly brackets) can be used for specific values (e. g. the current date) both in the path and in the file name. These placeholders are replaced by the current values when the export file is generated. To include the ID of the current company in the name, you must, for example, use the UNITID placeholder:
C:\temp\Export_{UNITID}.csv
The following placeholders are currently available:
- {YYYY}: year of the current period
- MM}: month of the current period
- {DD}: day of the current period
- {year}: year of the date
- {mon}: month of the date
- {day}: day of the date
- {hour}: hour of the date
- {min}: minute of the date
- {sec}: second of the date
- {PERIODID} ID of the current period
- {UNITID}: ID of the current unit
- {USERID}: ID of the current user
- {USERNAME}: name of the current user
- {BUKRS}: reporting entities of the current company according to Master Data | Company | Additional company codes
The placeholders can also be used in the path to store files in different directories, for example by the year and month:
C:\temp\{year}\{mon}\Export_{UNITID}.csv
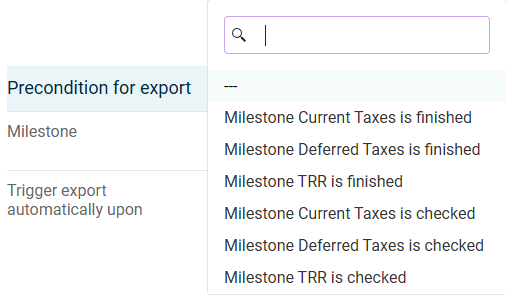
Automatic Export
In the interfaces, the Trigger export automatically upon option is also displayed if the Export and Custom Report (csv) options have been chosen:
Please note the following when using the automatic export: The {UNITID} (see Specifying the Complete File Path) must always be specified in the absolute file path of the automatic export.
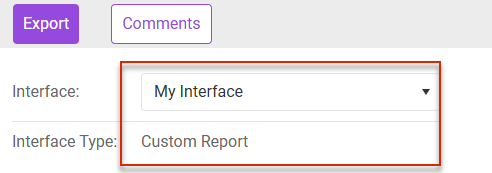
A standard interface configured in this way is displayed in the Interface drop-down list in the Data Export workspace, where it can be chosen:
An interface chosen here checks within the period whether the milestone chosen in the interface has been closed, and then performs the export. The Absolute file path field needs to be filled for this type of export.
In contrast, export interfaces can also be assigned to a company. If export interfaces are assigned to a company, only the exports assigned to that company are performed.
These exports can be triggered either by manually closing the milestone or by import in the subgroup area.
Export Procedure
To start the data export:
Open the Data Export workspace.
Select the required Interface.
Click Export to start the export.
If no absolute file path was specified, the file is downloaded directly from the browser. If a path was defined as described above, the file is stored under the name specified there. If an additional PDF export is optionally required, it is stored under the same name as the CSV file (with the extension .PDF).