General Functions
Last updated on 2025-03-14
Overview
The Lucanet CFO Solution Platform provides you with a number of general functions for purposes such as improving clarity, creating elements and copying values.
This article contains the following sections:
Function
Description
Showing and hiding menus
To show and hide both the main menu and the menus for the individual solutions and functions of the Lucanet CFO Solution Platform:
- Click the hamburger menu icon
 to show and hide the main menu, the names in the main menu, and the menu containing the individual solutions and functions.
 - Click the arrow icon
 to show and hide the menu containing the individual solutions and functions.
 - To hide the names in the main menu and the main menu itself, drag the dividing line between the menu and the main menu to the left.
 Example: Show Consolidation & Financial Planning menu
Showing and hiding areas
In the Consolidation & Financial Planning solution, you can show or hide certain areas using ![]() to make it easier to view items and accounts in the balance sheet. The areas you can show or hide include the Status bar the Dimension bar:
to make it easier to view items and accounts in the balance sheet. The areas you can show or hide include the Status bar the Dimension bar:
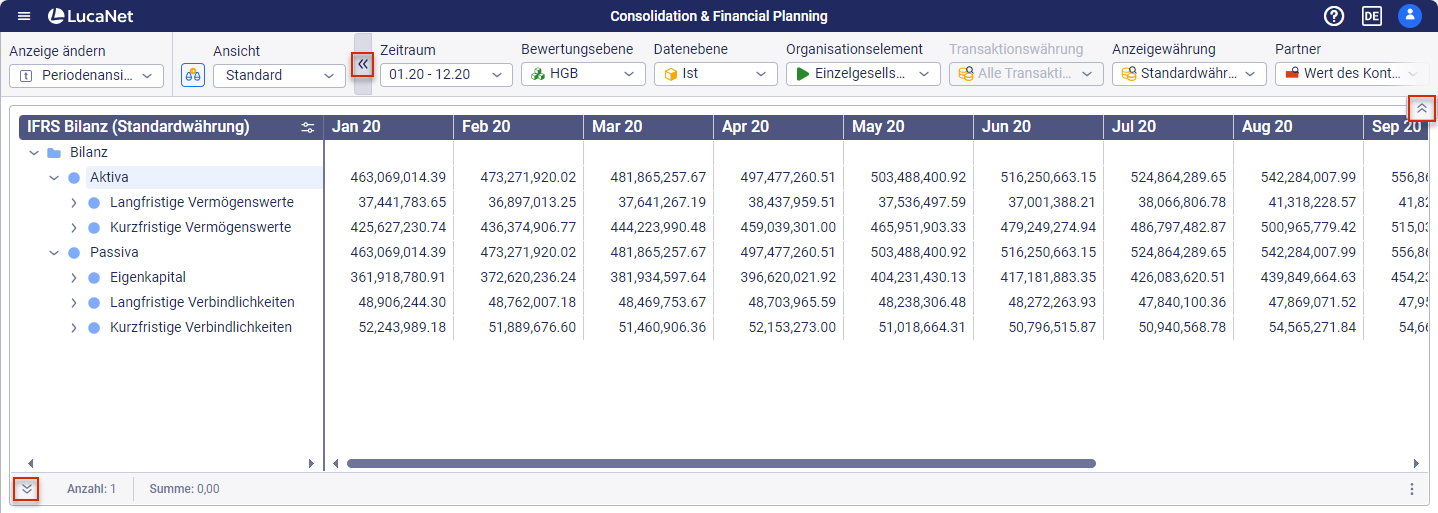 Options for showing and hiding certain areas
Changing order
In Consolidation & Financial Planning, you can change the order of elements in the tree view using the context menu command Change order. You can sort elements alphabetically in the Change order dialog, or use drag-and-drop to sort them manually.
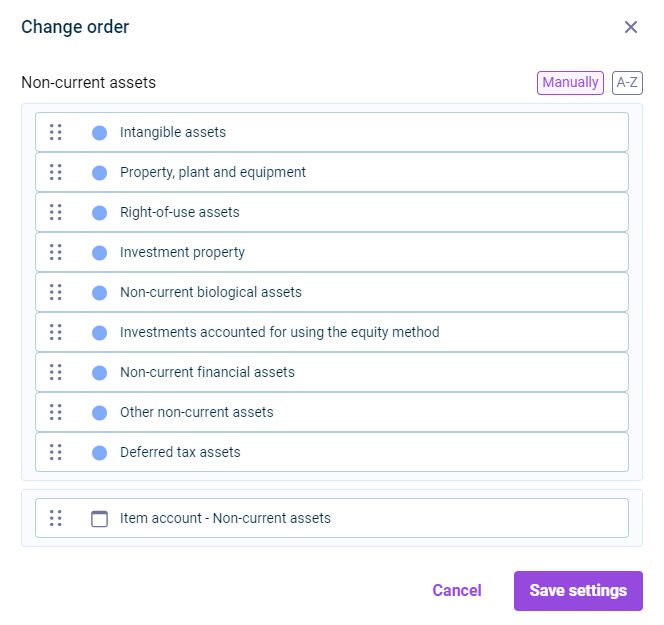 'Change order' dialog
To change the order of views in the tree view, mark the desired view, hold the mouse button, and move the view to the desired position.
Expanding and collapsing elements
Subordinate levels of elements can be expanded in the tree view to show more details or collapsed to have a better overview. In the tree view, navigate to a folder and open the context menu.
In the tree view of the Reporting and Analyzing functional area, you can also use the context menu for items and accounts to define whether you want to expand all levels, all items, or all accounts in each case.
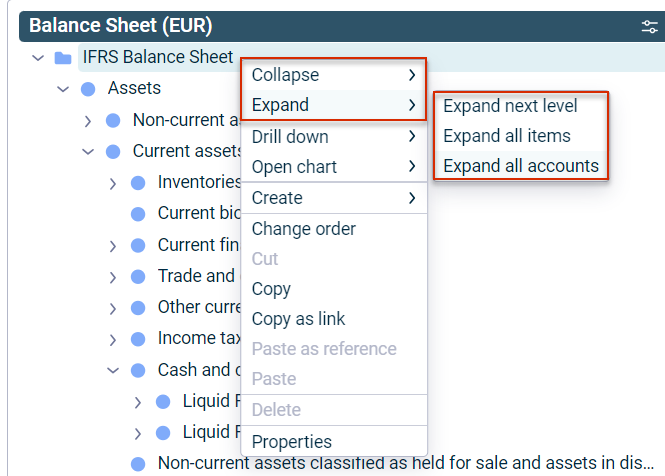 Context menu for expanding an account hierarchy
Adding and editing quick accesses
For certain menu elements, such as dashboards, you can right-click to define quick accesses that will make it easier for you to jump to the areas of the software you use most often.
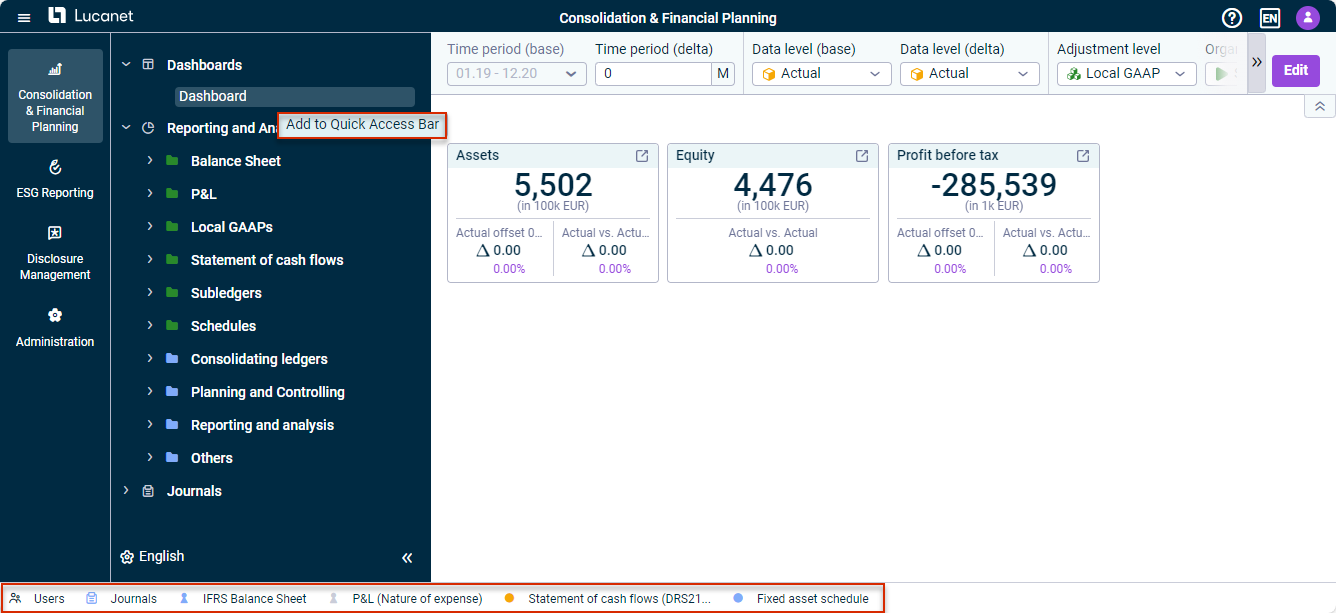 Add dashboard to the quick accesses
In the quick access bar, you can:
- Drag and drop the quick accesses to change their Order
- Delete any quick accesses you no longer need
When the access permissions for a user are changed, the quick accesses will be shown or hidden accordingly. The quick accesses only work for the solutions and workspaces to which the user has access.
Function
Description
Bold format
You can use the Bold format option to highlight important elements, such as certain items, formulas, and folders, in the workspaces under Reporting and Analyzing. To do so, navigate to the detail view of the desired element, open editing mode, and activate the Bold format check box.
To format elements in bold, you need the write permission for the respective workspaces. You can assign read and write permissions in the User management workspace of the Lucanet CFO Solution Platform (see Creating and Editing Users for the Lucanet CFO Solution Platform). The detailed permission for access to individual workspaces is still granted in Lucanet.Financial Client.
Creating, copying, cutting, pasting, and deleting elements
The functions used to create, copy, cut, paste, and delete elements in the tree view are available in workspaces below the Reporting and Analyzing functional area as well as in the workspace Importing data into reporting entities. The functions are currently available in the tree view of ledgers and schedules, and also for views. For this purpose, navigate to the desired element in the respective tree view and proceed as follows:
- In the tree view of a ledger or schedule, open the context menu to choose the desired function.
- In the tree view of a view, click the three dots icon
 to choose the desired function.
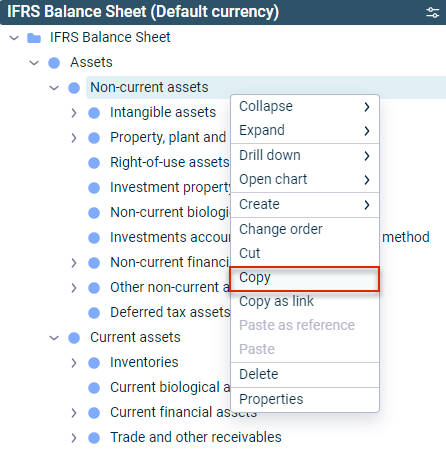 'Copy' menu command in the context menu of an account
Copy as link
The Copy as link context menu command can be used to copy a link to an element to the clipboard and then paste it, for example, in MS Word or MS Excel documents. When using the link in an external application, the Lucanet CFO Solution Platform and the corresponding database will be launched when a user clicks the link.
This function is currently available only in the Reporting and analyzing workspace.
Viewing element properties
You can use the Properties context menu command to display the respective element properties and edit them, for example accounts and items can be configured (see Elements in Ledgers and Schedules).
Filtering elements
In the User management area, you can filter the entries in each column by user name, e-mail address or permissions. To do this, click the hamburger menu icon ![]() and activate the check box for the entries you wish to filter.
and activate the check box for the entries you wish to filter.
Function
Description
Copying columns
Column contents can be copied and reused else where. To do so, navigate to the desired table column and copy the column to the clipboard with a right click | Copy or Copy with headers.
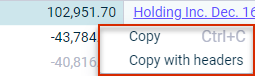 Context menu for copying column contents
Function
Description
Calculating the total and minimum, maximum, and mean values
In the Lucanet CFO Solution Platform, you can view the total and the minimum, maximum, and mean values of certain values, such as values from the balance sheet on the status bar or values in the Show postings dialog. Select the desired values to display the total on the status bar. Click the three dot icon ![]() to display the minimum, maximum and mean values.
to display the minimum, maximum and mean values.
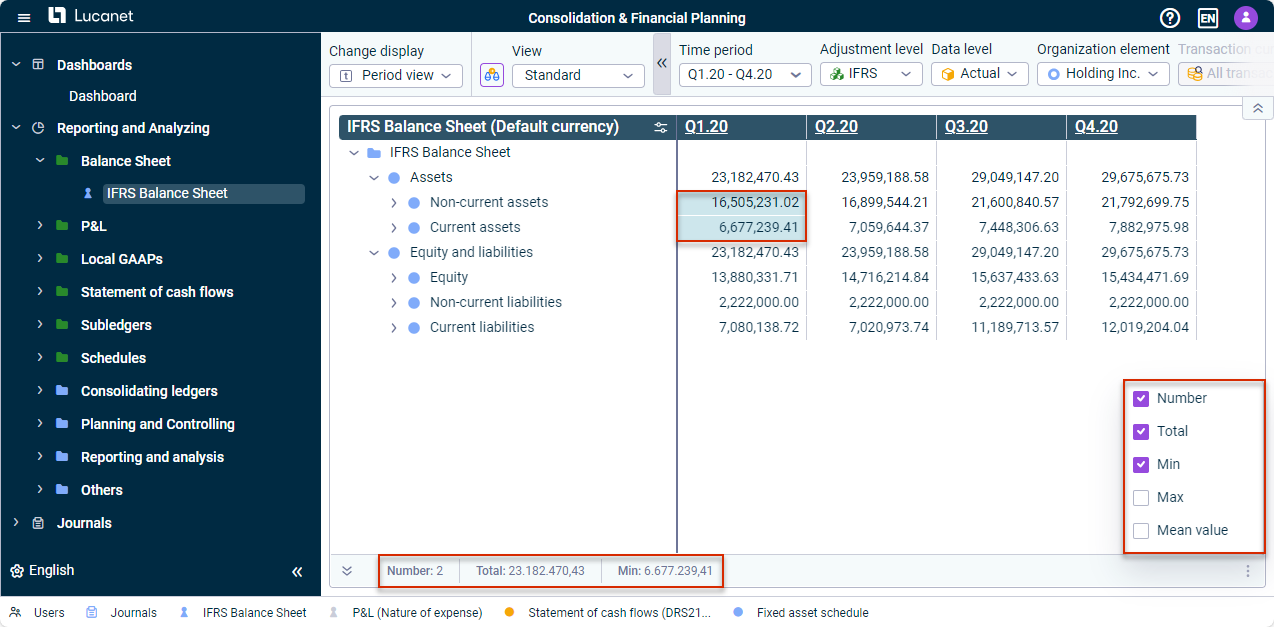 Example of displaying totals and other values in the balance sheet
Limiting the number of workspaces
The available workspaces can be limited or extended when selecting elements. To do so, click Select workspaces, for example, to create a KPI card in the Dashboard workspace:
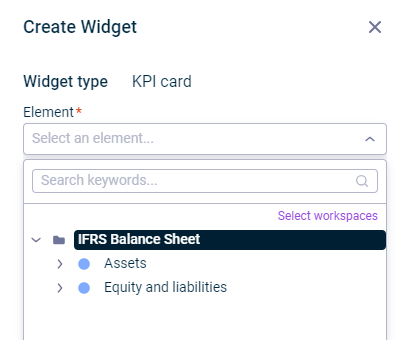 Select workspace when creating or editing a widget
Choose additional workspaces by activating the check boxes or limiting the selection.
Displaying additional information
A comment icon indicates that additional information is stored in the software for a particular entry, e.g. the exact posting date for the display of values of a posting in the Journals workspace:
 Comment icon with display of a date in the tooltip
Changing column widths
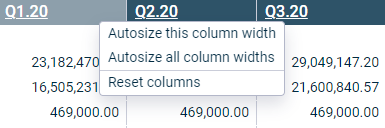 Menu of a column header in an account hierarchy
For a better overview, certain or all column widths can be automatically adjusted or the adjustment of the columns reset in tree views and detail views with tables. To do this, navigate to the header of the desired column and open the context menu to adjust the desired setting.
Copying values
The Copy values context menu command can be used to copy values to a different point within or outside the Lucanet software. To do so, navigate to the desired table value and copy the value to the clipboard with a right click | Copy values. Keep the CTRL key pressed to copy several values simultaneously.
To copy all values of a column simultaneously, you can click the column header. This automatically marks all cells and allows them to be copied.
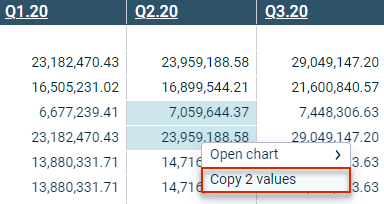 Copying values from an account hierarchy