Settings in Lucanet.Financial Client
Last modified on 2024-06-26
Overview
You can configure a number of settings in Lucanet.Financial Client, including the permissions for database areas. Specifically, the following permissions for Lucanet Consolidation & Financial Planning can be configured in Lucanet.Financial Client:
- Access to database areas and elements
- Access to views that have been created in Lucanet.Financial Client
This article contains the following sections:
Permissions for Database Areas
For users who have been assigned the user roles Editor or Observer in the Lucanet CFO Solution Platform, Lucanet.Financial Client allows you to define which areas of the database these users have read and/or write access to.
A distinction is made between the following categories of permissions for Lucanet.Financial Client and Lucanet Consolidation & Financial Planning:
| Category | Description |
|---|---|
| Workspaces | Defines which workspaces and elements are visible to the user and which elements in a workspace the user is permitted to create, change or delete, if necessary. |
| Data access | Defines the values to be displayed and the values the user is allowed to enter, change, or delete, if necessary. |
| Other permissions | Defines the administrative activities the user can perform and the additional information the user can access. |
| Dashboard | Defines things like whether the dashboard in Lucanet Consolidation & Financial Planning should be visible to the user, and whether the user should be allowed to edit the dashboard. |
Changing Permissions
To edit the permissions of users for specific database areas:
- Open the Users and user groups workspace in Lucanet.Financial Client.
- Mark the user whose permissions you wish to edit.
- Make the desired settings on the Permissions tab.
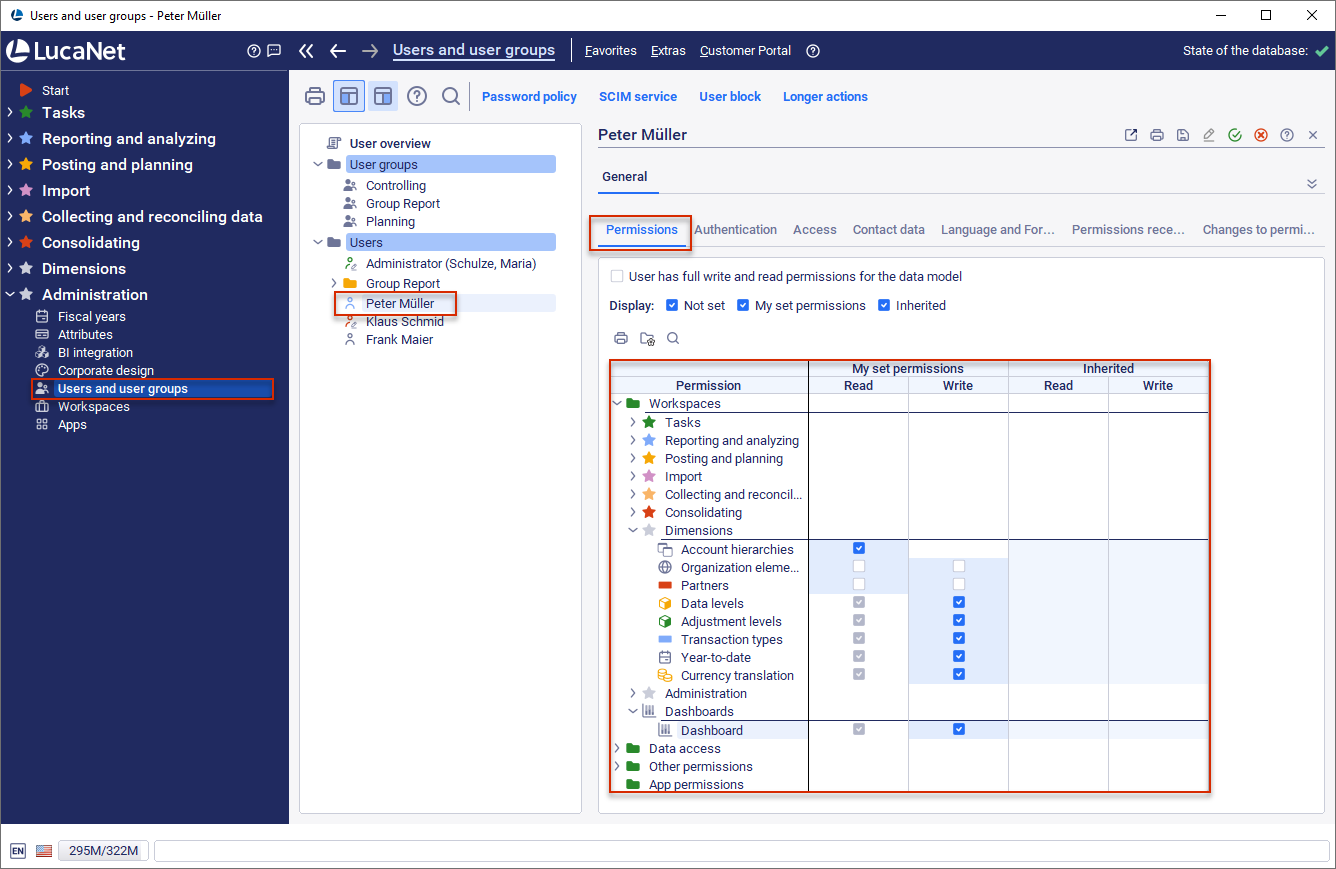 Configuring permissions for a user
Tip: You can find more information on permissions for users and user groups in the online help for Lucanet.Financial Client under: Complete description | Administration | Administration at database level | User management.
Activating Views for Lucanet Consolidation & Financial Planning
Views for configuring the dimension bar in account hierarchies can be defined in both Lucanet.Financial Client and Lucanet Consolidation & Financial Planning. The views defined in Lucanet.Financial Client can be activated for use in Lucanet Consolidation & Financial Planning.
To activate a view from Lucanet.Financial Client for use in Lucanet Consolidation & Financial Planning: