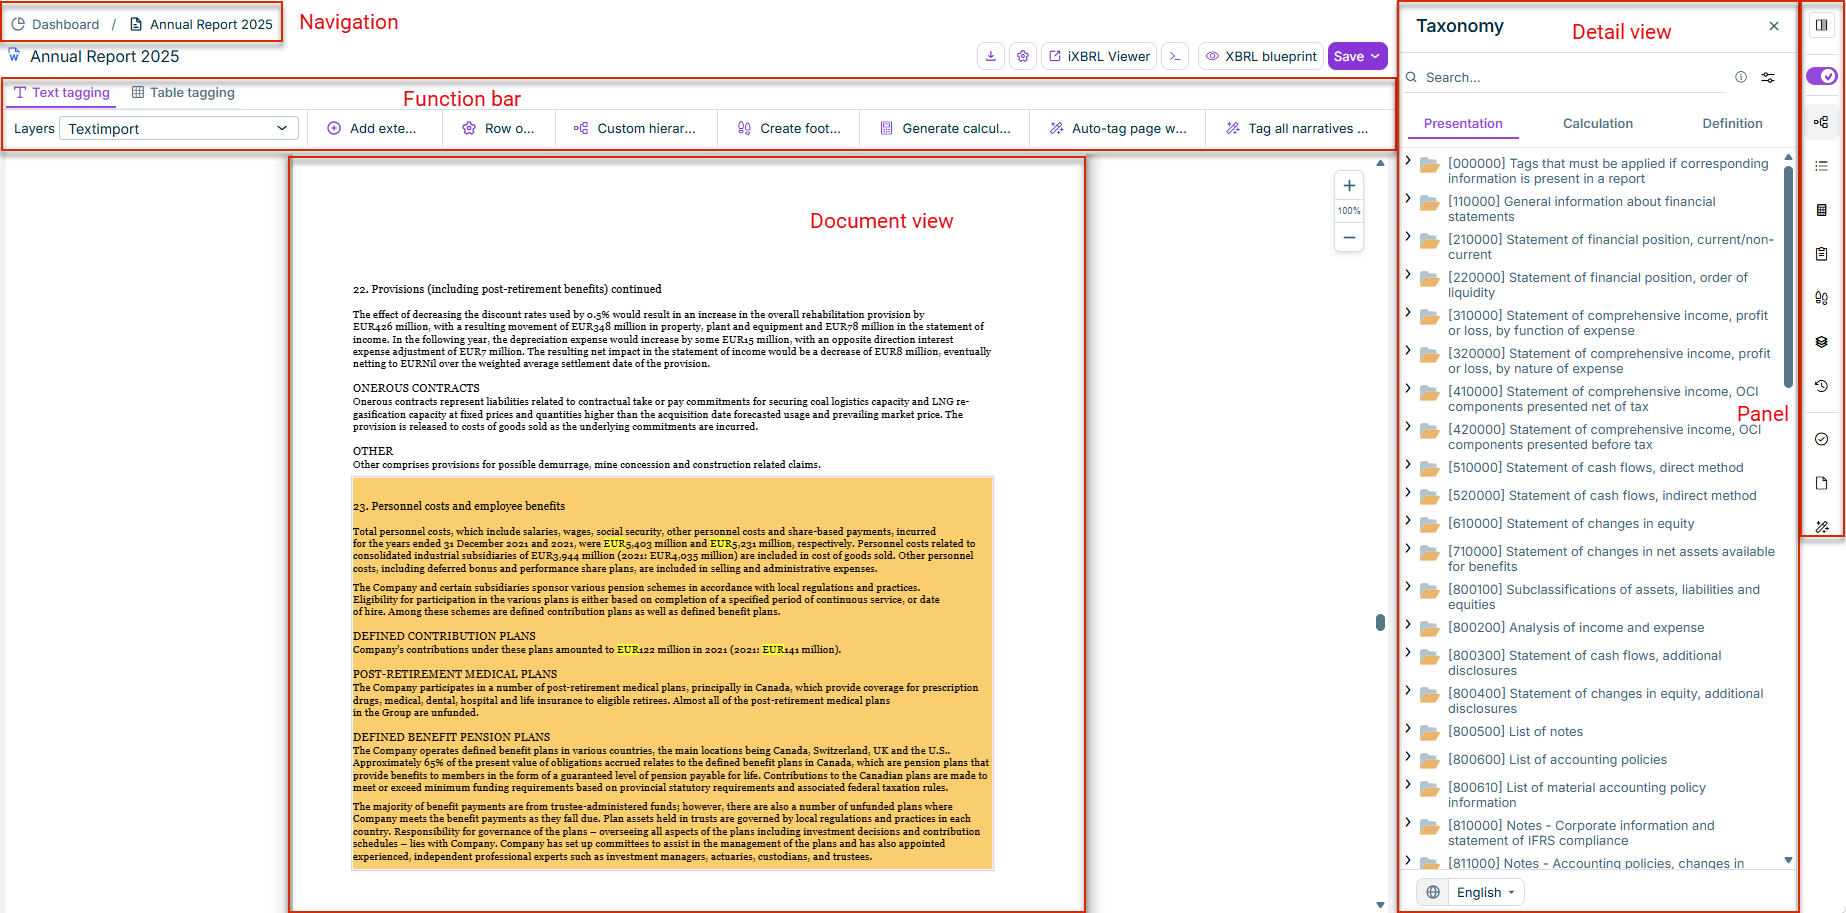
On this page, you can find information on the structure of the user interface and the main elements in the XBRL Tagger. From this page, you can go easily to the detailed descriptions of the individual workspaces of the XBRL tagger.
After opening the XBRL Tagger from the main menu, the application window of the Lucanet XBRL Tagger is displayed.
The user interface differs slightly depending on whether you open a Word document or a PDF document. However, the basic structure of the user interface is the same in both cases.
The application window consists of the following elements:
XBRL Tagger user interface
The following elements are available in the user interface:
You can use the breadcrumb navigation to switch between the different workspaces in XBRL Tagger. For example, you can use it to open the Dashboard, which displays all documents that have been loaded into XBRL Tagger.
Area in which a document is tagged (see chapter XBRL document).
When a PDF document is open, the document is displayed as a rendered PDF with tagging overlays. You can switch between the Text tagging and Table tagging layers at the top of the document area to work with text blocks or tables. For more information, see Tagging a Document and Working with Layers.
The panel contains buttons for showing and hiding additional and detailed information about the currently open document. The following can be displayed:
Taxonomy
Property
Calculation
Clipboard
Footnote
KVK filing information
Document outline
Version history
For PDF documents, only the Taxonomy and Property panels are available. They are displayed automatically as soon as an element is selected in the document. The other panels (Calculation, Clipboard, Footnote, KVK filing information, Document outline, Version history) are not available for PDF documents.
The panel also has its own bar at the bottom with the following functions: validation, generate XBRL report, AI background tasks.