This article provides step-by-step instructions on how to add, modify, and remove dimension breakdowns from variables in a data model in Lucanet xP&A (Extended Planning & Analysis). It further explores the application of formulas across dimensions, offering the ability to override and manage formulas for specific dimension items. Additionally, it covers techniques for sorting and filtering dimension data to enhance the organization and presentation.
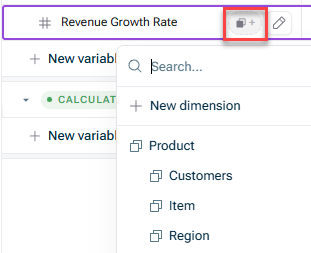
From its formula (if the formula refers to a variable that has the dimension)
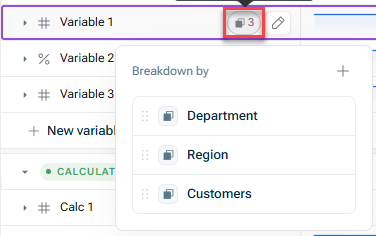
Variable that already has a dimension breakdown
What if I want to remove the dimension breakdown?
You can remove the dimension breakdown in xP&A by clicking the - next to the dimension after clicking the Dimensions button. However, if the dimension is coming from data, or from the formula, follow the steps below:
If your variable is connected to data, and the dimension is coming from data, you can either aggregate the dimension in the advanced data options on the variable, or you can remove the dimension from the model (from the left sidebar), which will remove the breakdown from all variables that had that dimension.
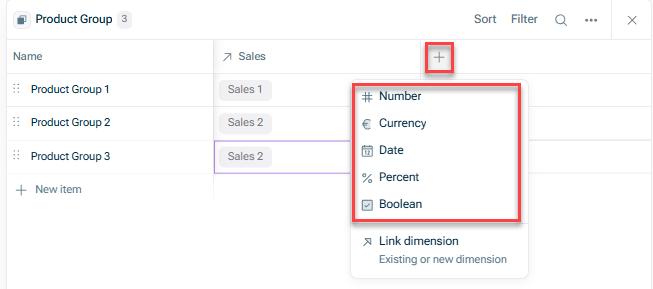
You can also create new variables in xP&A when viewing a dimension in the bottom-panel of the spreadsheet (once you open the dimension from the left-hand sidebar).
Click the + in the far-right column, and create a new dimensional variable by choosing its format from the drop-down (e.g. Currency, %).
When a variable is broken down by a dimension in xP&A, and you set a formula at the top (aggregate) row, it will be automatically applied in the same way across all dimension items. This is powerful as it means you only have to set the formula once.
Formula in the top row
If, however, you wish to set a different formula/value for certain dimension items, simply edit the formula for that particular row/cell. These edits will show up as an Override, and you can easily reset the override (back to the default formula), by clicking Reset override or Reset row.
Resetting a row
If you do not have a top (aggregate) row formula or value, then you have no "default", so different formulas or values for dimension item rows or cells are not considered Overrides.
FAQ regarding the Override function
Question: What if I have 2+ dimensions on a variable (e.g. Country and then Product), and then override for one of the Countries(e.g. New Zealand).
Answer: All the Products under New Zealand will now take their formula from the override for New Zealand (not the top-level/aggregate row of the variable).
Question: How do I override an entire dimension item row?
Answer: Either edit the formula in the formula column (which sets the formula for all months or time steps), or override a cell and then drag/fill-right that formula to all other cells in the row.
Question: Are different formulas/values in specific time step columns of the top-level/aggregate row of the variable considered overrides?
Answer: No, this just serves as a different formula for that time step.
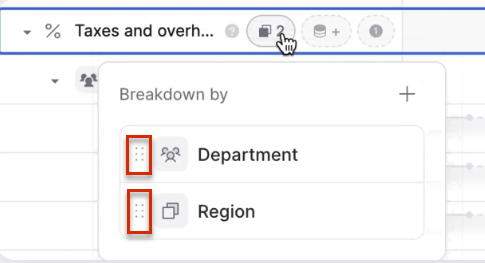
You can easily drag to reorder the dimension breakdown on a variable in xP&A.
For example, if you have a variable broken down by Department and then Region, you can swap the order around so it is Region and then Department instead. This will not change any calculations, it will just change the dimension ordering that you see when you expand the variable.
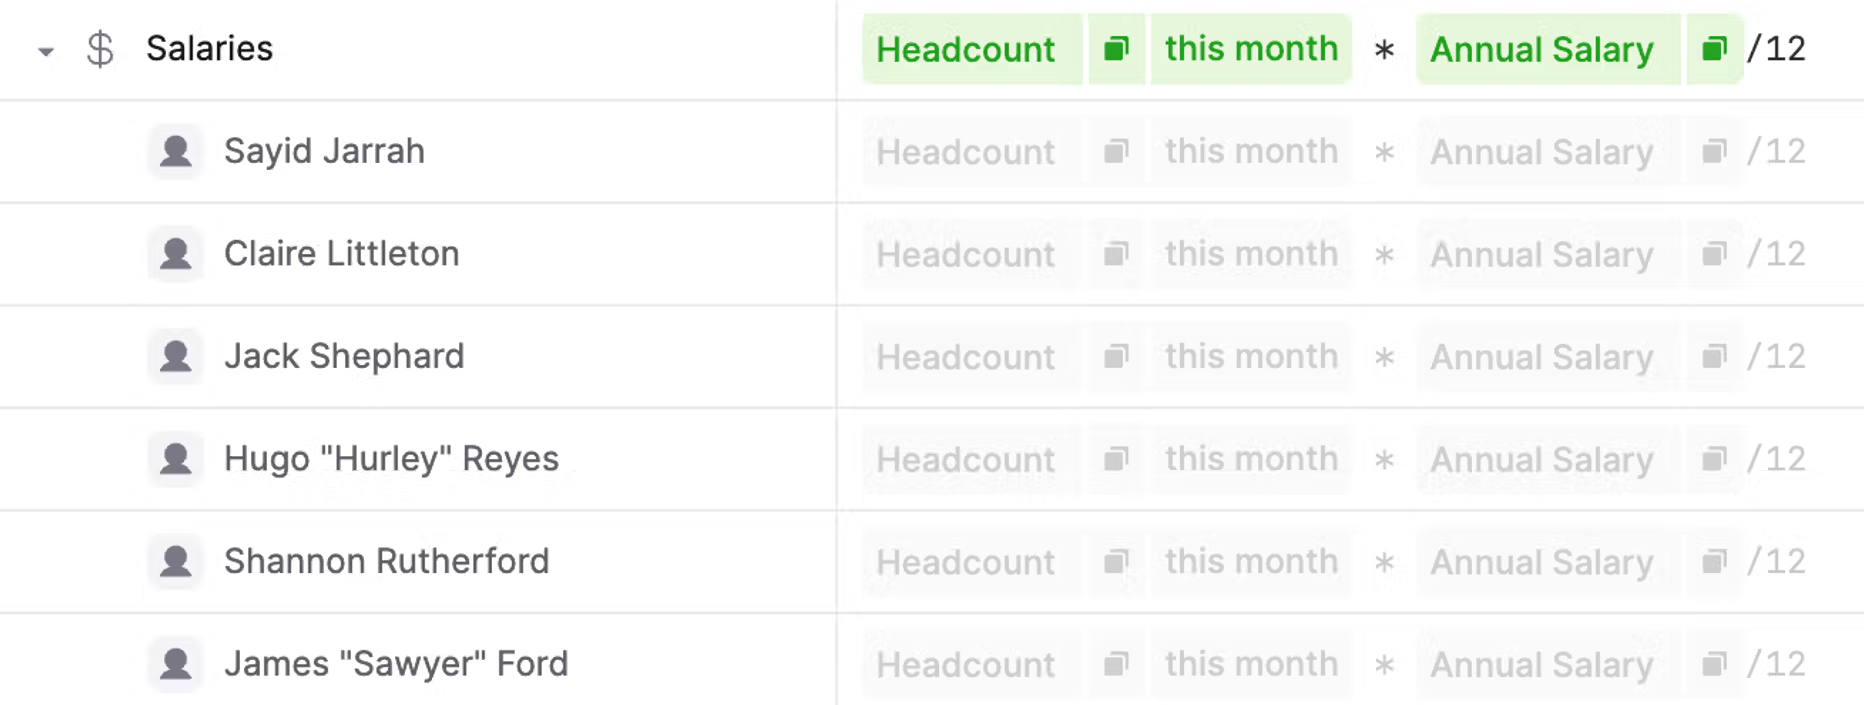
You can use your model's dimensions and dimension items in formulas in xP&A as follows:
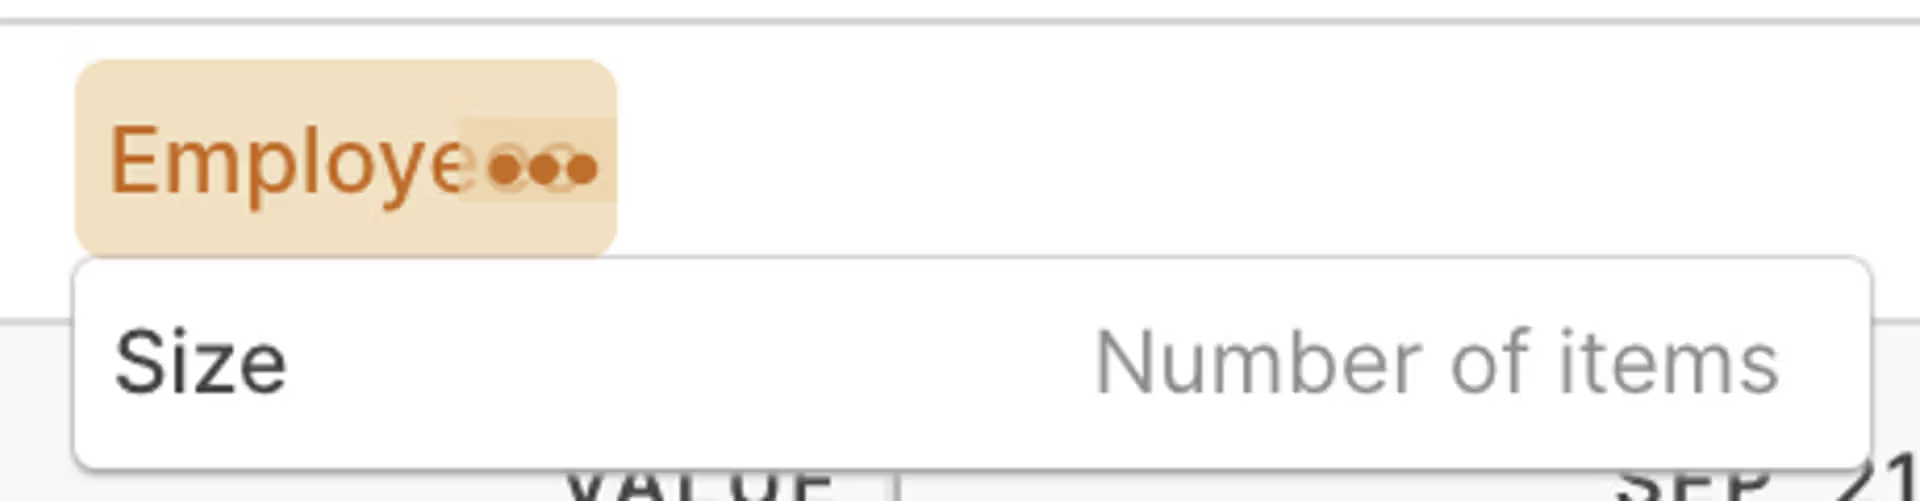
You can access the number of dimension items by clicking on the three dots menu and selecting Size:
Displaying the number of dimension Items
You can also use dimensions in if-statements (e.g. to dynamically define a variable's dimensional values without requiring a formula for each dimension item).
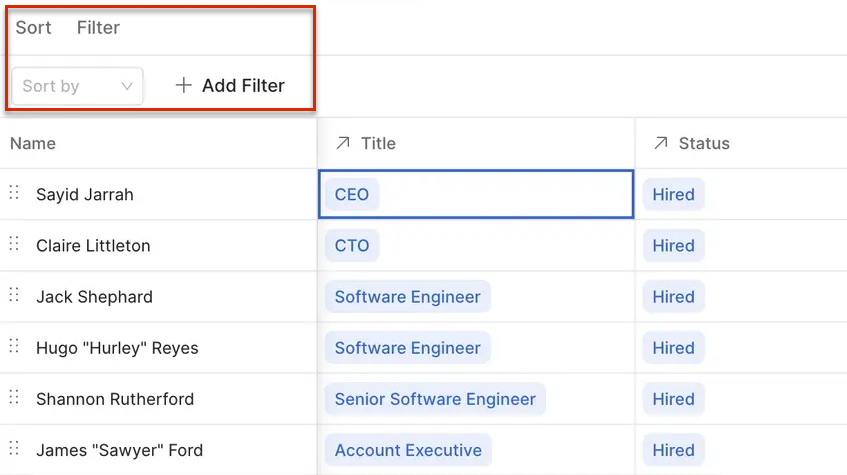
You can also dynamically filter and sort dimensions in xP&A in the bottom panel (after opening the dimension from the overview on the left).
You can sort either by clicking Sort Filter, or from the column header directly. If you sort the dimension items, you have the option to save the order, in which case it is applied to any variables in the models that have that dimension applied.
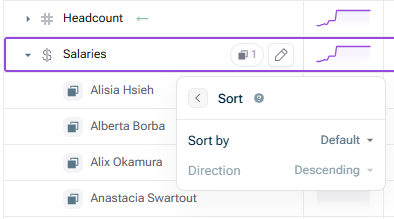
You can also sort by dimension item value on a variable in the spreadsheet in xP&A. For instance, if you have Spend broken down by Vendor, you can quickly sort the Spend variable so the breakdown is from biggest to smallest vendor.
Choose to sort based off the values for the Entire Model Period, or just the Last Actual Date, and choose Descending or Ascending order ( Descending is the default).
Sort dimension items
Find this setting in the edit menu on a variable.
To remove the sort, just click the x next to Entire model period/Last actual date.
Note that we use the Time Aggregation setting to determine how values are summed up for the entire model period. The default is Sum, but if you have set a Time aggregation setting of Final, for example, we will sort using only the final value in the entire model period.
This content was generated using AI and reviewed by Lucanet subject matter experts before publication.