In Disclosure Management, Excel and Word files are saved using the Check In function. When a file is checked in, a new version of the file is created automatically. All versions of a file can be recovered at any time.
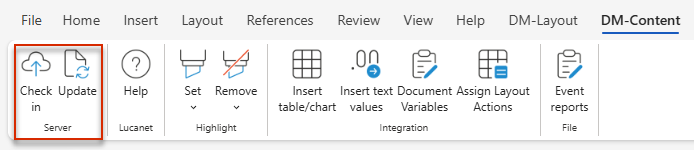
In Office for the Web and Office Native, checking in and updating work in a similar way to Office for Desktop. The two relevant buttons are located in the Word ribbon on the DM-Content tab:
Buttons for checking in and updating in the Word ribbon ('DM-Content' tab)
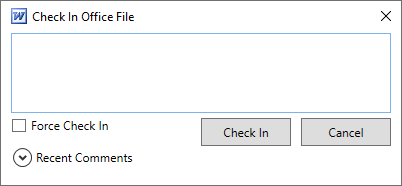
In the Word ribbon, on the DM-Content tab, click Check In.
The Check-In task pane opens on the right.
'Check-In' task pane
2
Enter a comment in the Check-in message field.
3
Click Check in.
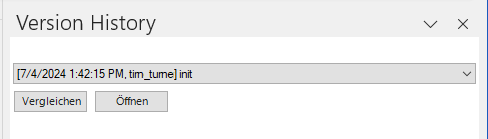
Disclosure Management creates a new version of the file. When you check in a Word chapter, an entry is created in the document History, from which the version can be recovered.
When you check in a Word chapter, an entry is created in the document History, from which you can recover a previous version. To open the history of a document:
You have the following options for entering a comment:
Enter a comment in the input field.
If helpful, click Recent Comments to reuse one of the 20 most recently used comments.
4
By default, an Excel or Word file that contains errors cannot be checked in. If you want to check in a defective file despite this, activate the Force Check In check box.
5
Click Check In.
Disclosure Management will then create a new version of the file. In the Cockpit, the time of the change will be displayed in the Word column.