In Lucanet Disclosure Management, the Style Guide gives you a central tool for binding the design of your reports to your corporate design in a consistent way.

With the Style Guide, you store your company's formatting rules as an XML file centrally in Disclosure Management. As a result, all authors work with the same specifications for fonts, headings, body text, and other text elements. This prevents visual inconsistencies between chapters or contributors from the outset and reduces the effort required for the final layout alignment.

The functions described here require an Advanced license or higher.

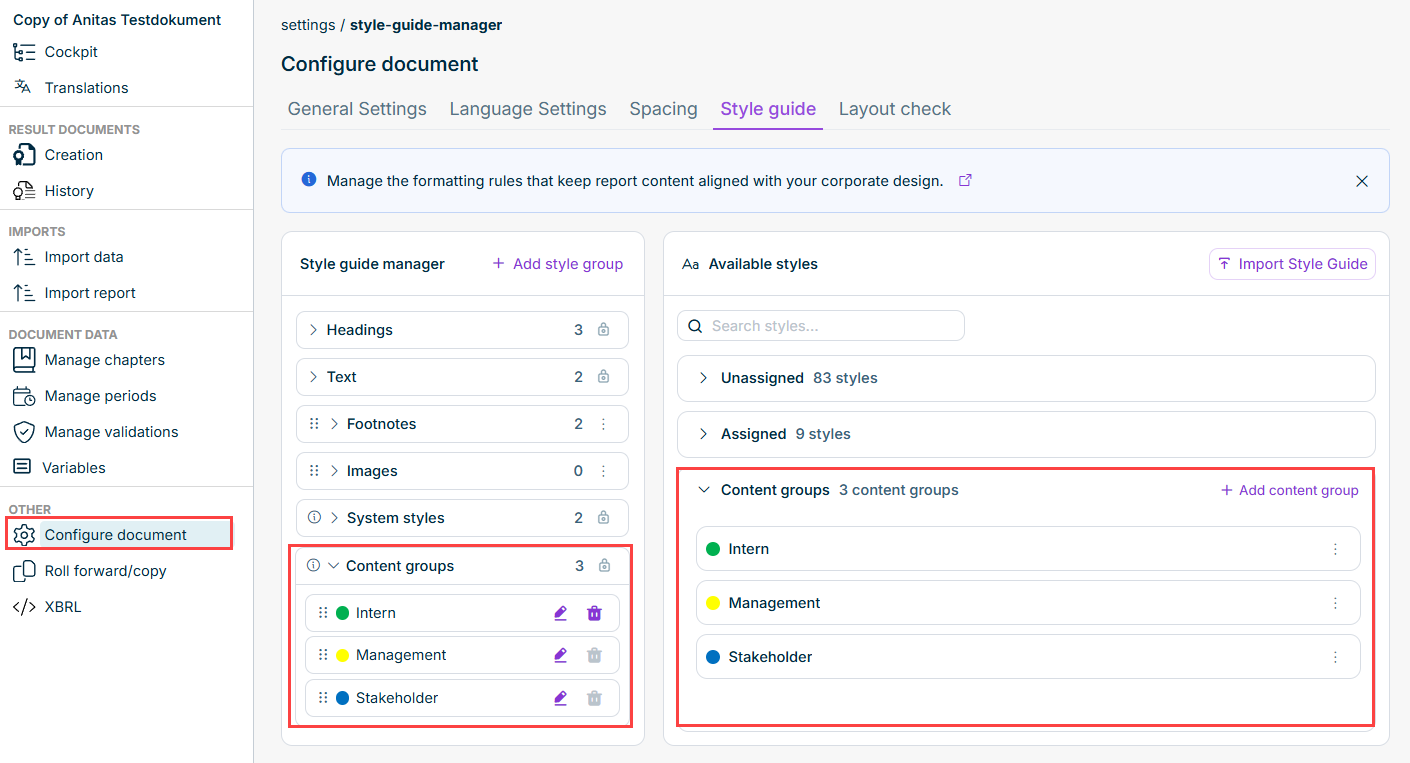
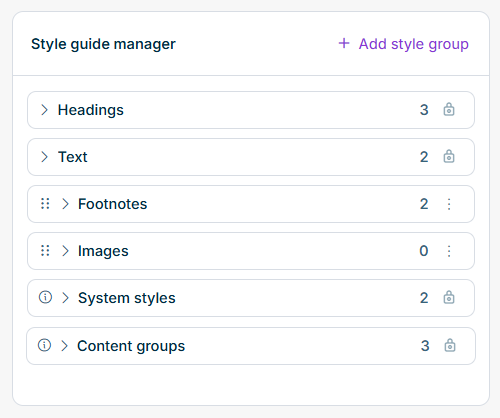
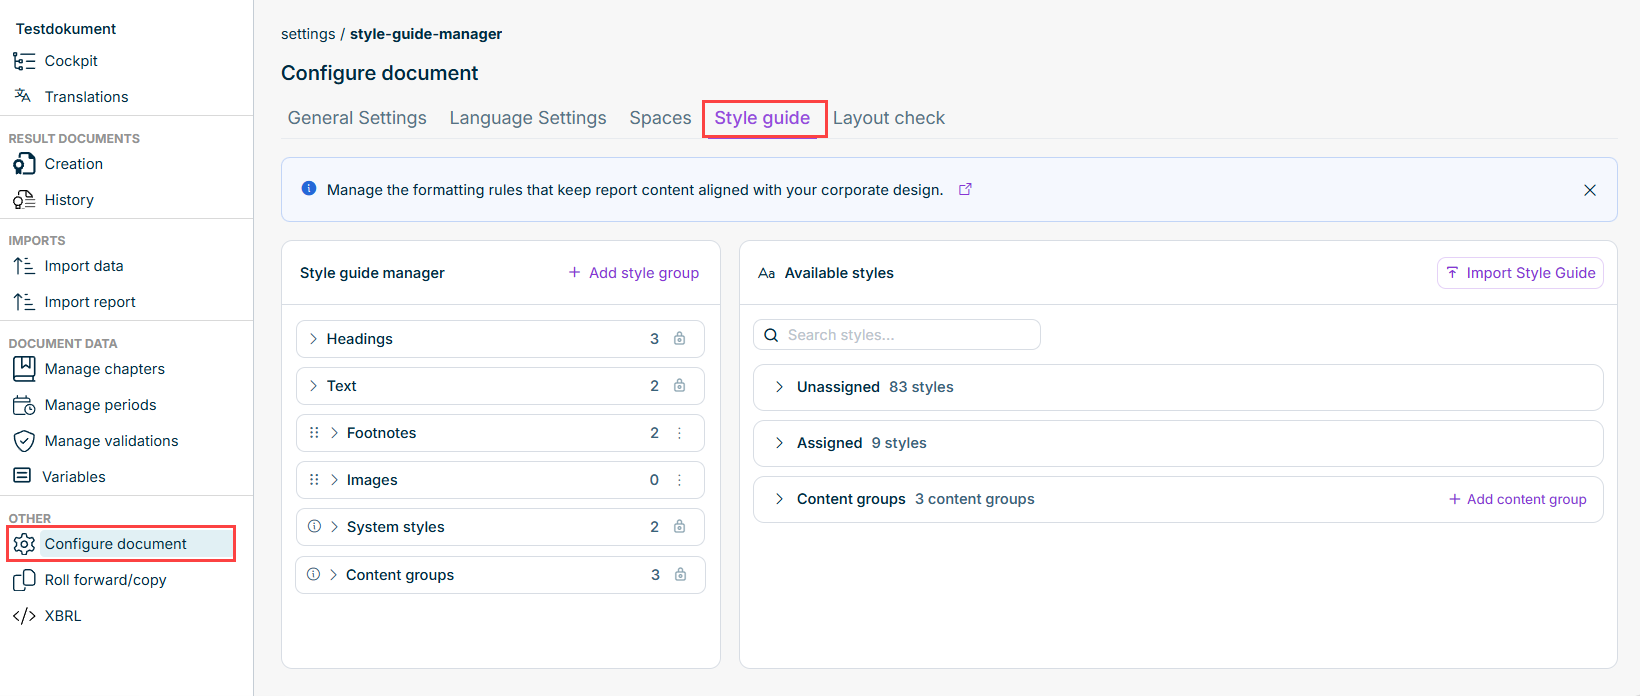
On the Style Guide tab in the Configure document work area, you manage the Style Guide Manager per document language. In the Style Guide Manager, you define which formats are available in Word documents for your reports. The styles defined in a Word template (Word styles) can be structured into groups, and you can control which styles are available for the respective content section of a report. The Style Guide Manager is displayed in the Configure document work area as follows, for example:

Groups displayed in the Style Guide Manager

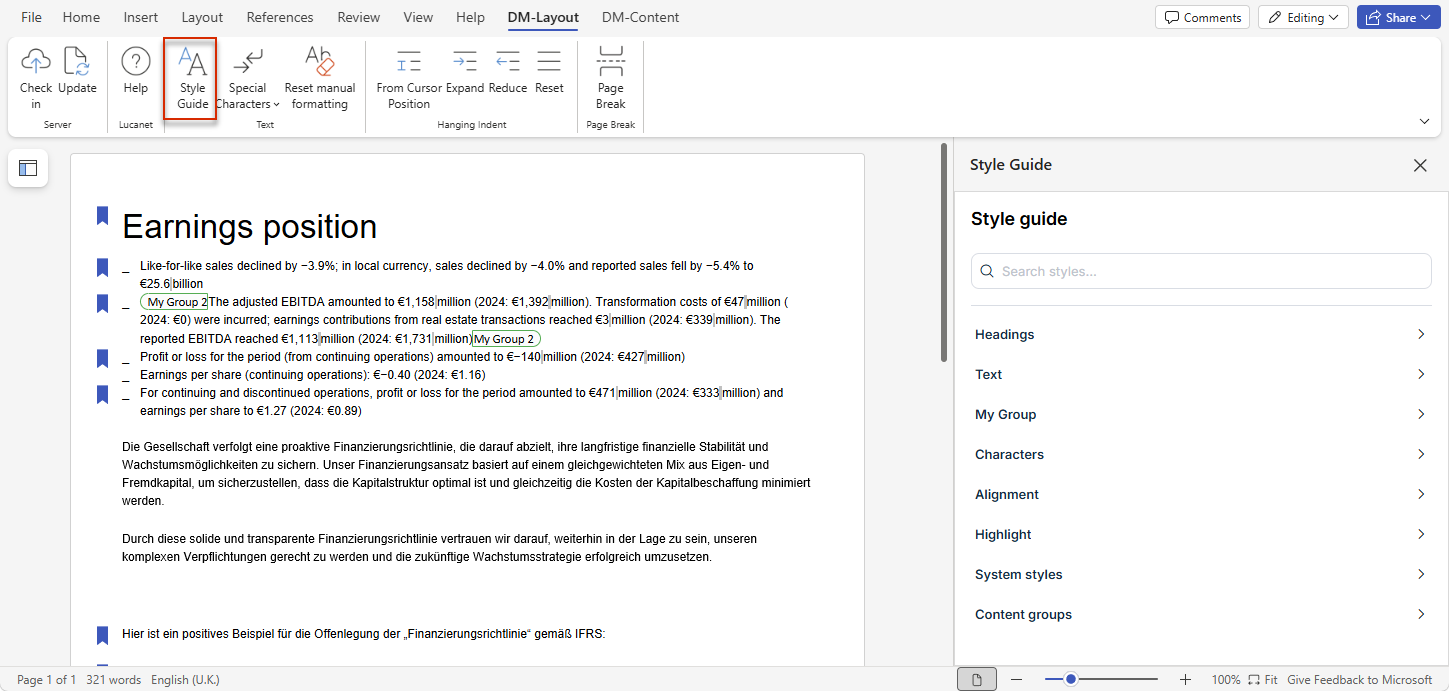
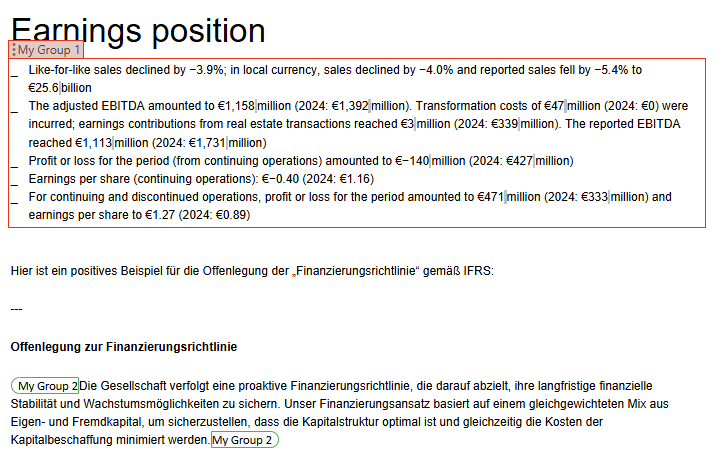
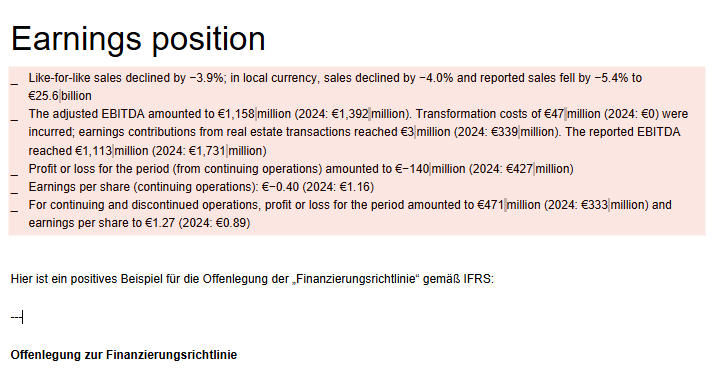
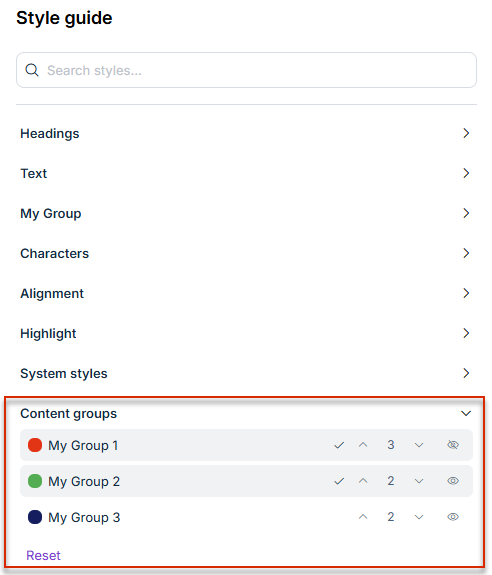
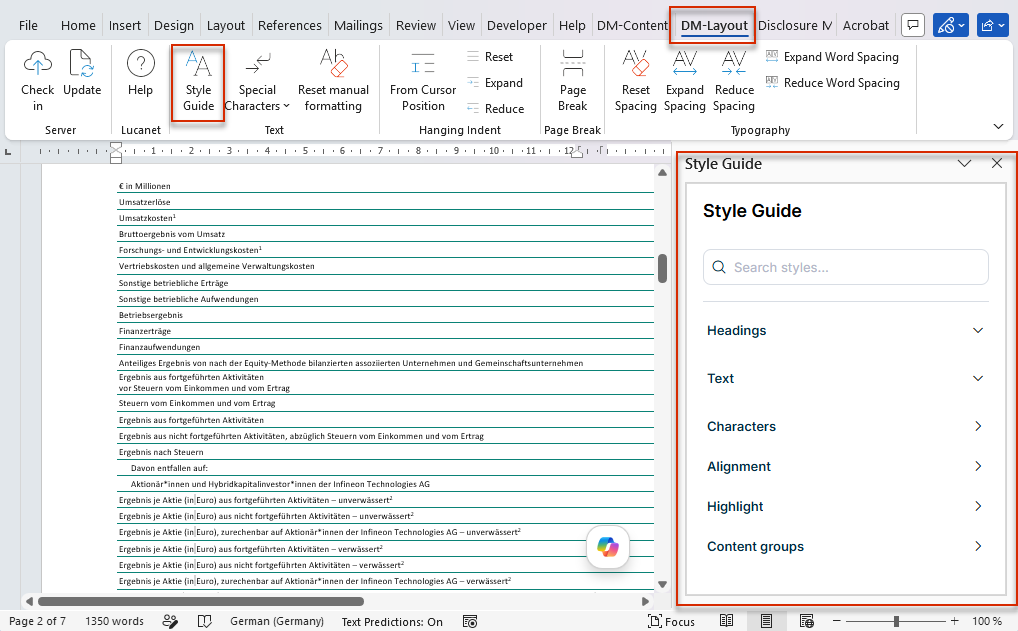
The Style Guide Manager configuration has the following effect: In Word documents, the Style Guide button is available in the DM-Layout Disclosure Management ribbon. Use it to show a pane in MS Word that displays the formats configured in the Style Guide Manager:

Style Guide in MS Word
'DM-Layout' Disclosure Management ribbon

As a user, you therefore do not need to distinguish between permitted and non-permitted styles, because all permitted formats are displayed and provided in a structured way in Word.

To open the Style Guide, proceed as follows:

1

Open a document and click Configure document.

2

Open the Style Guide tab. The Style Guide tab is displayed as follows, for example:

The 'Style Guide' tab in the 'Configure document' work area

On the left, the Style Guide Manager shows the groups; on the right, it shows the available styles.

To configure the Style Guide Manager, you generally perform the following steps:

  • You can import a firesys Word template (see the Importing a Style Guide section).
  • You can assign styles to the predefined default groups (Heading and Text) by dragging and dropping them from the list of available formats.
  • You can create your own groups and assign styles to them by dragging and dropping them from the list of available formats.

The following two groups are predefined groups that cannot be deleted or renamed:

GroupPurpose
HeadingsWord styles for headings (for example, Heading 1 to Heading 9, Title, Subtitle).
TextWord styles for body text (for example, Body Text, Normal, Quote).

Click the group name to expand or collapse the section. Next to the group name, the number of currently assigned styles is displayed (for example, "Headings 0").

In addition to the predefined groups, you can create your own groups. To create a group, proceed as follows:

1

In the Style Guide Manager, click + Add Group.

2

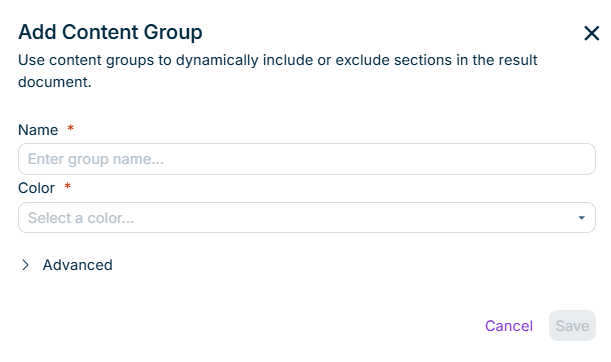
In the Group name field, enter a name for the group. Click Save.

3

The new group then appears in the Style Guide Manager.

The following additional functions are available for your own groups:

  • Change name: In the group row, click the edit icon and adjust the name as required in the dialog that follows.
  • Delete group: In the group row, click the delete icon and confirm the security prompt.
  • Change order: Each group is preceded by an icon for dragging the group: . Use it to drag a group to the desired position.

The Available Styles area on the right lists all Word styles imported from the Word template, sorted by group assignment. Above the section, you find:

  • The Import button for importing a Style Guide configuration (see below).
  • The Search styles... field for filtering the styles by name.

By default, the Unassigned section is expanded and contains all styles that are not yet assigned to a group. The number of unassigned styles is shown in the heading (for example, Unassigned · 91 styles).

To assign a style to a group, proceed as follows:

1

Find the desired style in the Available Styles area (using the search field if necessary).

2

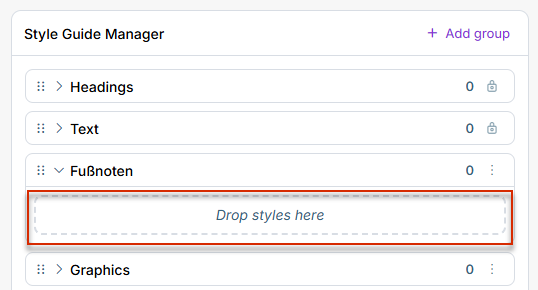
On the left in the Style Guide Manager, expand the desired target group so that the Drop Styles here field is visible:

Expanded target group showing the Drop Styles here field
The Drop Styles here field of the expanded target group.

3

Click and drag the style into the Drop Styles here field of the desired group on the left.

4

Drop the style. The status of the style changes from Unassigned to the name of the target group.

5

In the Available Styles area, all assigned styles are displayed in the Assigned section.

Using the Import button above the Available Styles list, you can import an existing Style Guide configuration from firesys. Proceed as follows:

1

Click Import. The Style Guide Import dialog is displayed:

2

Drag and drop the import file into the upload area, or click Browse to select the file.

3

Click Import.