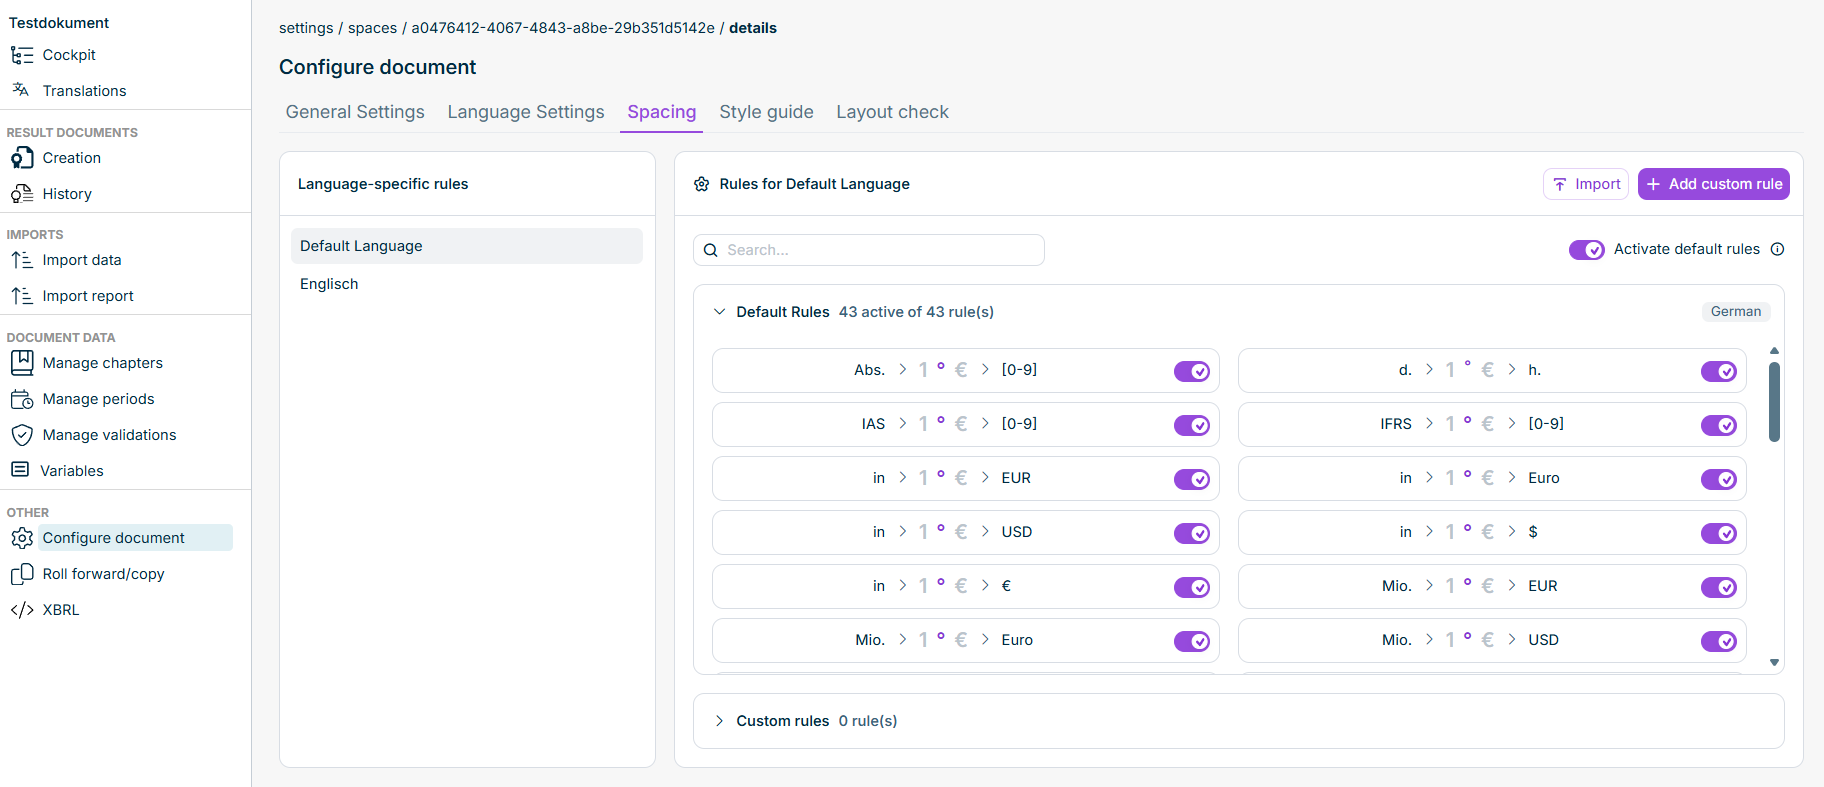
The Spaces tab in the Configure document workspace provides a central overview of the typography rules. Typography rules define how certain expressions are treated typographically when a Word file is opened (checked out) – for example, by inserting a non-breaking space between a number and a unit or by suppressing a space between a currency symbol and an amount.

Typography rules are managed per document language and are divided into two areas:

  • Default rules: predefined rules provided by Lucanet e.g. for German and English.
  • Custom rules: company- or project-specific rules that you create yourself.

The Spaces tab and all associated functions require an Advanced license or higher and are available exclusively to Global Admins and Document Admins.

To open the Spaces tab, proceed as follows:

1

Open a document and click Configure document.

2

Open the Spaces tab. It is displayed, for example, as follows:

The 'Spaces' tab in the 'Configure document' workspace
3

In the Language-specific rules list on the left, select the language whose rules you want to manage. The Default Language entry refers to the primary language defined under Language Settings.

4

The rule editor on the right shows the rules for the selected language. The upper area displays the default rules for the selected language, and the lower area displays the custom rules.

The following options are available for activating or deactivating default rules:

  • Activate or deactivate default rules globally: Located in the upper-right area of the rule editor (Activate default rules). Activates or deactivates all default rules of the selected language at once. When the global toggle is off, the entire Default rules area is hidden.
  • Activate or deactivate specific default rules: Each default rule has its own toggle on the right-hand side of the rule row. Use it to deactivate individual rules that do not match your company's internal requirements.

When the global toggle is switched back on after a deactivation, all individual toggles are reset to on. The system then automatically checks whether there are any conflicts with existing custom rules and automatically deactivates conflicting default rules.

For languages without predefined default rules (for example, French), the global toggle is disabled and grayed out. The tooltip reads: Default rules are not available for this language .

To create a custom rule, proceed as follows:

1

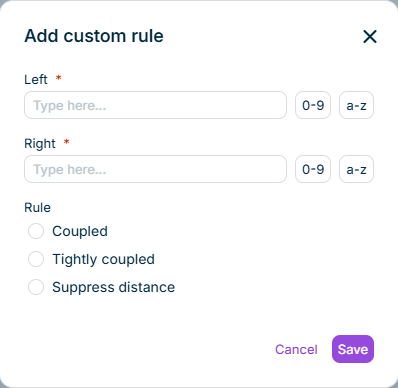
In the Custom rules area, click Add custom rule. The Add custom rule dialog appears:

The 'Add custom rule' dialog
2

Enter the left (Left) and right (Right) term of the expression for which you want to create a rule.

  • Use the 0-9 button to insert a [0-9] placeholder for any digit.
  • Use the a-z button to insert the [a-z] placeholder for any letter.
  • Purely numeric entries (for example, 5 or 100) are automatically converted to [0-9] when you leave the field.
3

Under Rule, select a rule type. The following rule types are available:

For Coupled and Tightly coupled rules, the corresponding character is inserted even if there is no space between the two terms.

4

Click Save.

If, when you save a custom rule, a default rule with an identical Left/Right combination already exists, a dialog appears in which you can decide how to proceed.

To edit or delete custom rules, proceed as follows:

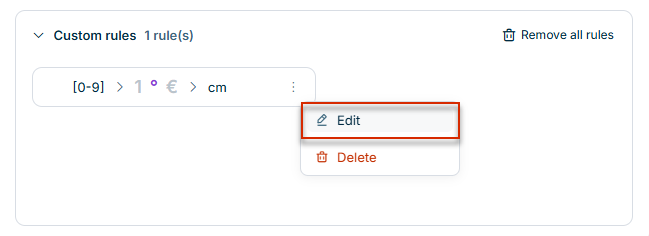
  • Edit a rule: In the three-dot menu of a custom rule, click Edit:
Editing custom rules

The Edit rule dialog opens with the existing values. Edit the rule configuration as required.

  • Delete a specific rule: In the three-dot menu of a custom rule, click Delete. Confirm the deletion in the dialog that appears. If this custom rule previously deactivated a default rule with an identical Left/Right combination, the following note appears: One or more default rules are currently deactivated and may now be reactivated manually.
  • Delete all rules: To remove all custom rules of the selected language at once, click Remove all rules in the Custom rules area. The button appears as soon as at least one custom rule exists.

    In the confirmation dialog, click Delete to permanently delete all custom rules of the selected language. If there are deactivated default rules with an identical Left/Right combination, the dialog includes a note that these default rules can be reactivated manually after the deletion.

Active typography rules are applied automatically when a Word file is checked out. For more information about the behavior during check-out and about removing the markings in Word, see Creating and Editing Word Files and Ribbons for Disclosure Management.