Administrators Collectors Approvers Submitted Approved Cancelled.

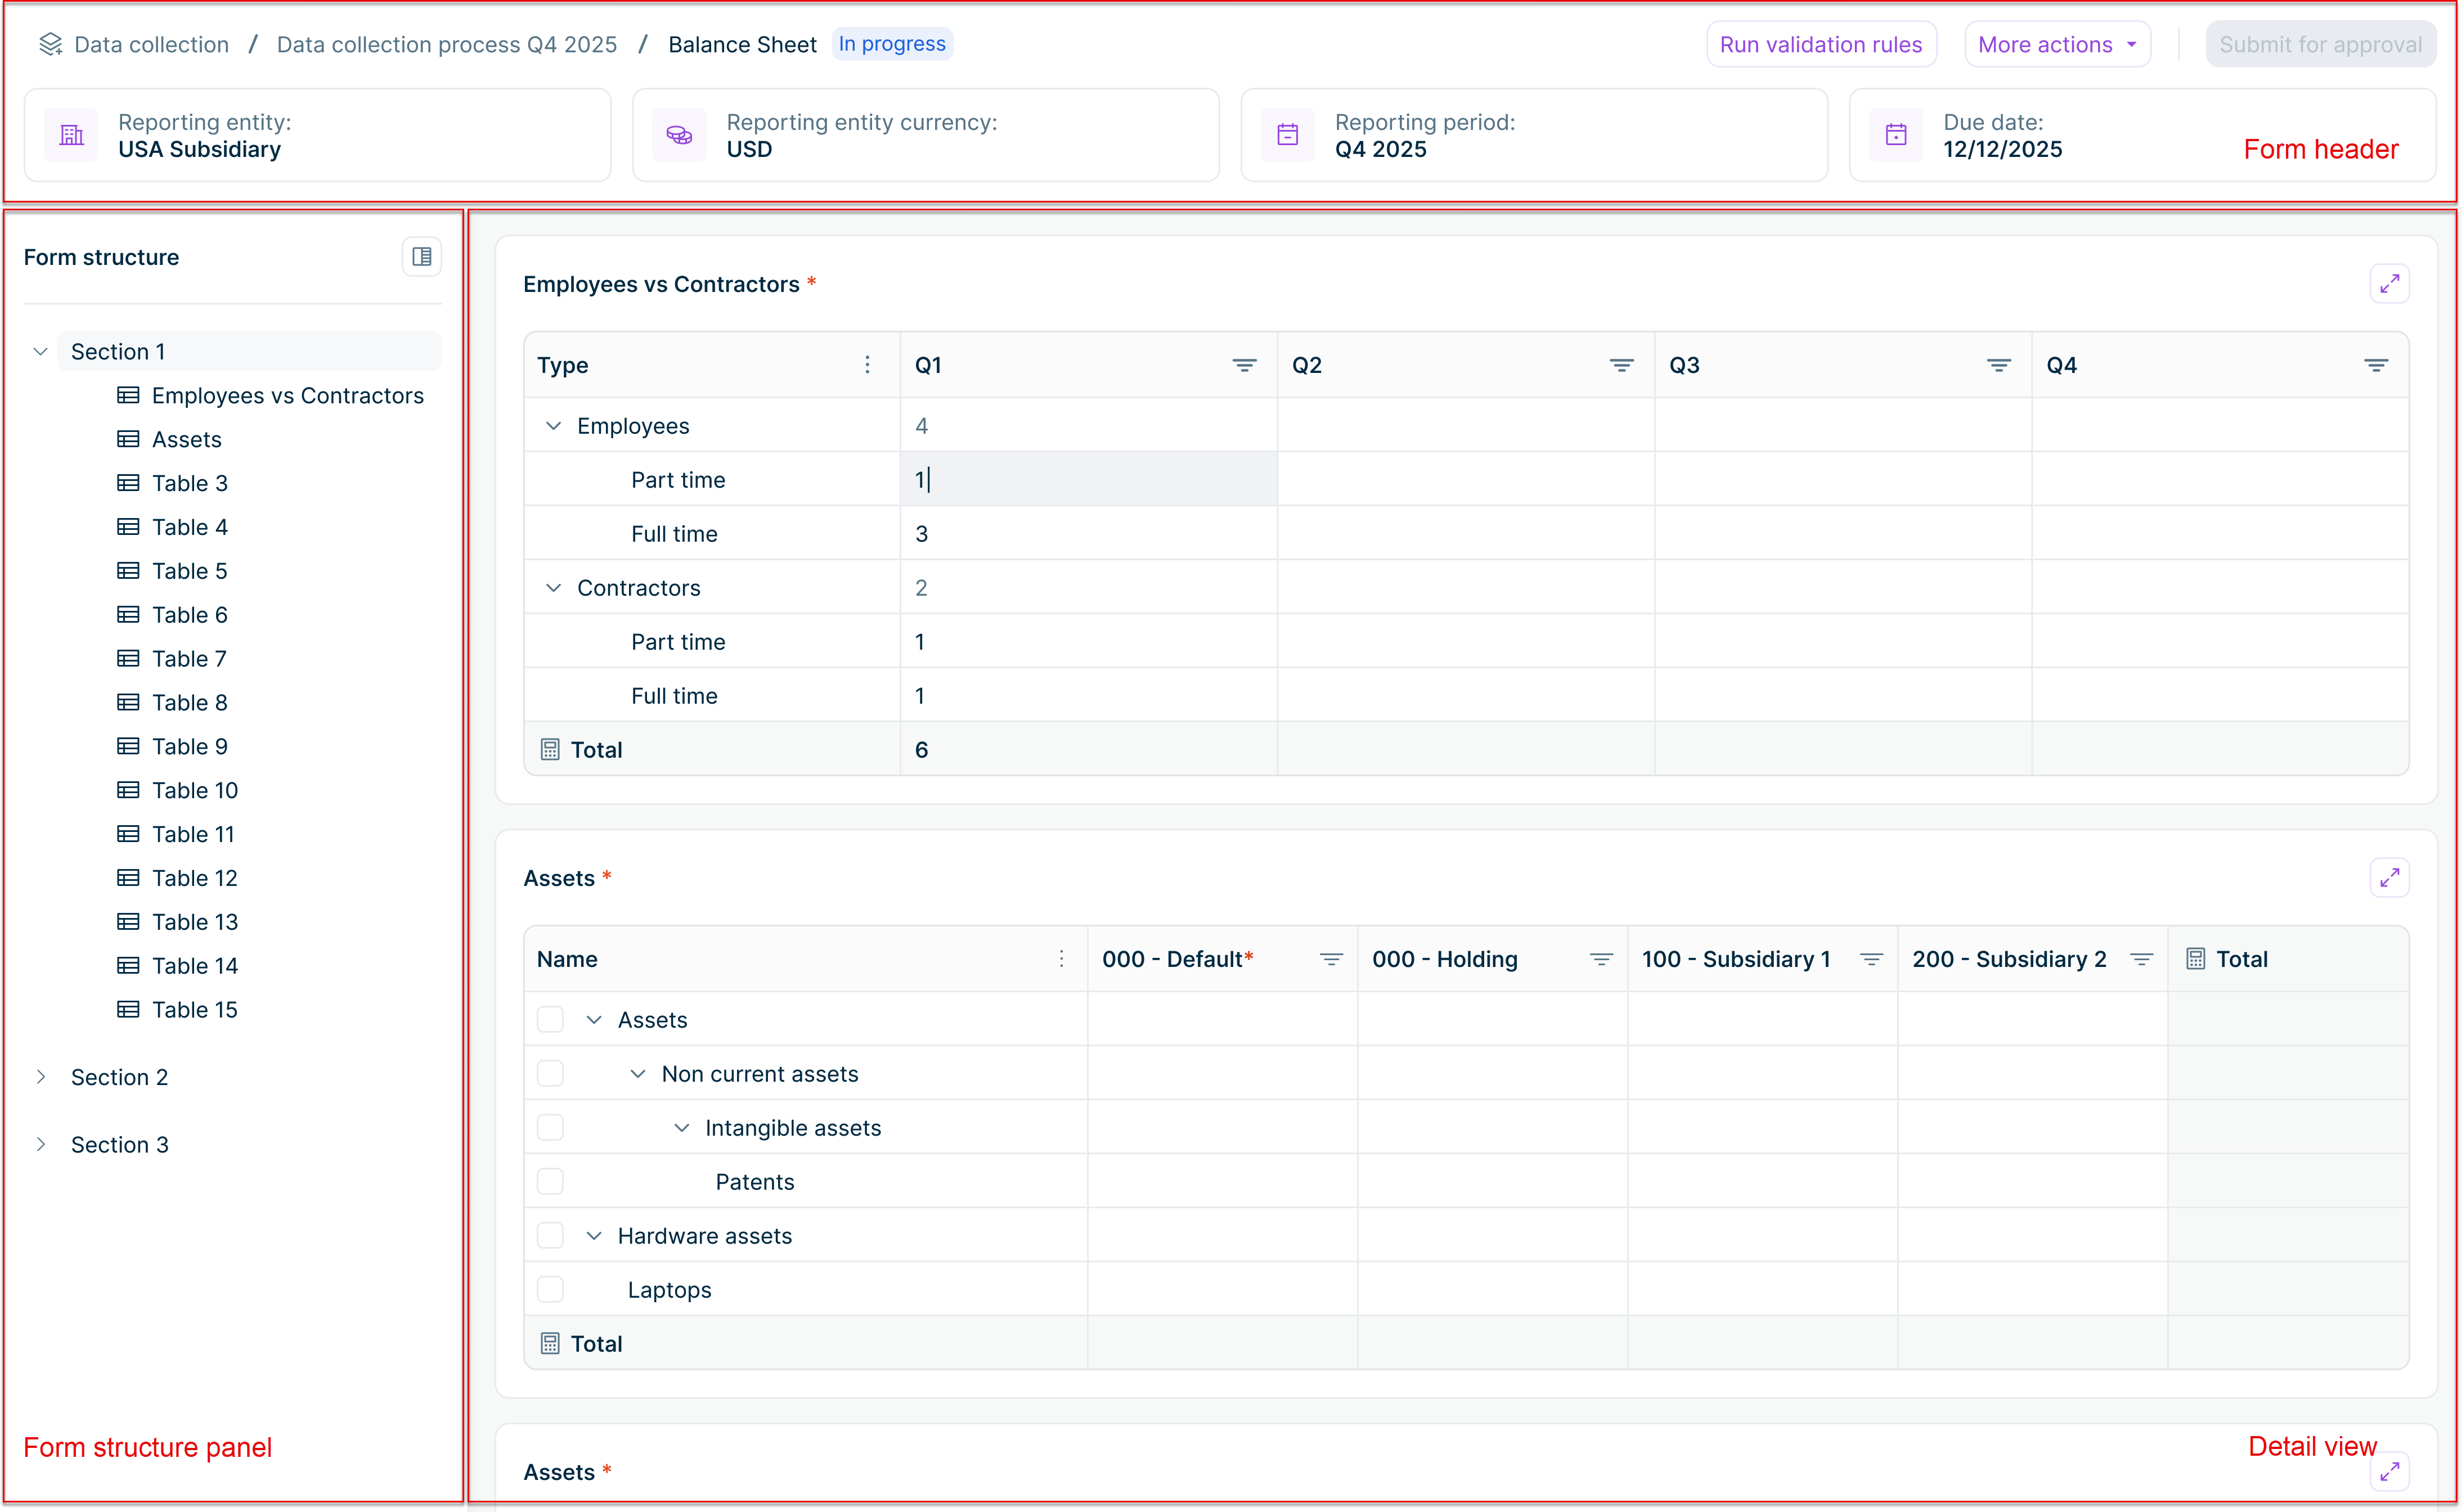
Click on a cell to enter or edit values Data is saved automatically as you type For tables with hierarchical rows, only lowest-level rows are editable. Superordinate rows aggregate values automatically. If drill-down is configured for a row or column, enter data at the drill-down level
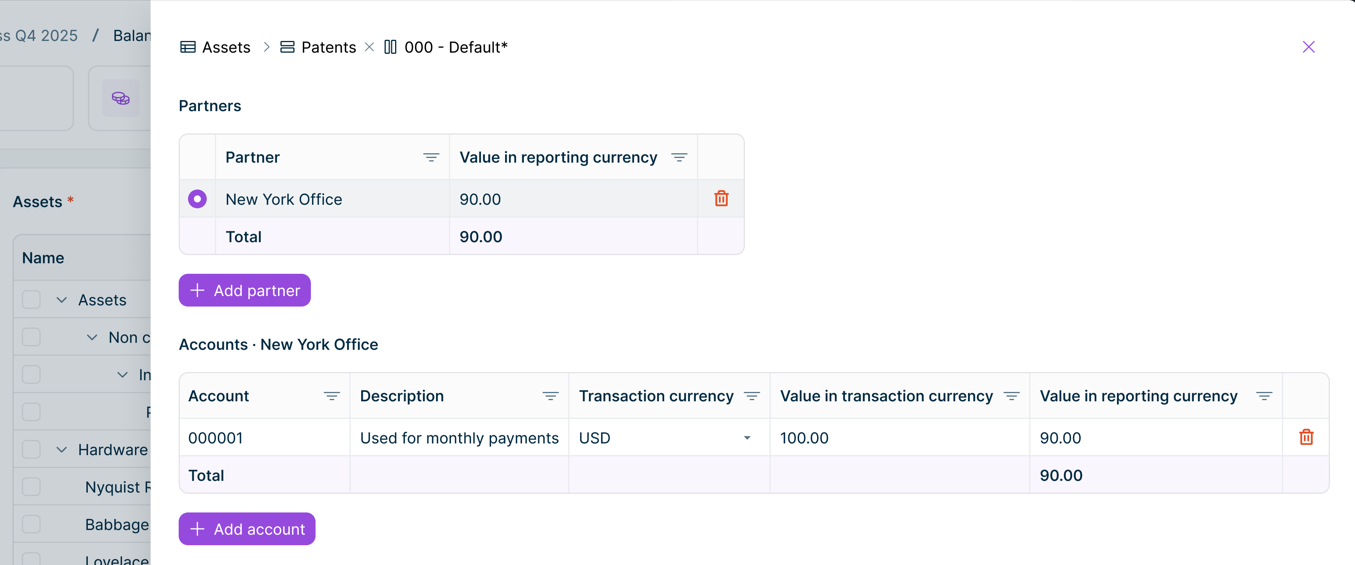
Click + Add row Right-click an existing row and select Duplicate Right-click a row and select Delete Click each cell to enter a value. Data is saved automatically when you move out of the cell.
![]()
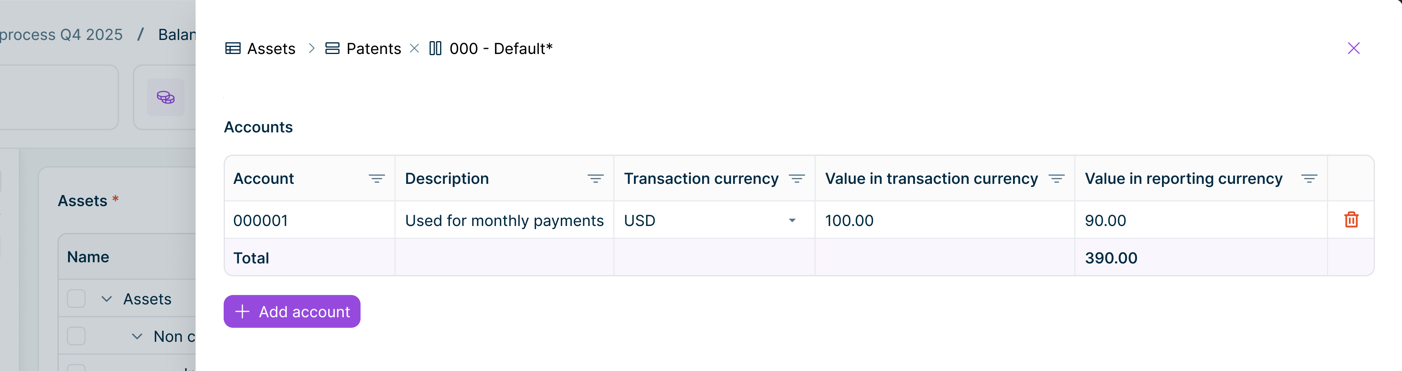
Level 1 (top) Value in reporting currency Level 2 (bottom)
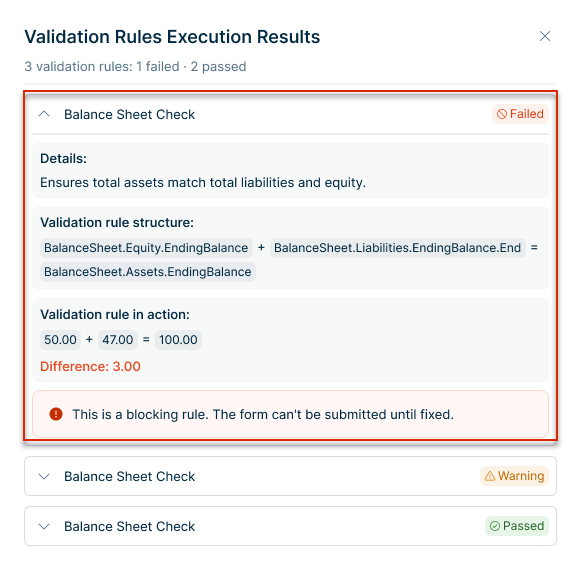
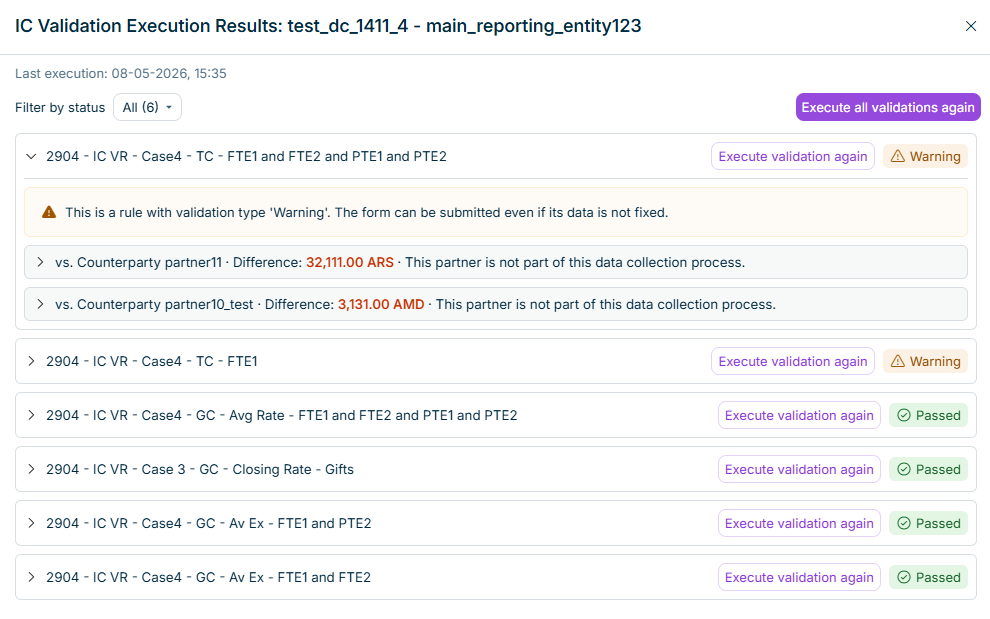
Validation rules Intercompany validation
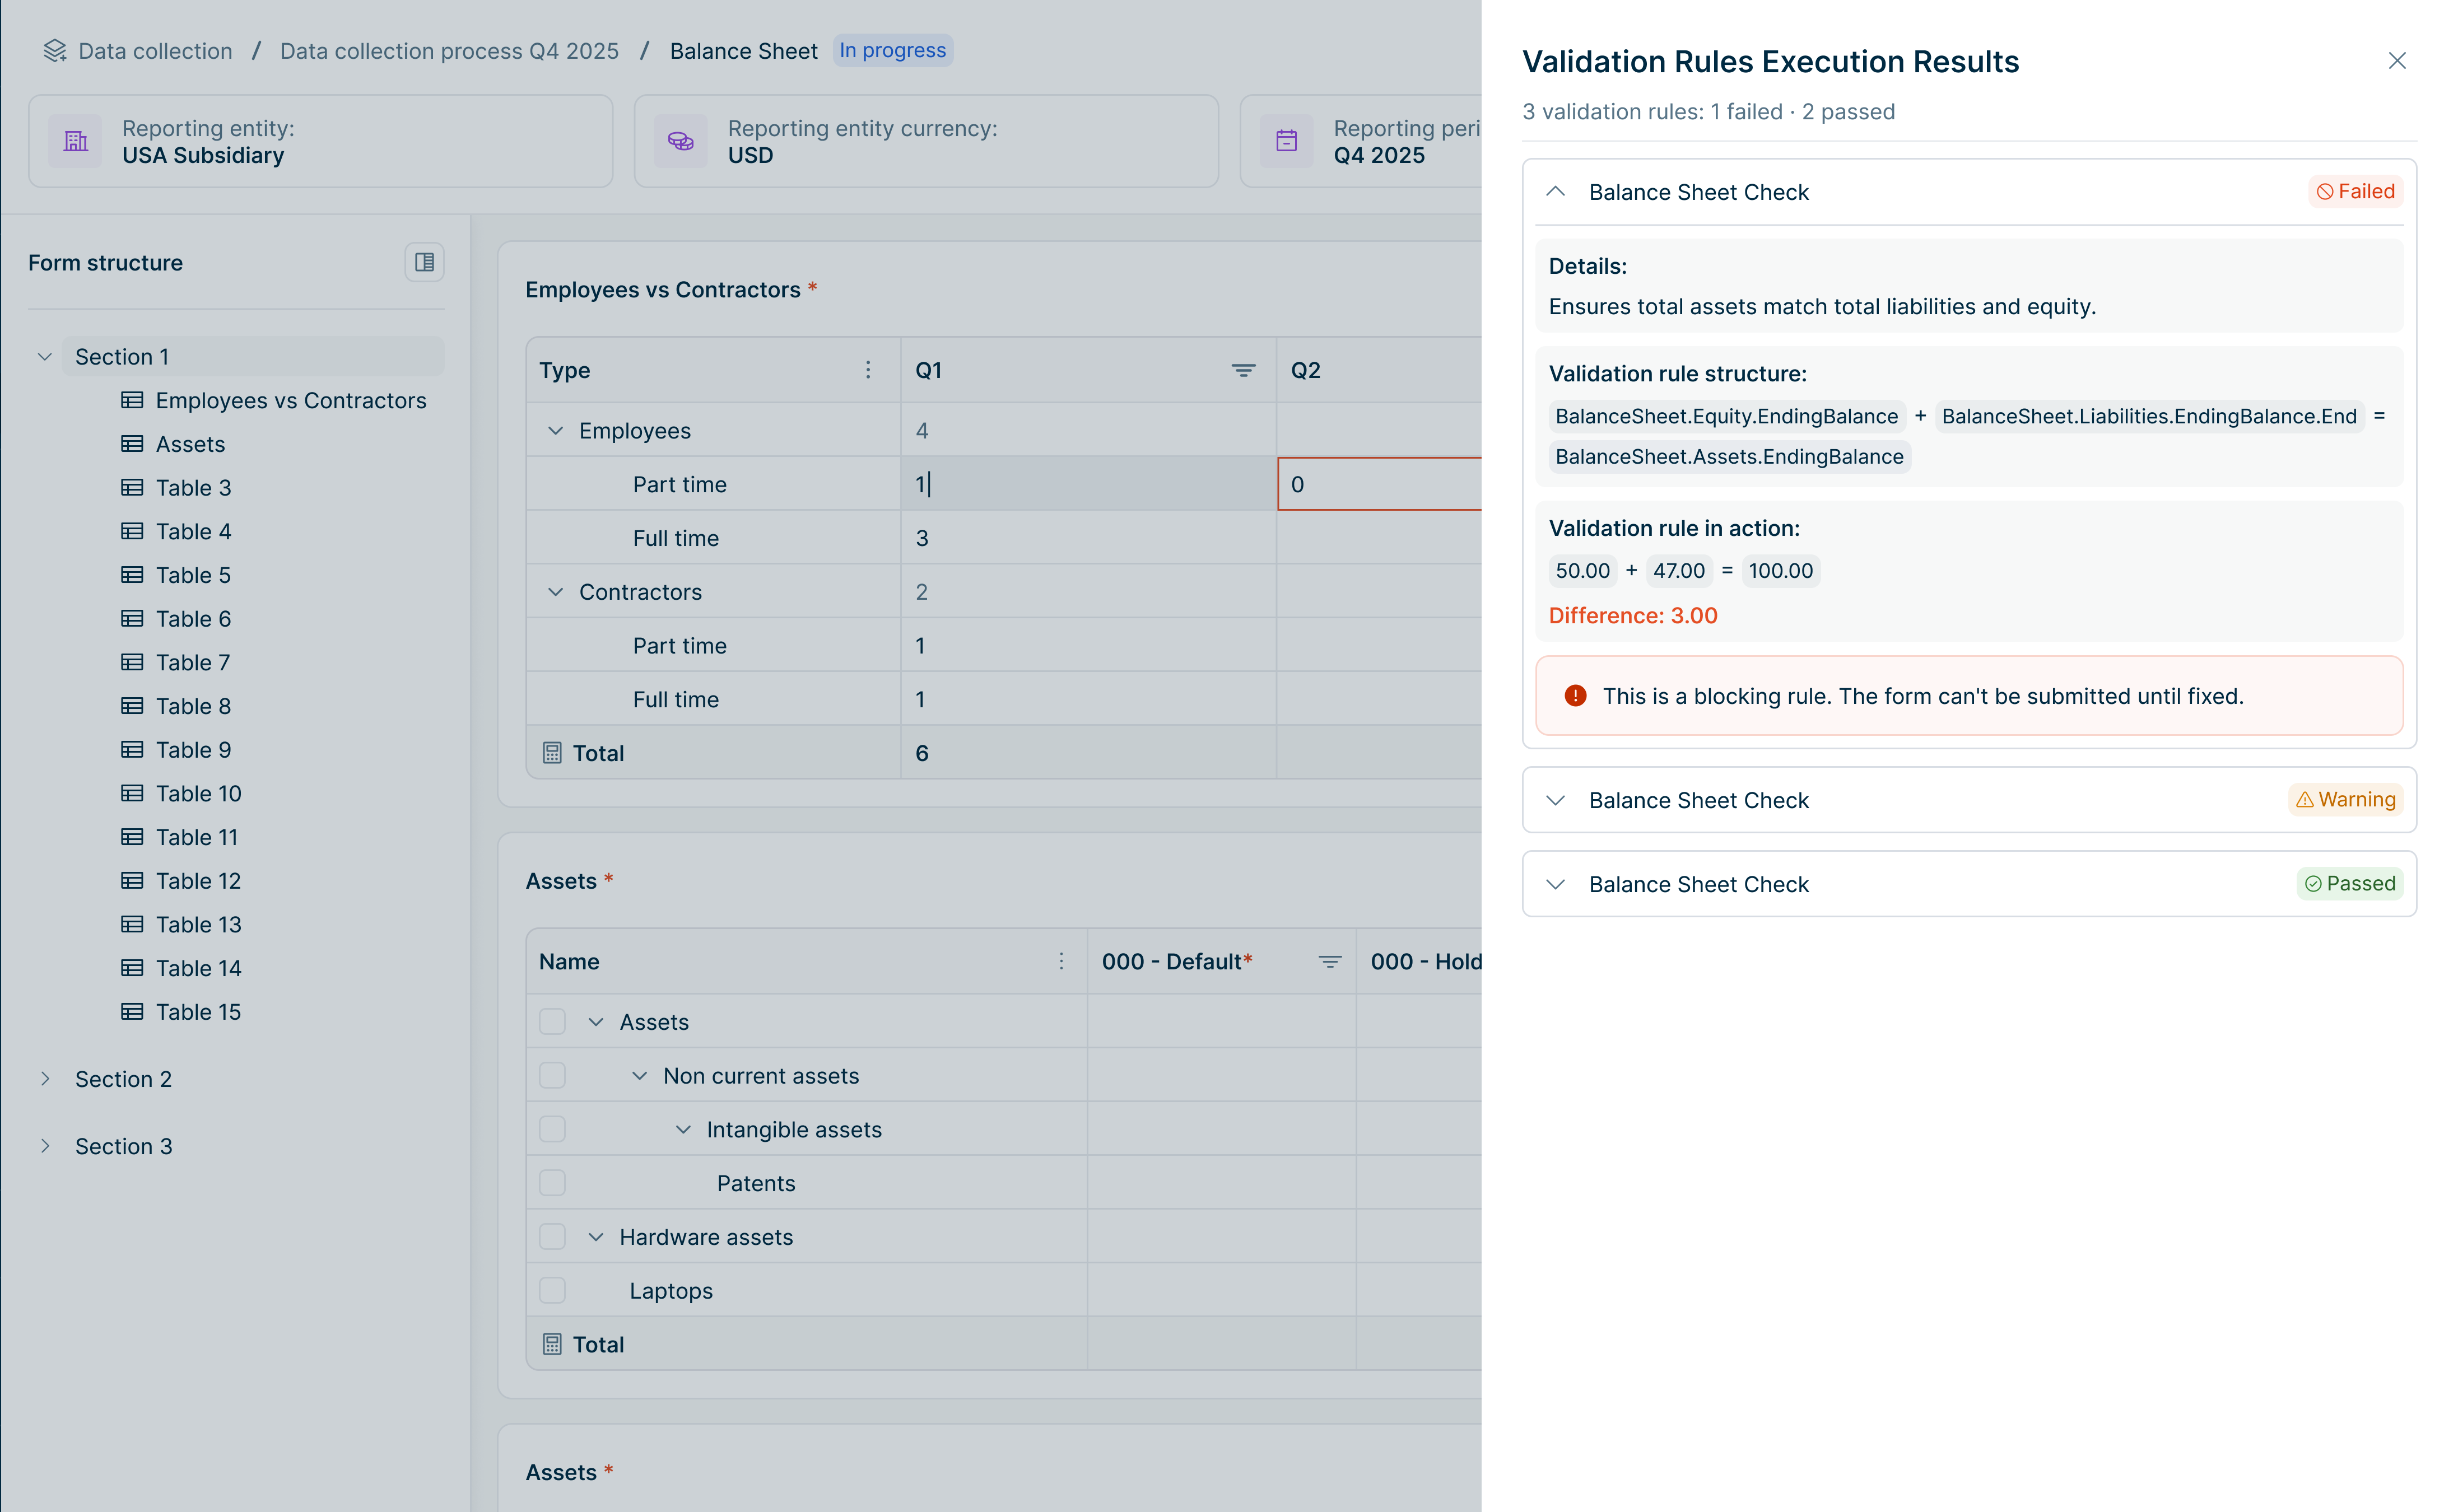
Blocking Warning Passed
Details Validation rule structure Validation rule in execution
validation is completed successfully and results are up to date, or the form status changes from In Progress

Passed Warning
Mandatory fields are not filled in Validation rules have not been executed Blocking validation errors exist

Last updated on May 28, 2026