When you have defined the data source(s) and the connections to these data sources as the basis for the import in the Import Management area, you can configure and execute the data import. Both are carried out in the Import data workspace at individual document level.

The Import data workspace is only activated for users who have been assigned the Document Administrator or Document Data Importer role at document level in Disclosure Management role management. (For additional information about user roles in Disclosure Management, see Creating and Editing User Roles for Disclosure Management.)

To configure and execute a data import:

1

In the overview of a document, click Import data to open the workspace.

2

Select the data source to be used for the import (see section Selecting a Data Source).

3

Choose the parameters for the data import at document level (see section Parameterizing Data).

4

If necessary, display a preview of the import and check the data (see section Displaying a Preview and Checking Data).

5

Start the data import (see section Starting the Data Import).

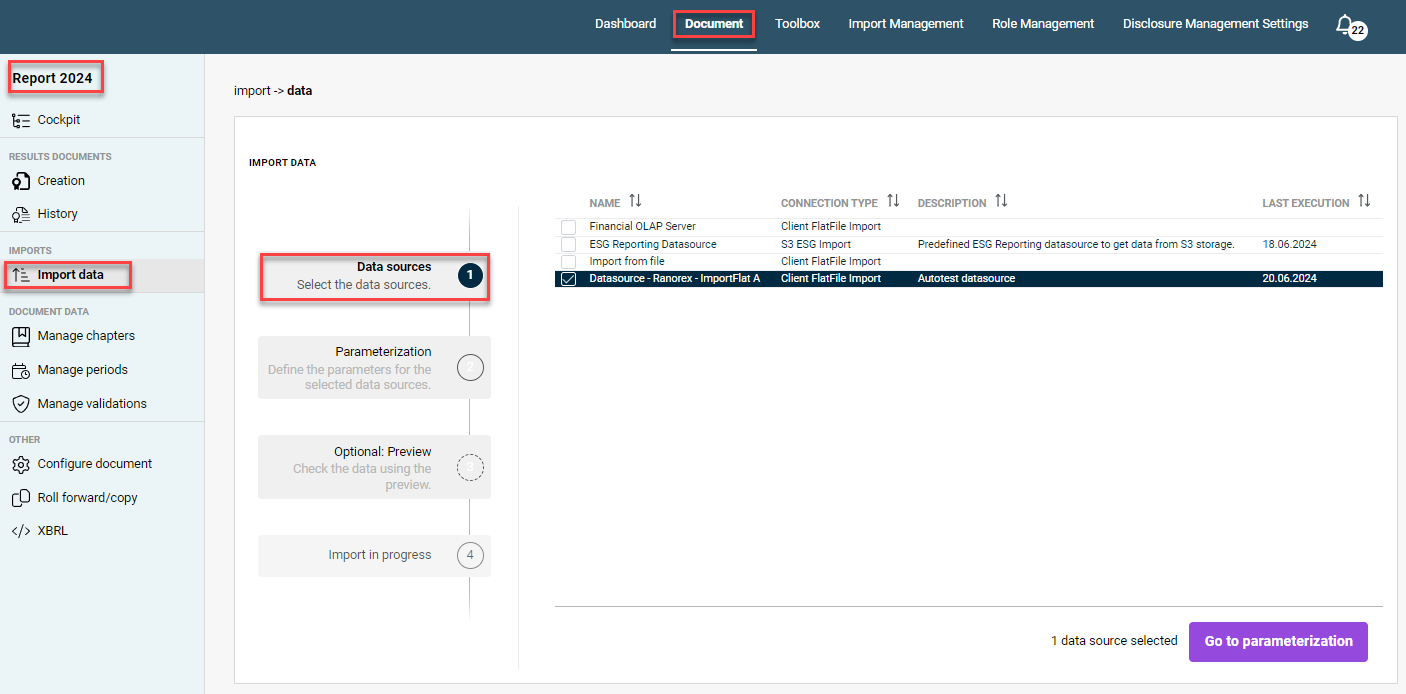
When you open the Import data workspace at document level, the Data sources area is displayed by default:

Displays the Data sources area in the Data import workspace for the Report 2024 document. Four created data sources are available in this area.
‘Data sources' area

This area contains all the data sources you defined in Import Management (see section Defining a Data Source). You can sort the data sources by name, connection type, description or last execution date.

Select the data source(s) to be imported by activating the corresponding check box(es) and click Go to parameterization.

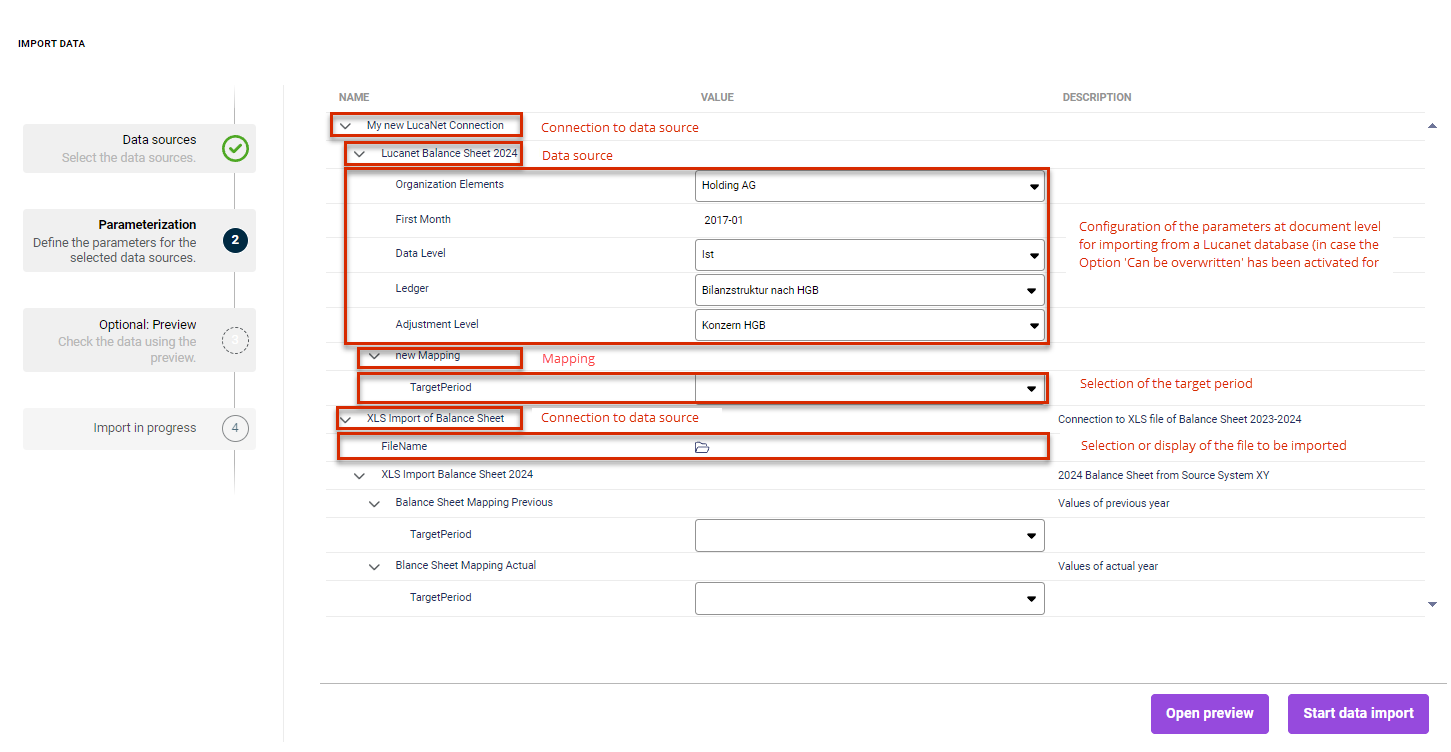
In the Parameterization area, select the parameters for importing the selected data source(s) at document level. The area is displayed as follows, for example:

Displays the Parameterization area in the Data import workspace. The connection, the data source, the parameters for an import from a LucaNet database, a mapping and the field for selecting the target period are highlighted in red as examples
‘Parameterization' area

The area contains the following elements:

Displays the connection of the selected data source and serves as the top root folder for parameterizing the data source. The element can be expanded and collapsed using the arrow icon.

A separate root folder for parameterization is displayed for each data source selected in the Data sources area.

Displays the selected data source. The element can be expanded and collapsed using the arrow icon so that further parameters can be assigned for this data source, if necessary.

Displays the mapping that has been defined within a data source. The element can be expanded and collapsed using the arrow icon.

For each mapping defined within a data source, a separate folder is displayed that can be expanded and collapsed.

For additional information on defining mappings see section Defining a Data Source.

When you have selected all parameters for all displayed data sources, you have the following options:

  • You can use the Open preview button to display a preview of the imported data in order to check the data again before the actual import. For additional information on this, see chapter Displaying a Preview and Checking Data.
  • You can use the Start data import button button to import the data immediately without a preview. For additional information on this, see section Starting the Data Import.
  • You can navigate back to the Data sources area to make any necessary adjustments to the selection of data sources.
When you have configured all parameters for all selected data sources, you can use the Open preview button to display a preview of the imported data in order to check the data again before the actual import.

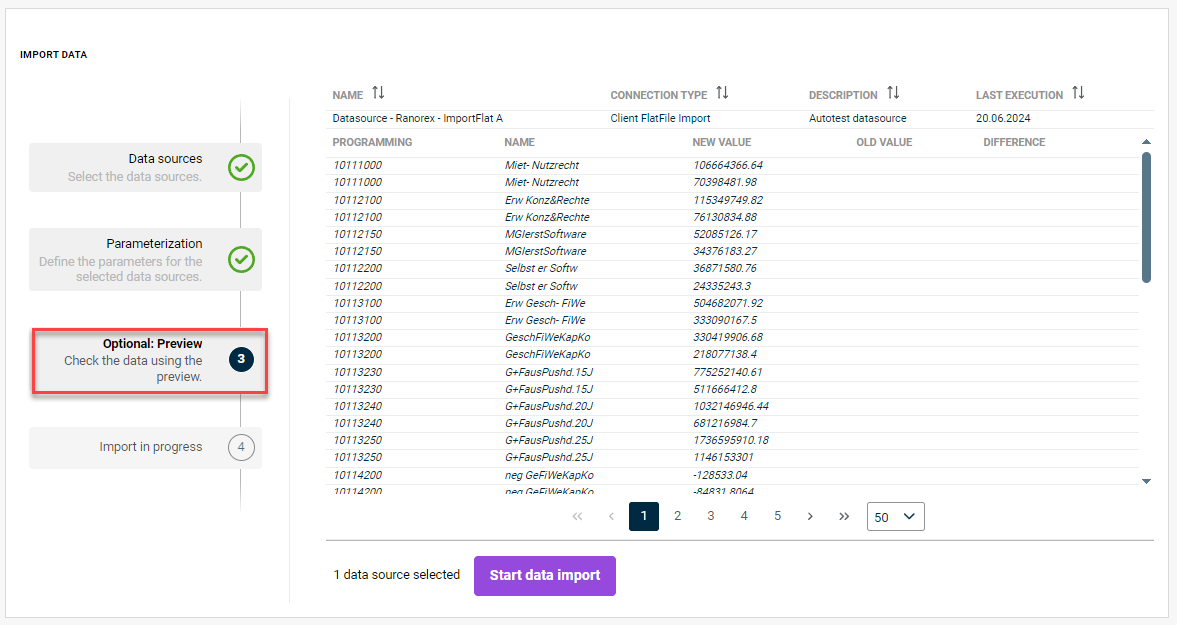
The preview is displayed as follows, for example:

Displays the Preview area in the Data import workspace.
‘Preview' area

The following elements are displayed in the preview in the top section:

ElementDescription
NameName of the data source(s) to be imported

Connection type of the data source:

  • Client FlatFile Import: Client-side import of an Excel or CSV file
  • Server FlatFile Import: Server-side import of an Excel or CSV file
  • Lucanet Rest API Import: Import from a Lucanet database
  • S3 ESG Import: Import from Lucanet ESG Reporting

Description

Description stored in the definition of the connection to the data source

Last execution

Date of the last execution of an import of this data source

The following elements are displayed in the preview in the table:

ElementDescription
ProgrammingContent of the column that was defined as a programming column in the imported data source
NameContent of the column that was defined as a name column in the imported data source
New valueNew value after the current import
Old valueOld value before the import
DifferenceDifference between new and old value

When you have checked the import in the preview, you have the following options:

  • You can import the data using the Start data import button. For additional information on this, see section Starting the Data Import.
  • You can make changes to the configuration of the import and reopen the preview. Changes are possible in the following areas:
    • In the previous steps Data sources or Parameterization.
    • In the Import Management in the connection to the data source or the data source itself.

To start a data import, click Start data import either in the Parameterization area or in the Preview area.

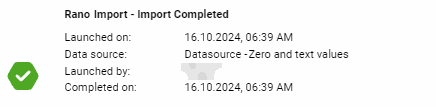
The task of executing the data import is then transferred to the job monitor and you can display the status of the task by clicking on the bell icon at the top right-hand corner. Successful execution of an import is displayed as follows, for example:

Displays the notification that is displayed in the Job Monitor as soon as the import has been successfully completed - recognizable by a green tick and the message Import completed
Notification of successful import