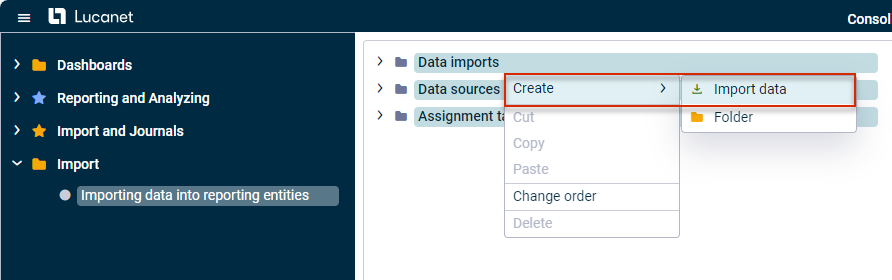
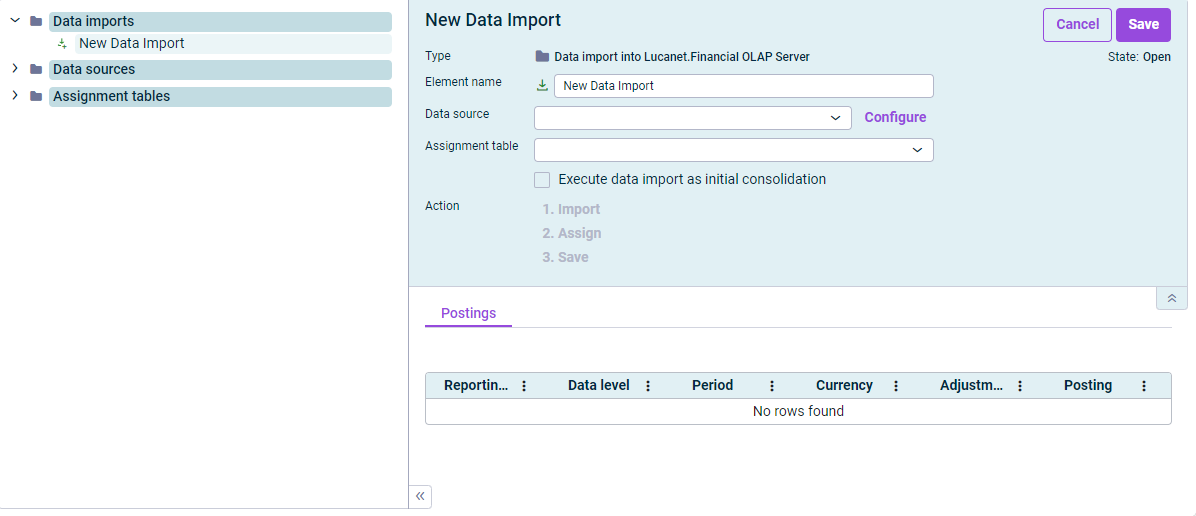
Once the script, the data source, and the assignment table to be used for the import have been created, you can create and execute the actual import and assignment of xP&A data in Consolidation & Financial Planning (CFP).
Note for customers who still use Lucanet.Financial Client
You can either perform this step in the Lucanet CFO Solution Platform or in Lucanet.Financial Client. The data import will be visible and editable in both systems, no matter where you created it.
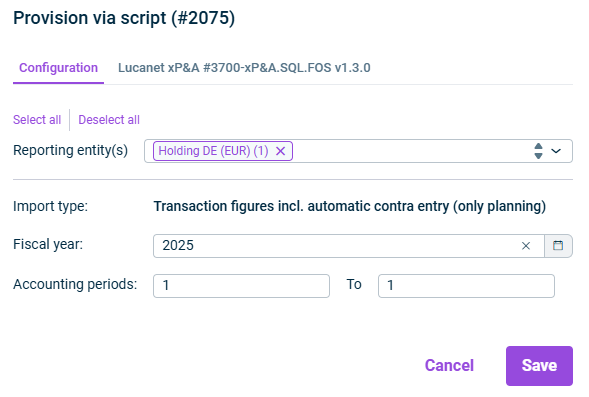
Click 1. Import. The Configuration dialog is displayed:
Dialog for the configuration of the import parameters
2
Choose the following to be used for the import:
Import type
Fiscal year
Accounting period
3
If necessary, you can open the tab with the script name to adjust the configuration of the data source before you execute the import.
Lucanet recommends to make these settings in the data source directly to avoid configuring the settings every time you execute a data import.
4
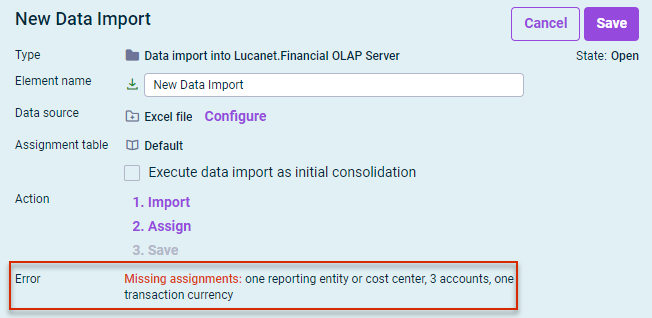
Click Save. If there are any missing assignments, these assignments will be displayed in the detail view of the import:
Detail view with the display of missing assignments
5
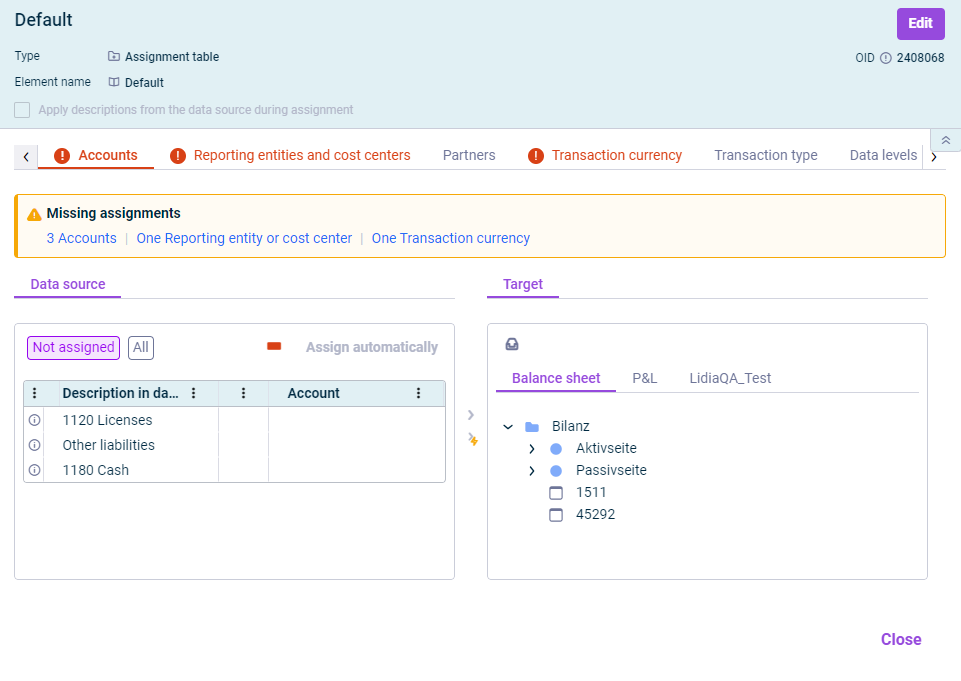
Click 2. Assign. The assignments are displayed, for example as follows:
Assignment table with missing assignments
6
Check the assignments and, if necessary, edit any missing assignments. For a detailed instruction on how to assign data, see Assigning Data).
7
Save the data import by clicking 3. Save.
Every newly-created data import can only be saved when the import has been successfully performed and all elements have been assigned so that debit = credit is guaranteed in the general ledger (assets side = equity and liabilities side).
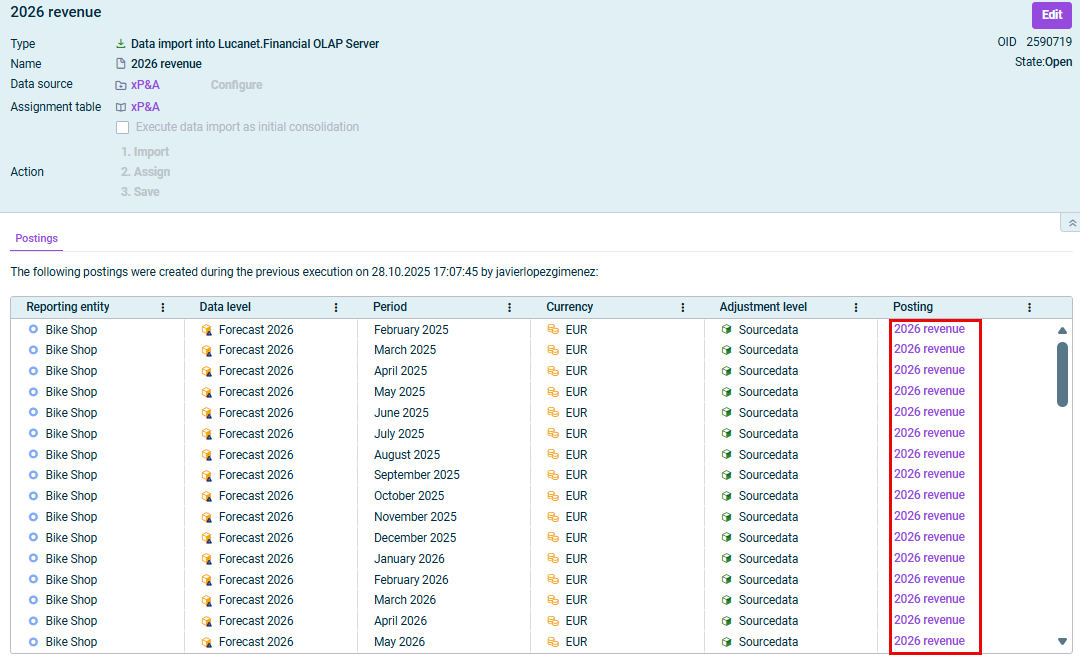
As soon as a data import has been successfully saved, the data of the created postings are displayed on the Postings tab. You can open the details of each posting by clicking the corresponding link in the Posting column.
Furthermore, the data source and assignment table used for this import can be accessed via a link in the general properties of the data import.
Postings created by the import from xP&A
This content was generated using AI and reviewed by Lucanet subject matter experts before publication.