You can establish a direct connection to Snowflake to pull in data into xP&A.

This article contains a description of the prerequisites and the individual steps of the set-up process.

The fields that are pulled in must be defined during the set-up process using a database query. For a detailed instruction on how to structure such a query, see Defining Database Queries.

Make sure the account you are using has permission to access the tables you wish to query.

Snowflake has the option of implementing a Network Policy in order to restrict access based on IP addresses.

  • If you are not using a Network Policy, then your database is publicly accessible and no further actions are necessary.
  • If you have enabled a Network Policy, you need to enable xP&A to connect to your database by whitelisting the following static IP address:
    • 52.59.129.235
1

Choose one of the following options:

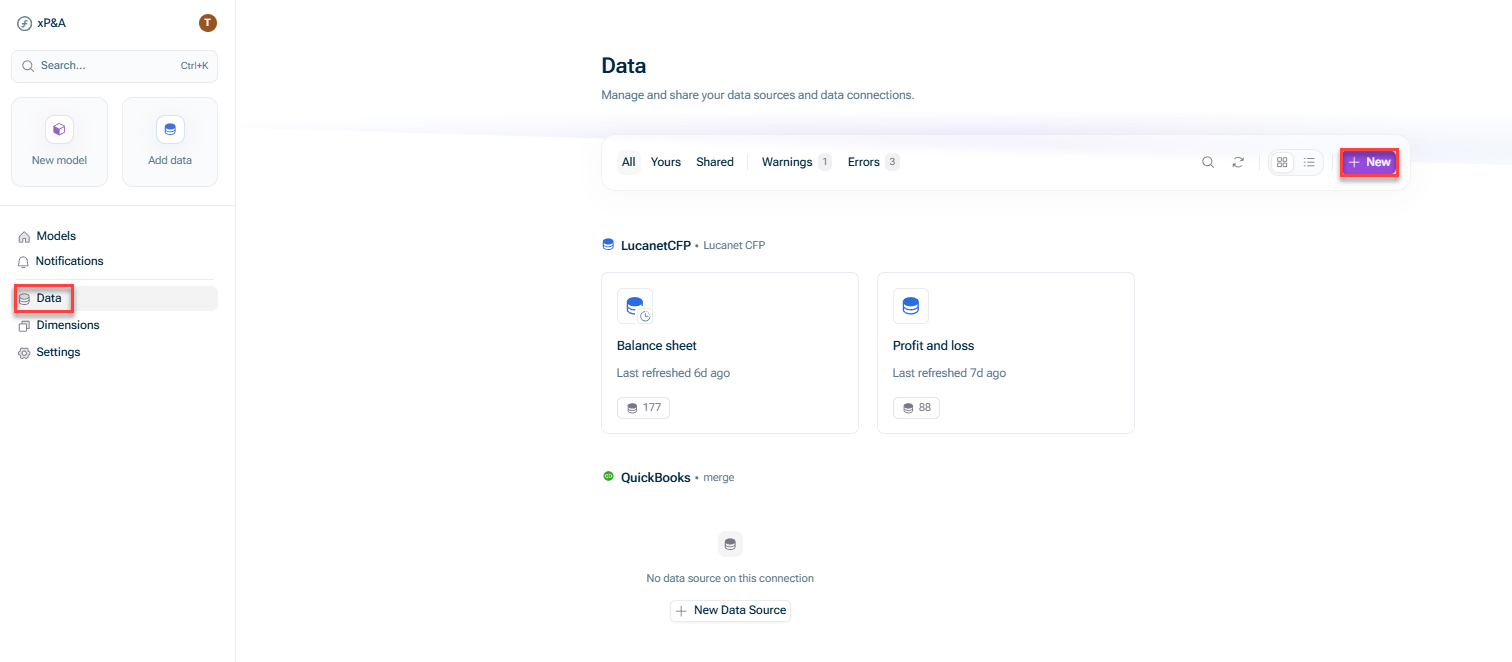
  • Open the Data workspace from the overview on the start page and click + New.
Shows the start page of Lucanet xP&A. Highlighted are the buttons that need to be used to create a new data source connection from the start page.
New data source connection from the Data workspace
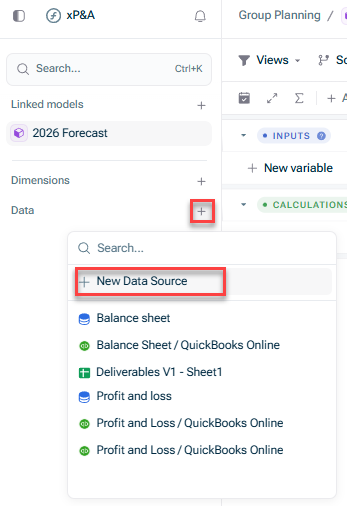
  • Open the model into which you would like to integrate the data, click the + sign next to Data in the overview, and choose New data source:
Shows the view of a model. Highlighted are the buttons that need to be used to create a new data source connection from the model view.
New data source connection from within a model
2

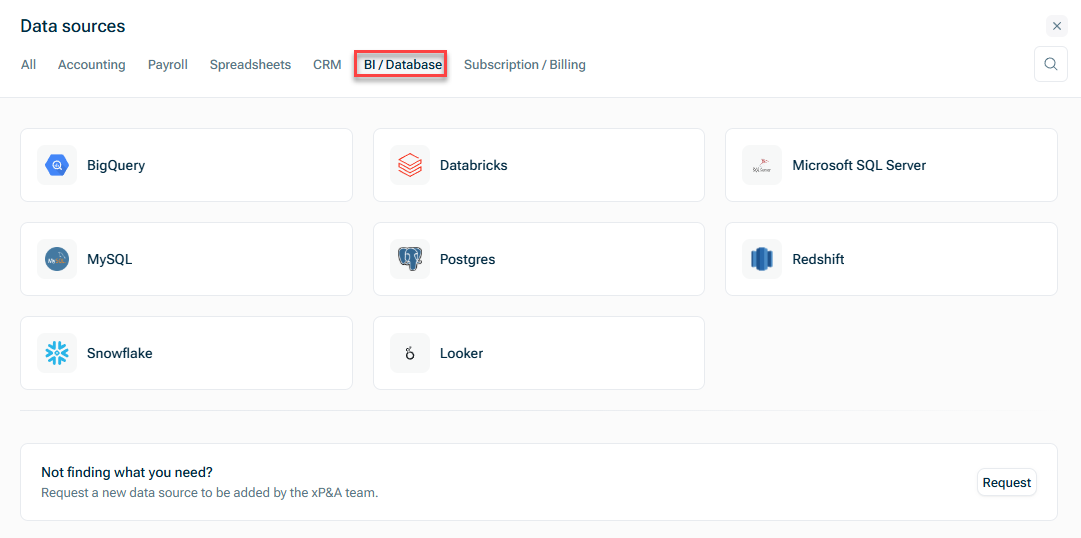
In the Data sources dialog, open the BI/Database tab and choose Snowflake

Shows the Data Sources dialog. Highlighted in red is the 'BI/Database' tab.
'BI/Database' tab
3

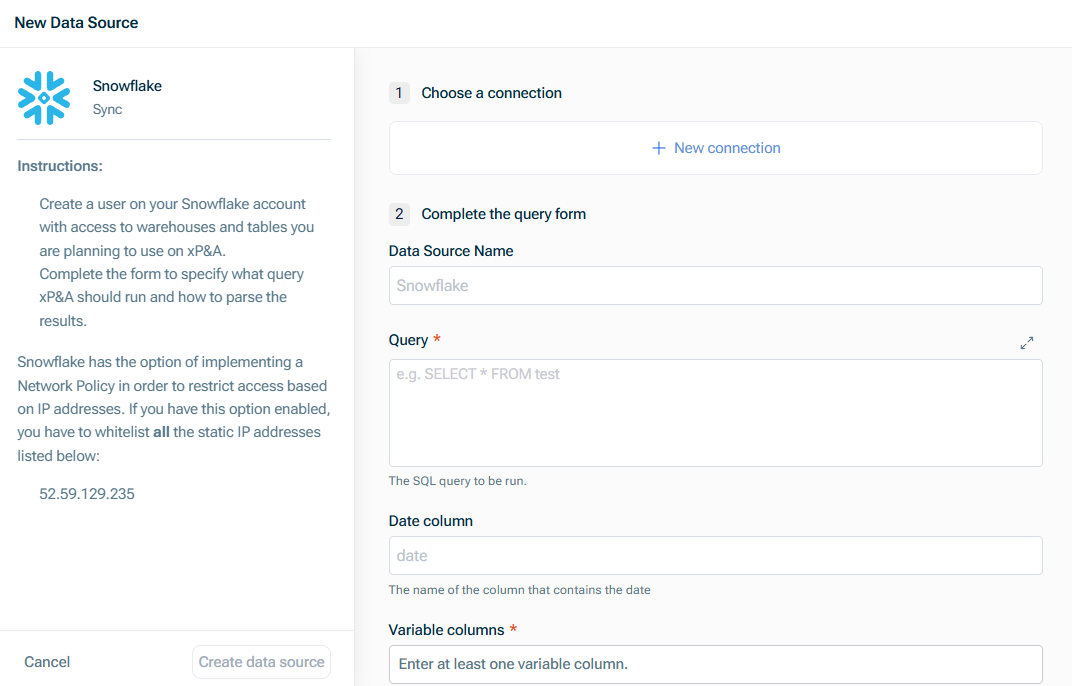
The New Data Source dialog is displayed as follows:

Shows the 'New Data Source' dialog for a Snowflake connection
'New Data Source' dialog for Snowflake
4

Configure the steps as described in the following section.

5

Click Create data source.

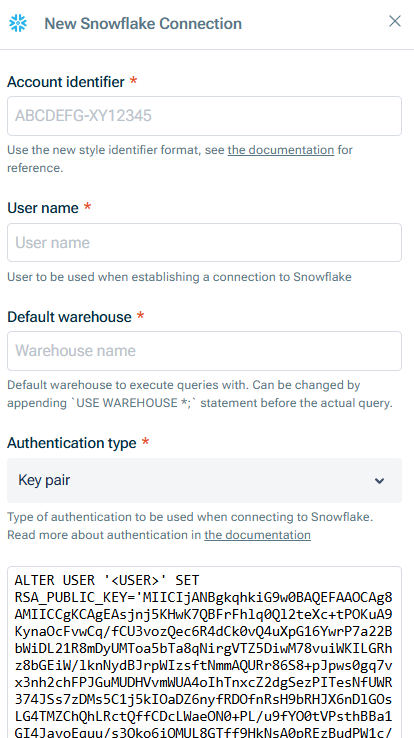
Choose an existing connection, or, if you have not configured a connection yet, click New Connection and enter the following in the New Snowflake connection dialog:

  • Snowflake account identifier in the format _<org_name>-<account_name> .

    _ Please do not use your account name. For more information on Snowflake account IDs, see Account identifiers.

  • Snowflake user name

  • Name of the default warehouse you want to execute the queries with.

    This can be changed by appending the `USE WAREHOUSE *;` statement before the actual query.

  • Authentication type to be used when connecting to Snowflake. Choose one of the following options:

    • Key pair: If you choose this option, copy the displayed key into your clipboard and execute this statement in Snowflake to associate xP&A's public key with the user you have configured.
    • Password: If you choose this option, enter the password of the user to be used when establishing a connection to Snowflake
Setting up a Snowflake connection

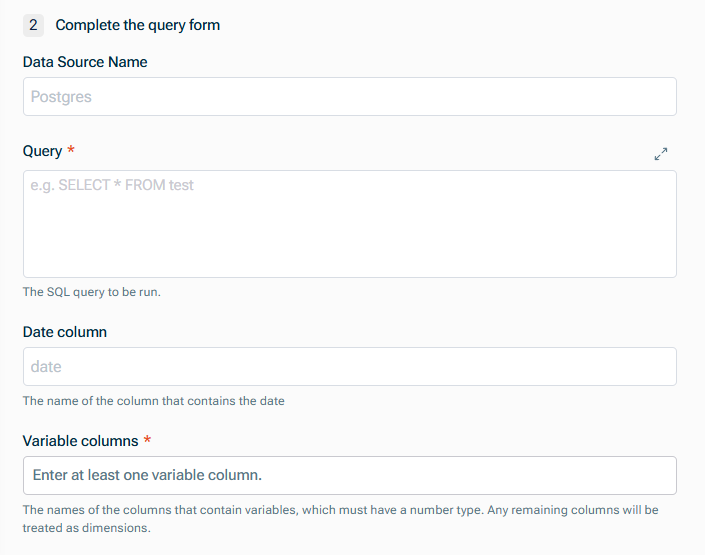
Enter the following:

  • Data Source Name
  • Query to define the fields which are to be pulled in. For more information, see Defining Database Queries.
  • Name of the Date column, which must be one of Snowflake's date formats
  • Names of the columns that contain variables(which must have a numeric data type)

Any remaining columns will be treated as dimensions, and must have a string data type.

An exception is the cohort dimension, which must be a date, with the column header explicitly labelled Cohort.