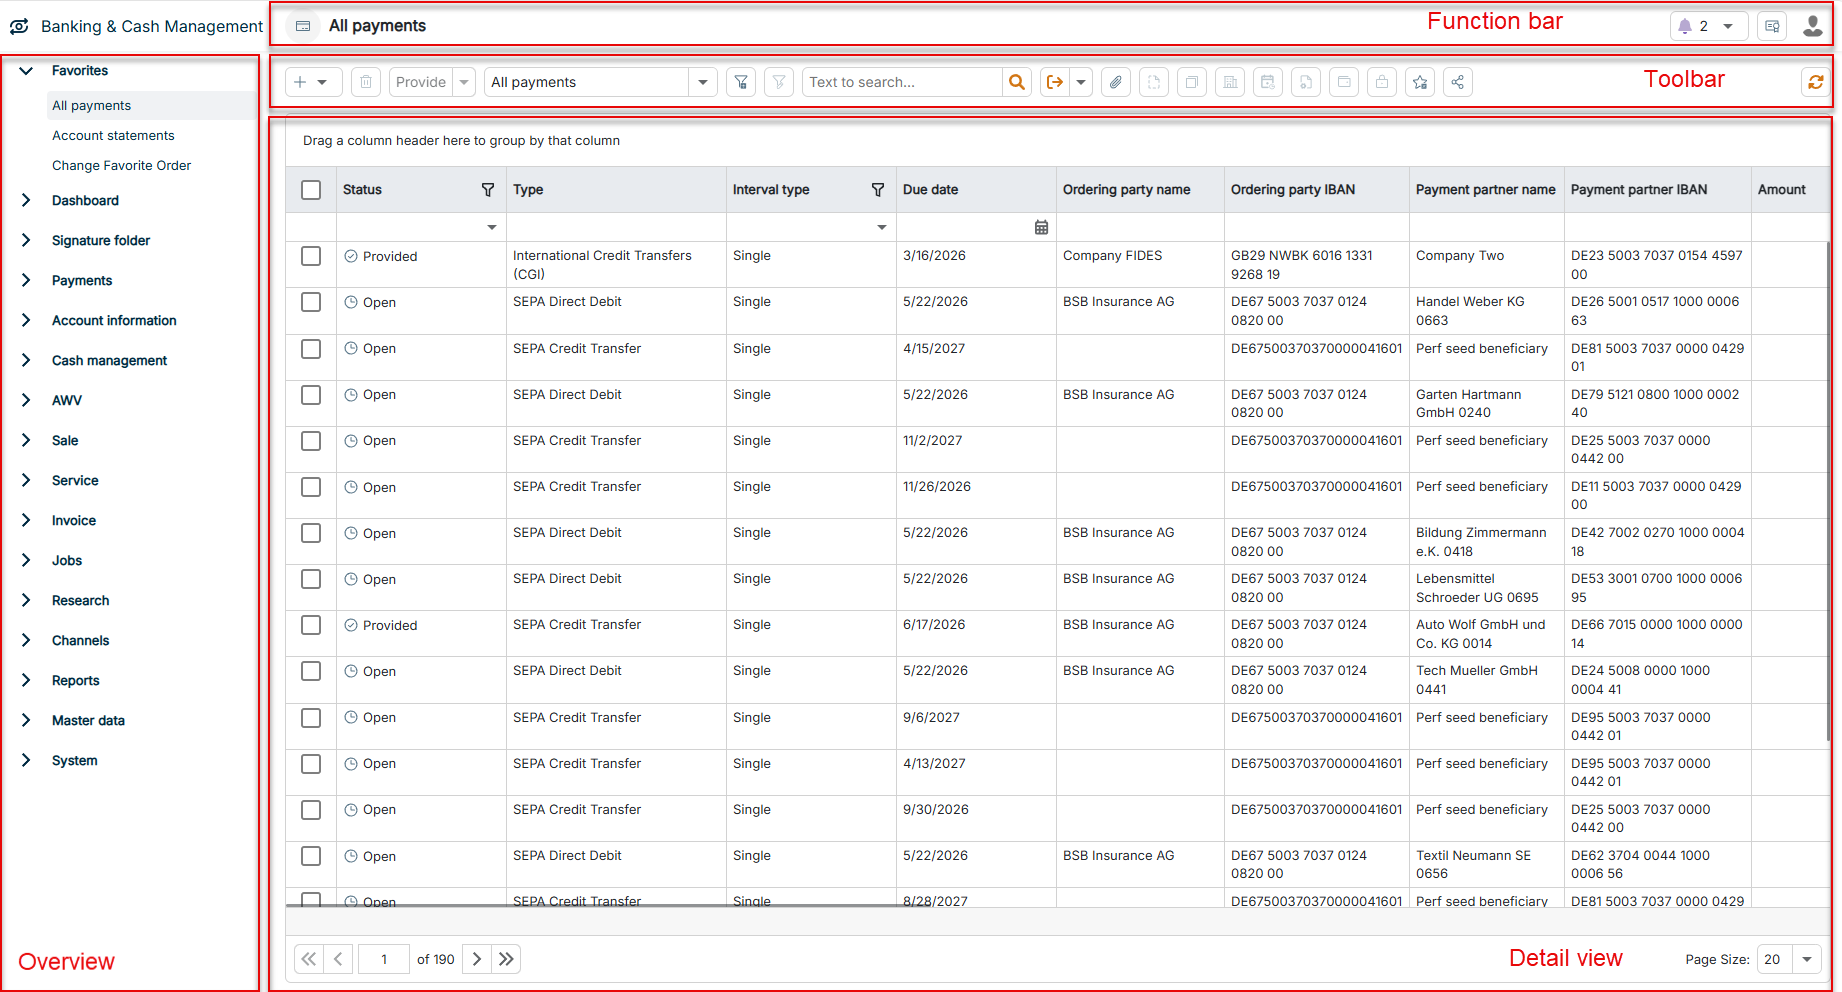
After opening the BCM solution via the main menu, the user interface of the solution is displayed. The user interface is divided into the areas Overview, Function bar, Toolbar, and Detail view.
User interface of Banking & Cash Management
The following elements are available in the user interface:
Element
Description
Function bar
The function bar contains the following options: - License Information: Details about the current license - User name: Information about the current user (see System) - Automatic notifications: Activates a notification bell in the function bar for pending tasks based on custom list filters (see System). If the Enable notification option is activated in a list filter and the filter finds at least one record, BCM displays a notification. By default, BCM uses the filter name as the notification text; you can overwrite the text in the Alternative notification text field.
Next to the notification bell, the number of existing notifications is displayed. When you click a notification, the corresponding list view is displayed with the filter applied; manually set filters are reset.
Toolbar
The functions of the toolbar in the detail view depend on the currently open workspace. Functions that apply across multiple workspaces are described in General Functions in Banking & Cash Management.
Overview
The overview enables you to navigate between the workspaces of the individual functional areas in BCM.
Detail view
The detail view displays records in lists page by page. By default, 20 records are displayed per page; you can adjust the number to 10, 50, 100, or 200 records using the drop-down list at the bottom right below the list.
You can navigate between the pages using the navigation elements at the bottom left below the list.
You can select a single record or multiple records by activating the check boxes in the first column, and all records by activating the check box in the column header.
You can apply the available functions to the selected records. Some functions, for example Clone, are only possible for a single selected record; you can apply other functions, for example Delete, to multiple records at the same time.
This content was generated using AI and reviewed by Lucanet subject matter experts before publication.