With user groups, you can combine Consolidation & Financial Planning users and assign shared permissions to all members at once, instead of configuring each user individually. You can create and manage user groups in Administration | User management | User groups.

For each user group, you can:

  • Define permissions for the data model (Workspaces, Data access, and Other permissions).
  • Transfer the group's permissions to individual users or other user groups, optionally for a limited period.
  • Receive permissions from other user groups (inheritance).
  • Review the change log of the group.

Currently, user groups manage permissions for Consolidation & Financial Planning and are available to platform administrators with the Administrator or Master role for Consolidation & Financial Planning. For users who only have the Observer role for user management, the User groups menu item is not displayed. All settings made for user groups on the Lucanet CFO Solution Platform are automatically synchronized with Lucanet.Financial Client, provided that the platform administrator is also assigned the Master role in Lucanet.Financial Client.

To create a user group:

1

Navigate to Administration | User management | User groups.

2

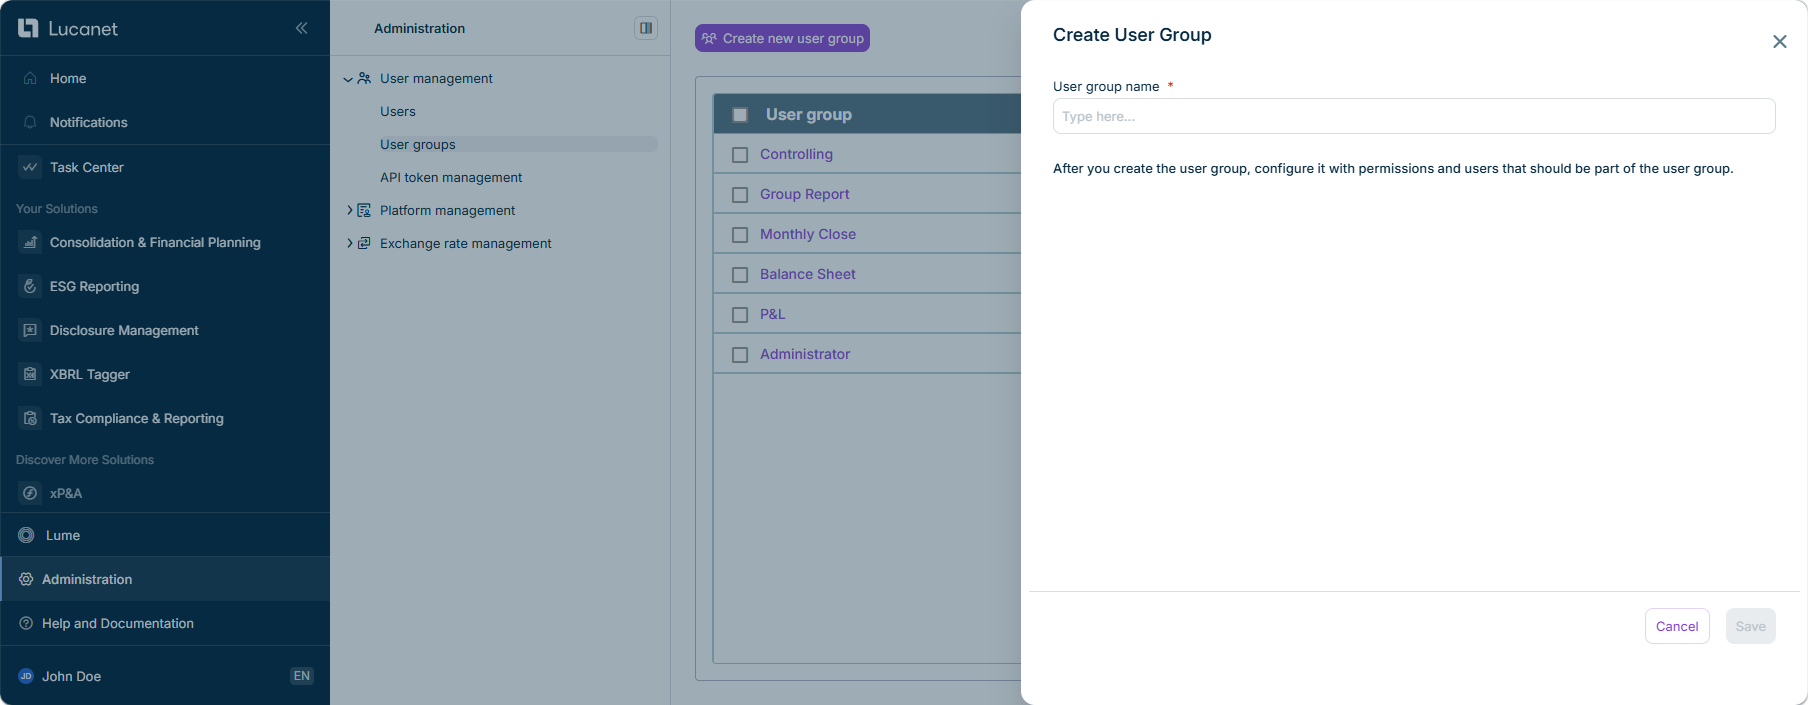
Click Create new user group. The Create User Group panel is displayed as follows, for example:

The 'Create User Group' side panel with the mandatory 'User group name' field.
'Create User Group' side panel
3

Enter a name in the User group name field. The name is mandatory and must be unique.

4

Click Save.

The user group is created and displayed in the list of user groups. You can now configure the group's permissions and assign users (see Configuring User Group Permissions).

The list of user groups displays the following information:

ColumnDescription
User groupThe name of the user group
Users and user groupsThe number of users and user groups that the group's permissions are transferred to
Last edit dateThe date and time the user group was last changed

By default, the most recently edited user groups are displayed at the top of the list. You can filter the list by user group name and sort by last edit date.

To manage an existing user group, open the menu of the three-dot menu icon in the group's row:

To delete several user groups at once, activate the check boxes in front of the relevant groups and click Delete user groups at the top right.

To configure a user group, select the user group in the list to open the Edit User Group panel. In addition to the User group name, the panel provides the following tabs:

TabDescription
WorkspacesDefines which workspaces and elements the group's permissions apply to
Data accessDefines which values the group can display, enter, change, or delete
Other permissionsDefines which administrative activities the group can perform and what additional information it can access
Permissions transferredTransfers the group's permissions to users or other user groups (see Transferring Permissions)
Permissions receivedReceives permissions from other user groups (see Receiving Permissions)

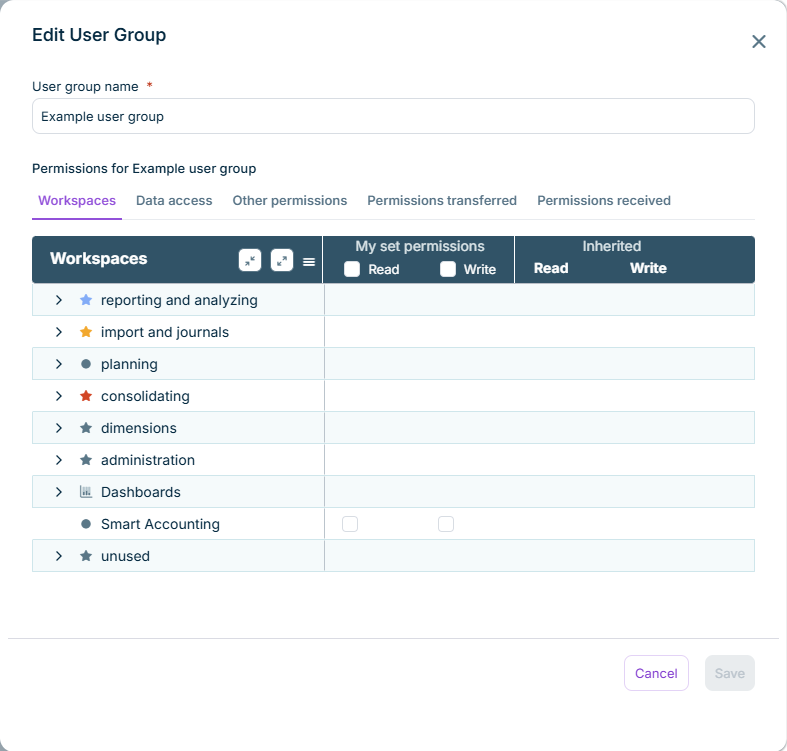
To define permissions, open the Workspaces, Data access, or Other permissions tab and activate the Read and/or Write check boxes in the My set permissions column for the relevant areas. Permissions inherited from other user groups are displayed in the Inherited column.

The Workspaces permission tab is displayed as follows, for example:

The 'Edit User Group' panel with the 'Workspaces' permission tab open.
'Workspaces' permission tab of a user group

The permission categories (Workspaces, Data access, Other permissions) and the permission symbols work exactly the same way as when you define permissions for an individual user. For a description of the categories and symbols, see Defining User Permissions for Data Model Roles.

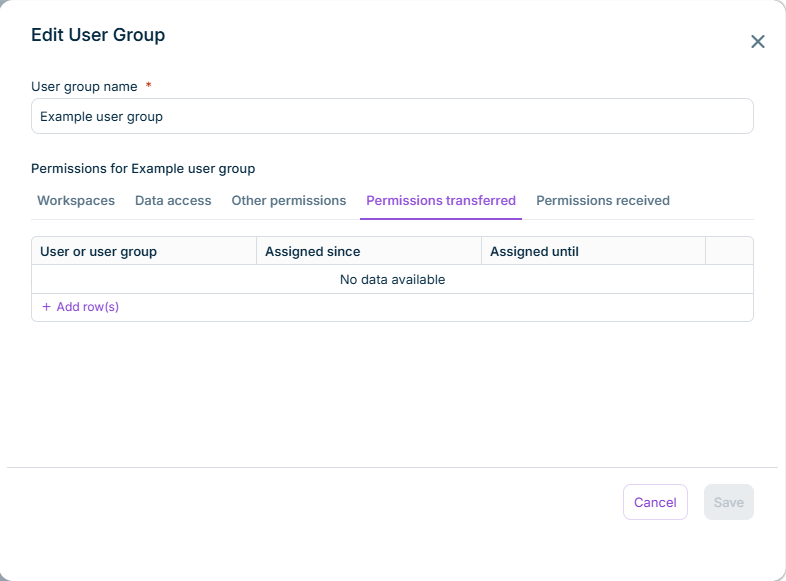
On the Permissions transferred tab, you can transfer the user group's permissions to individual users or to other user groups, optionally for a limited period. The tab is displayed as follows, for example:

The 'Permissions transferred' tab with the 'User or user group', 'Assigned since', and 'Assigned until' columns.
'Permissions transferred' tab

To transfer the group's permissions:

1

In the Edit User Group panel, open the Permissions transferred tab.

2

Click + Add row(s) and select the user or user group that should receive the permissions.

3

(Optional) Limit the validity period by entering a date in the Assigned since and Assigned until columns. If you leave Assigned until empty, the permissions are assigned with no end date (Unlimited).

4

Click Save.

A user group's permissions are added to a user's own permissions, but a user can never receive more permissions than their user role(s) allow. For example, a user with the Observer role keeps read-only access even if a user group transfers write permission to that user.

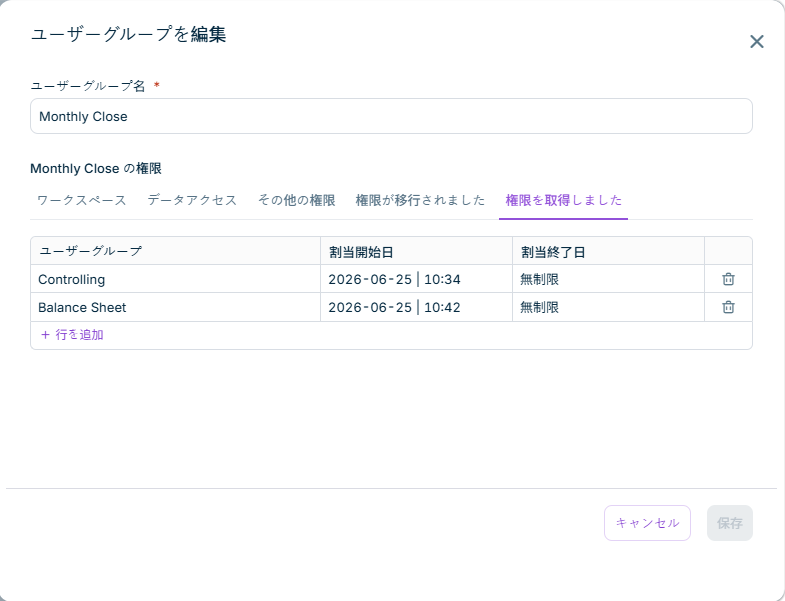
On the Permissions received tab, a user group can inherit the permissions of one or more other user groups. The columns work the same way as on the Permissions transferred tab, except that only user groups can be selected. The tab is displayed as follows, for example:

The 'Permissions received' tab with the 'User group', 'Assigned since', and 'Assigned until' columns.
'Permissions received' tab

To receive permissions from another user group:

1

In the Edit User Group panel, open the Permissions received tab.

2

Click + Add row(s) and select the user group whose permissions should be inherited.

3

(Optional) Limit the validity period by entering a date in the Assigned since and Assigned until columns. If you leave Assigned until empty, the permissions are assigned with no end date (Unlimited).

4

Click Save.

Changes to user group permissions take effect only after the affected users have logged out and logged back in.

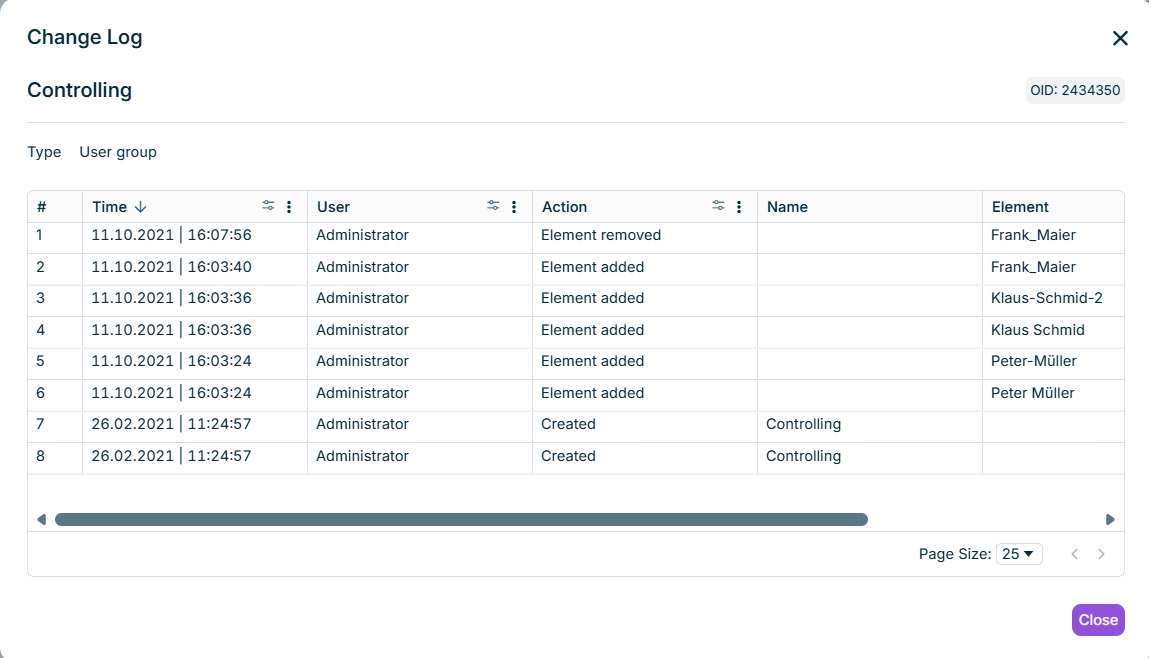
To review the changes made to a user group, click the icon in the group's row and choose Change log. The Change Log dialog is displayed as follows, for example:

The 'Change Log' dialog for a user group, showing the Time, User, Action, Name, and Element columns.
'Change Log' dialog for a user group

The change log lists actions such as a user group being created or edited, elements (users or user groups) being added to or removed from the group, and the user group itself being added to or removed from another user group. Depending on the action, the Name, Element, Group, and Parent columns identify the affected user group, member, or related group. You can sort and filter the Time, User, and Action columns.

Changes to read and write permissions are not recorded in the user group change log.