Processing rules chain business processes in Lucanet Banking & Cash Management (BCM) in an event-driven way: The rules monitor the state of jobs and automatically trigger the linked channels as soon as a job reaches the defined state. Unlike time-driven triggers such as recurring jobs, processing rules react to events — this creates complex, automated process chains without manual intervention.

To configure processing rules, you should be familiar with the logic of channels and jobs.

Processing rules can be subject to the administrative four-eyes principle and then require an approval (see Activating the Four-Eyes Principle for Processing Rules).

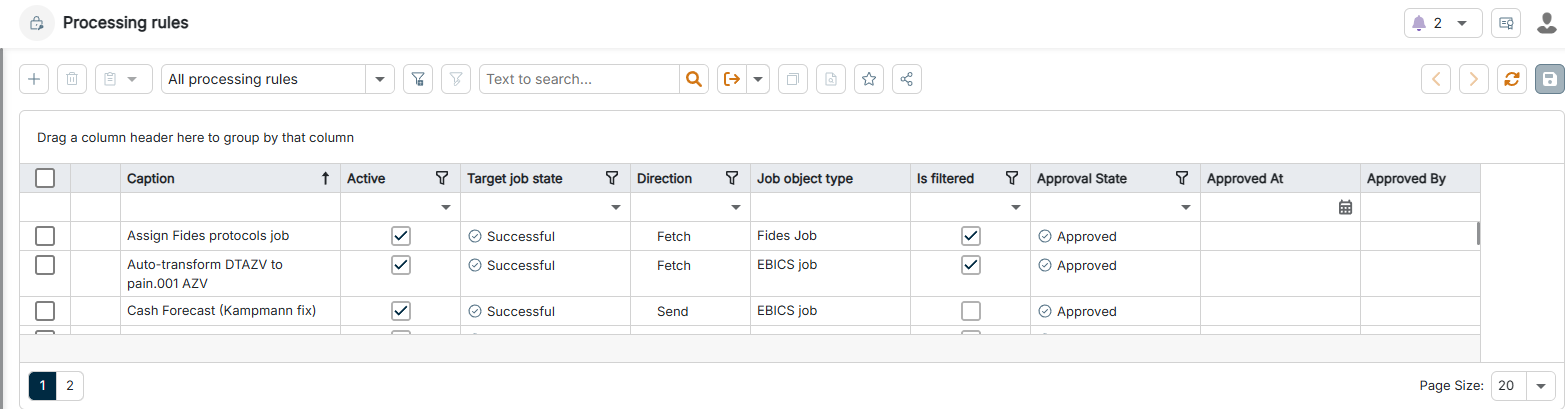
The Processing rules workspace can be found under Banking & Cash Management | Channels | Processing rules and is displayed as follows, for example:

The Processing rules workspace is highlighted in the menu navigation.
'Processing rules' workspace in the menu navigation

To create a processing rule:

1

Navigate to Channels | Processing rules.

2

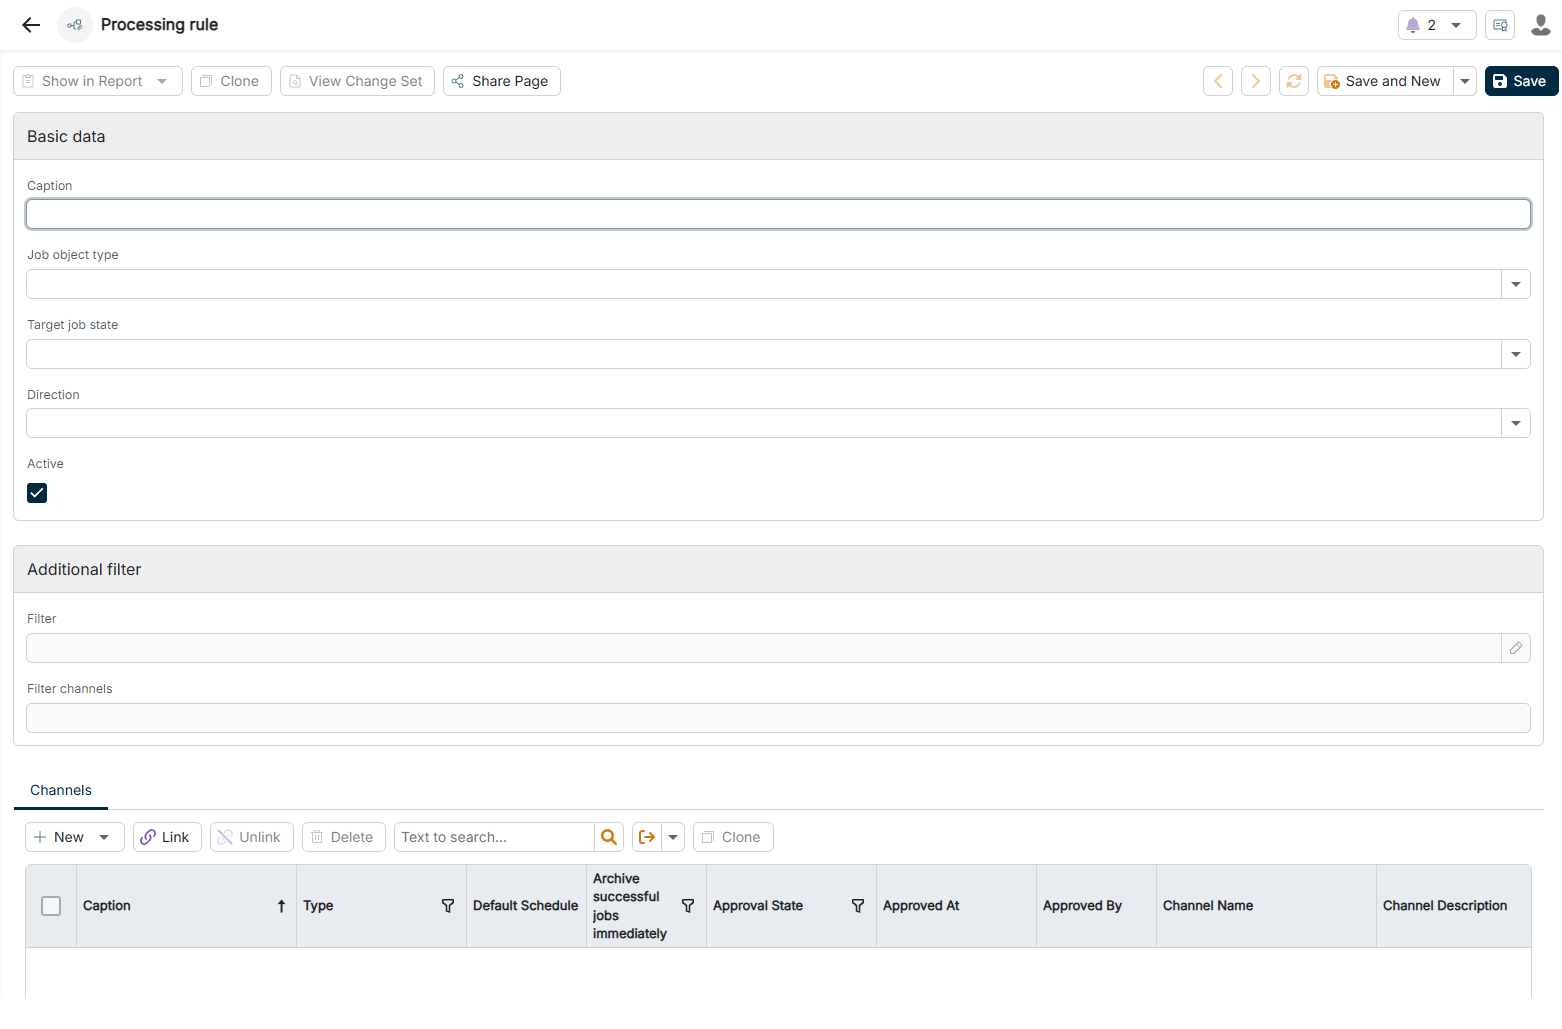
Click the Plus icon in the upper left corner. The configuration of a processing rule is displayed as follows:

The configuration of a processing rule is displayed.
Configuring a processing rule
3

Configure the rule according to your requirements (see Configuring Processing Rules).

4

Click Save. With Save and New, you save the rule and directly create another one.

The configuration options of a processing rule are divided into two areas: Basic data and Additional filter. On the Channels tab, you also define the target channels that the rule triggers.

The Basic data area contains the following options:

OptionDescription
CaptionOptional name for the processing rule
Job object typeThe type of job that is to trigger the rule. All available job types can be selected.

Without a job object type, you cannot save the rule. As long as no job object type is selected, the Filter and Filter channels options remain deactivated.
Target job stateThe state that a job must reach to trigger the rule.

Available values:
- Wait for first authorisation: The job has been created and is waiting for the first signature
- Wait for further authorisation: The job has been partially signed but requires further signatures
- Wait for execution: The job is waiting to be executed. This state applies to fully approved jobs as well as to jobs that do not require an approval, for example, retrievals of account information from the bank.
- Wait for manual execution: The job must be started manually
- Wait for fetch execution: The job is ready for a fetch
- In processing: The job is currently being executed
- Executed: The job has been executed. The result in the form of the bank protocol is still pending and has not yet been assigned to the job.
- Successful: The job has been completed successfully
- Error: The job has failed
- Postponed: The job has been paused and is no longer processed. The execution time does not change as a result.
- Canceled: The job has been canceled manually
- Wait for VOP result: The job is waiting for an event of the payee verification — Verification of Payee, VOP for short
- Wait for VOP authorisation: The job requires a special authorization as part of the payee verification (VOP)
DirectionThe direction of the job, optional for further restriction. Available values:
- Send: for jobs that send data to external systems, for example, payment orders or reports
- Fetch: for jobs that retrieve data from external systems, for example, account statements or advice transactions

Leave the option empty if the rule is to apply to both directions.
ActiveIf activated, BCM executes the rule when the defined conditions occur; the check box is activated by default. If deactivated, BCM ignores the rule; the rule is retained, and you can activate it again later.

The Additional filter area contains the following options:

OptionDescription
FilterOptional filter that defines additional conditions for triggering the rule. Use the Pencil icon to create a complex filter that checks specific data fields of the job, for example, EBICS order types such as STA, C53, VMK, PTK, or HAC. The filter only takes effect once the conditions from Job object type, Target job state, and Direction are already met.

The data fields available in the filter depend on the job type selected under Job object type.

Note: If you change the job object type, BCM automatically resets an existing filter.
Filter channelsMultiple selection of the source channels to which the rule is to apply. The field is optional: Leave it empty if you do not want to restrict the rule to specific channels. If the field is filled, the rule only triggers if the job was executed via one of the selected channels. This way, you can trigger different actions for different bank connections or communication channels.

Example: Import of account statements only for jobs that were fetched via a specific EBICS channel, for example, Commerzbank.

On the Channels tab, you define the target channels that BCM executes when the processing rule triggers:

  • Use New to create a new channel; use Link to link existing channels to the rule.
  • A processing rule can trigger several channels; BCM processes them one after the other.
  • The triggered channels can themselves create further jobs, which in turn trigger other processing rules — this creates complex automation chains.

If the administrative four-eyes principle is activated for processing rules, processing rules are subject to an approval workflow and behave like any other data record: As soon as you create or change a rule, it receives the state Approval required and waits for approval. As long as the rule is not approved, you cannot edit its fields, and BCM does not apply the rule. You approve the rule via the approval action in the toolbar. After the approval — state Approved — the workspace displays the Approved on and Approved by fields.

To activate the four-eyes principle for processing rules:

1

Navigate to System | Configuration (Security).

2

Select the Four-eyes principle tab.

3

Click New. The Four-eyes principle dialog is displayed.

4

In the Approval Count drop-down list, select the required number of approvals.

5

In the Approvable Object Types list, activate the check boxes of the required data types.

6

Click OK.